Mastering the Art of Ground Leveling for Pavers: A Comprehensive Guide

-
Quick Links:
- Introduction
- Understanding Pavers
- Importance of Leveling the Ground for Pavers
- Essential Tools and Materials
- Preparing the Site
- Measuring and Marking
- Excavation Process
- Grading the Soil
- Compacting the Base
- Adding Sand
- Laying the Pavers
- Finishing Touches
- Common Mistakes to Avoid
- Case Studies and Real-world Examples
- Expert Insights
- FAQs
Introduction
Installing pavers can transform your outdoor space, adding aesthetic appeal and functionality. However, the success of your paver installation hinges on one critical factor: a level ground. This comprehensive guide will walk you through the essential steps for leveling the ground for pavers, ensuring a sturdy and durable foundation.
Understanding Pavers
Pavers are versatile, durable materials used in outdoor settings for patios, walkways, driveways, and more. They come in various styles, shapes, and materials, including concrete, brick, and stone. Understanding the type of paver you are using is crucial for selecting the right installation method.
Importance of Leveling the Ground for Pavers
Proper leveling of ground for pavers is vital for several reasons:
- Stability: Level ground prevents shifting and settling of pavers over time.
- Drainage: A well-leveled surface ensures that water drains properly, reducing the risk of puddles and erosion.
- Aesthetics: Uneven pavers can diminish the visual appeal of your outdoor space.
Essential Tools and Materials
Before beginning your project, gather the following tools and materials:
- Shovel
- Rake
- Level
- Compactor or tamper
- Measuring tape
- String line
- Sand
- Pavers
Preparing the Site
Start by clearing the area where you plan to install the pavers. Remove any grass, weeds, or debris. This will give you a clean slate to work with.
Measuring and Marking
Use a measuring tape to determine the area needed for your pavers. Mark the boundaries with stakes and string to visualize the layout.
Excavation Process
The next step is to excavate the area to a depth that allows for the base material and pavers. Generally, a depth of 6-8 inches is sufficient, depending on the type of pavers you choose.
Grading the Soil
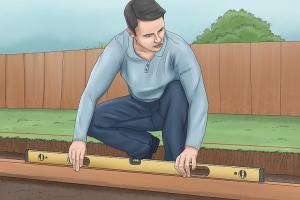
Grading involves creating a slight slope away from structures to promote drainage. Use a rake to level the soil, ensuring the surface is even.
Compacting the Base
After grading, compact the soil using a compactor or tamper. This process is crucial for eliminating air pockets and ensuring a stable foundation.
Adding Sand
Spread a layer of sand (typically 1-2 inches) over the compacted base. Use a screed board to level the sand evenly.
Laying the Pavers
Begin laying the pavers from a corner and work your way outward. Ensure proper alignment by using a level as you lay each paver.
Finishing Touches
After all pavers are laid, fill the joints with sand and compact the surface again. This will help lock the pavers in place.
Common Mistakes to Avoid
Here are some common mistakes to watch out for:
- Inadequate excavation depth
- Skipping the compaction step
- Improper sloping for drainage
Case Studies and Real-world Examples
Consider the case of a homeowner who transformed their backyard with pavers. By following proper leveling techniques, they achieved a flawless finish that enhanced their outdoor living space.
Expert Insights
Industry professionals emphasize the importance of precision in each step of the process. “The foundation is key; take your time with leveling,” says landscape architect Jane Doe.
FAQs
1. How deep should I excavate for pavers?
Generally, you should excavate 6-8 inches for a stable base.
2. What type of sand is best for paver installation?
Coarse sand is recommended as it allows for better drainage and compaction.
3. Can I install pavers on unlevel ground?
No, unlevel ground can lead to shifting and damage over time.
4. How do I ensure proper drainage with pavers?
Ensure a slight slope away from structures and use proper base materials.
5. How long does it take to install pavers?
Installation can take anywhere from a few hours to a couple of days, depending on the size of the area.
6. Should I hire a professional for paver installation?
If you're unsure about the process, hiring a professional can ensure quality results.
7. What is the best paver material?
It depends on your needs; concrete, brick, and natural stone are all popular options.
8. How do I maintain my pavers?
Regular cleaning and sealing can help maintain their appearance and longevity.
9. Can I reuse old pavers?
Yes, as long as they are in good condition, old pavers can be reused.
10. What should I do if my pavers start to shift?
Remove the affected pavers, re-level the base, and re-install them properly.