Mastering Gravel Driveways: A Comprehensive Guide to Building Your Own

-
Quick Links:
- Introduction
- Benefits of Gravel Driveways
- Choosing the Right Materials
- Planning Your Gravel Driveway
- Step-by-Step Installation Process
- Maintaining Your Gravel Driveway
- Cost Analysis and Budgeting
- Case Studies
- Expert Tips for Success
- FAQs
Introduction
Gravel driveways are not only a functional addition to your property but also an aesthetic enhancement that can increase your home’s curb appeal. This comprehensive guide will walk you through everything you need to know about making a gravel driveway, from gathering materials to installation and maintenance.
Benefits of Gravel Driveways
Before diving into the "how-to," let's explore why gravel driveways are a popular choice:
- Cost-Effective: Typically less expensive than asphalt or concrete.
- Versatile: Available in a variety of colors and sizes to match your landscape.
- Drainage: Naturally allows for better water drainage, reducing puddles and erosion.
- Environmentally Friendly: Made from natural materials and can be recycled easily.
Choosing the Right Materials
The success of your gravel driveway largely depends on the materials you choose. Here are some options:
- Gravel Types: Pea gravel, crushed stone, and granite are popular choices.
- Geotextile Fabric: Helps prevent weeds and keeps the gravel in place.
- Edging Materials: Wood, stone, or metal can be used to define the driveway’s boundaries.
Planning Your Gravel Driveway
Effective planning ensures a smooth installation process. Here are the steps to plan your driveway:
- Measure the Area: Determine the dimensions of your driveway.
- Check Local Regulations: Ensure compliance with zoning laws and HOA guidelines.
- Design Layout: Consider curves, slopes, and drainage in your design.
Step-by-Step Installation Process
Now, let's get into the nitty-gritty of installing your gravel driveway. Follow these steps for a successful installation:
Step 1: Prepare the Site
- Clear the area of grass, debris, and any obstructions.
- Excavate to a depth of at least 4-6 inches, depending on your gravel type.
Step 2: Lay Geotextile Fabric
Place geotextile fabric to prevent weeds and keep the gravel from sinking into the soil.
Step 3: Install Edging
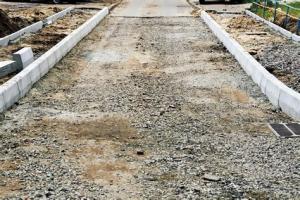
Install edging materials to keep the gravel contained and maintain a clean appearance.
Step 4: Add the Base Layer
Start with a base layer of larger stones (3-4 inches) for stability before adding smaller gravel.
Step 5: Add the Top Layer
Finish with a top layer of smaller gravel (1-2 inches) to create a smooth surface.
Maintaining Your Gravel Driveway
To keep your gravel driveway looking great and functioning well, regular maintenance is essential:
- Weed Control: Regularly remove any weeds that may sprout.
- Raking: Rake the gravel periodically to redistribute it evenly.
- Resurfacing: Add new gravel as necessary to maintain depth.
Cost Analysis and Budgeting
Understanding the costs involved can help you budget effectively. Here’s a breakdown:
| Item | Estimated Cost |
|---|---|
| Gravel (per ton) | $15 - $50 |
| Geotextile Fabric (per square foot) | $0.50 - $1.50 |
| Edging Materials | $200 - $800 |
| Installation Tools | $100 - $500 (if renting) |
Case Studies
Here are a couple of real-world examples demonstrating the benefits of gravel driveways:
Case Study 1: The Smith Family
The Smiths replaced their asphalt driveway with a gravel alternative due to cost and drainage concerns. They saved 30% on installation costs and enjoy the improved water runoff.
Case Study 2: Local Community Park
A community park opted for a gravel path for its eco-friendliness and aesthetic appeal. The path has received positive feedback from visitors and has reduced maintenance costs significantly.
Expert Tips for Success
To ensure your gravel driveway stands the test of time, consider these expert tips:
- Invest in high-quality materials for durability.
- Consider the climate in your area when choosing the type of gravel.
- Plan for sufficient drainage to prevent erosion.
FAQs
1. How deep should I excavate for a gravel driveway?
You should excavate to a depth of 4-6 inches for a stable base.
2. Can I install a gravel driveway myself?
Yes, with proper planning and tools, a DIY installation is feasible.
3. What type of gravel is best for driveways?
Crushed stone and pea gravel are popular choices due to their stability and appearance.
4. How do I prevent weeds in my gravel driveway?
Using geotextile fabric and regularly removing weeds can help.
5. How often should I maintain my gravel driveway?
Regular maintenance every few months is recommended to keep it in top shape.
6. What is the average lifespan of a gravel driveway?
A well-maintained gravel driveway can last 10-15 years or longer.
7. Can I use a gravel driveway in a wet climate?
Yes, but ensure proper drainage to prevent erosion and puddles.
8. How much does a gravel driveway cost?
The cost can range from $1 to $3 per square foot, depending on materials and installation.
9. Is a gravel driveway environmentally friendly?
Yes, gravel driveways allow water to infiltrate the ground, reducing runoff and erosion.
10. Can I add a gravel driveway over an existing concrete one?
Yes, but it’s important to ensure proper drainage and stability.
Random Reads
- How to text from gmail
- How to text without showing your number
- Ultimate guide to recording audio mobile
- How to upgrade graphics card
- How to upgrade ice staff cod bo2
- How to integrate large data sets in excel
- How to iron curtains
- How to unlock secure pdf file
- How to unlock sim card iphone
- Unlocking pdf protection 3 simple ways to copy a secured pdf