Ultimate Guide: How to Create a Minecraft Server on a Mac

-
Quick Links:
- Introduction
- Requirements for Creating a Minecraft Server
- Installing Java on Your Mac
- Downloading the Minecraft Server Software
- Setting Up Your Minecraft Server
- Configuring Server Settings
- Running Your Minecraft Server
- Connecting to Your Server
- Advanced Server Setup Options
- Troubleshooting Common Issues
- FAQs
Introduction
Minecraft remains one of the most popular games globally, with millions of players immersing themselves in its blocky world. One of the best ways to enhance your gaming experience is by creating your own Minecraft server. This guide will walk you through the entire process of setting up a Minecraft server on a Mac, ensuring you have a place to play with friends or even host a multiplayer gaming community.
Requirements for Creating a Minecraft Server
Before you start the process, ensure you have the following:
- A Mac computer running macOS.
- At least 4GB of RAM (more is better, especially for larger servers).
- Java Development Kit (JDK) installed on your Mac.
- Internet connection for downloading files and hosting (if you want others to connect).
- Basic understanding of terminal commands (for advanced users).
Installing Java on Your Mac
Java is essential for running a Minecraft server. Follow these steps to install it:
- Open your Terminal (you can find it through Spotlight or in Applications > Utilities).
- Type
java -versionand press Enter. If Java is installed, you’ll see version information. - If Java is not installed, download the latest version from the official Java website: Java SE Development Kit Downloads.
- Follow the installation instructions provided by Oracle.
Downloading the Minecraft Server Software
To create a Minecraft server, you need to download the server software:
- Visit the official Minecraft website: Minecraft Server Downloads.
- Download the
minecraft_server.jarfile. - Move the downloaded file to a dedicated folder (e.g.,
~/MinecraftServer).
Setting Up Your Minecraft Server
Now that you have the server software, it’s time to set it up:
- Open your Terminal and navigate to the folder where you placed the server file. Use the command:
- Run the server using the command:
- The first time you run this command, it will create several files, including
eula.txt. - Open
eula.txtand changeeula=falsetoeula=trueto accept the End User License Agreement. - Run the command again to start the server.
cd ~/MinecraftServerjava -Xmx1024M -Xms1024M -jar minecraft_server.jar noguiConfiguring Server Settings
Configuring your server settings allows you to customize your Minecraft experience:
- Open the
server.propertiesfile in a text editor. - Modify settings such as
server-port,max-players, andlevel-name. - Save the changes.
Running Your Minecraft Server
To run your server:
- Open Terminal and navigate to your Minecraft server folder.
- Run the server again using the command mentioned above.
- Keep the Terminal window open to keep the server running.
Connecting to Your Server
To connect to your newly created server:
- Open Minecraft on your Mac.
- Select "Multiplayer" from the main menu.
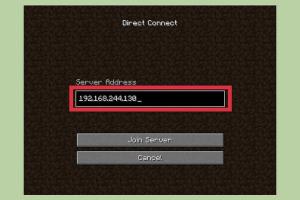
- Click "Add Server." Enter a name and the server address (your local IP or "localhost" if you’re playing on the same machine).
- Click "Done" and select your server from the list to join.
Advanced Server Setup Options
For those looking to enhance their server experience:
- Consider using server mods like Bukkit or Spigot for plugins.
- Explore server management tools like McMyAdmin for easier management.
- Set up a dynamic DNS if you want others to join your server over the internet.
Troubleshooting Common Issues
If you encounter issues while setting up your server, refer to these common problems:
- Server not starting: Ensure Java is installed and the correct command is being used.
- Connection refused: Check your IP and ensure the server is running.
- Lag issues: Allocate more RAM to the server if necessary.
FAQs
- 1. Can I run a Minecraft server on an older Mac?
- Yes, but ensure it meets the minimum requirements for RAM and Java.
- 2. Do I need a powerful Mac to host a server?
- While not required, a more powerful Mac will improve performance, especially for larger player bases.
- 3. How many players can join my server?
- This depends on your server's configuration and your Mac's resources. Generally, 10-20 players can work well on average machines.
- 4. Can I play while hosting the server?
- Yes, but performance may decrease if your Mac is under heavy load.
- 5. Is it safe to host a server publicly?
- Ensure you have proper security measures in place, such as firewalls and whitelisting players.
- 6. What if I want to install mods?
- Consider using a modded server software like Forge, Bukkit, or Spigot.
- 7. How can I back up my server?
- Regularly back up the server folder, especially the world data.
- 8. Can I change the server version?
- Yes, download the desired server version from the Minecraft website.
- 9. What are the best plugins for a Minecraft server?
- Some popular plugins include Essentials, WorldEdit, and LuckPerms.
- 10. How can I promote my server?
- Consider using social media, Minecraft forums, and gaming communities to attract players.
Random Reads
- Find a person with google
- Find dpi of an image
- How to add phone number apple messages
- How to unlock a door without a key
- How to unlock baby luigi mario kart wii
- How to order alphabetically in sql
- How to organize a dresser drawer
- Repair broken headphones
- Reorganize samsung apps
- How to wash marble floors