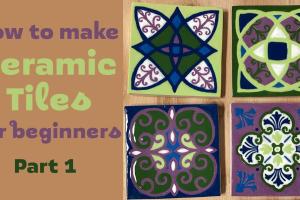
Crafting Masterpieces: A Comprehensive Guide on How to Make Ceramic Tile

-
Quick Links:
- Introduction
- A Brief History of Ceramic Tile
- Essential Materials for Making Ceramic Tiles
- Tools Required
- Step-by-Step Guide to Making Ceramic Tile
- Understanding the Firing Process
- Finishing Techniques for Ceramic Tiles
- Exploring Design Options
- Case Studies and Examples
- Expert Insights and Tips
- FAQs
Introduction
Ceramic tiles have been a staple in homes and buildings for centuries, valued for their durability, aesthetic appeal, and versatility. Making your own ceramic tile can be a rewarding experience, allowing for personalization and creativity. In this guide, we will walk you through the entire process of making ceramic tile, from selecting materials to firing and finishing.
A Brief History of Ceramic Tile
Ceramic tiles date back to ancient civilizations, with evidence of their use in Mesopotamia, Egypt, and China. The art of tile-making evolved over the centuries, influencing architectural styles and interior design. Understanding this history enriches our appreciation for the craft and its modern applications.
Essential Materials for Making Ceramic Tiles
Before diving into the tile-making process, it's crucial to gather the right materials. Here’s what you will need:
- Clay: The primary material, usually earthenware or stoneware.
- Water: For mixing and shaping the clay.
- Glazes: For coloring and sealing the tiles.
- Additives: Such as grog or sand to enhance texture and strength.
Tools Required
Having the right tools is essential for a smooth tile-making process. Here’s a list of necessary tools:
- Potter's Wheel: For shaping the clay.
- Rolling Pin: For flattening the clay.
- Tile Cutter: For precise cuts.
- Brushes: For applying glaze.
- Kiln: For firing the tiles.
Step-by-Step Guide to Making Ceramic Tile
Step 1: Preparing the Clay
Start by kneading the clay to remove air bubbles and achieve a consistent texture. This process, known as wedging, is crucial for preventing cracks during firing.
Step 2: Shaping the Tiles
Use a rolling pin to flatten the clay to your desired thickness, typically between 1/4 inch to 1/2 inch. Cut the clay into squares or rectangles using a tile cutter or knife.
Step 3: Drying the Tiles
Allow the shaped tiles to dry for several hours to a day until they reach a leather-hard consistency. This stage is essential for minimizing warping during firing.
Step 4: Applying Designs and Glazes
Once dried, you can carve designs into the tiles or apply underglaze for color. Afterward, apply a clear glaze to seal the tile and enhance its appearance.
Step 5: Firing the Tiles
Load the tiles into the kiln and fire them according to the manufacturer's guidelines. The firing temperature usually ranges from 1,800°F to 2,400°F, depending on the type of clay used.
Understanding the Firing Process
The firing process is critical to turning raw clay into durable ceramic. Here are key points about firing:
- Bisque Firing: The first firing that hardens the clay.
- Glaze Firing: The second firing that melts the glaze and fuses it to the tile surface.
Finishing Techniques for Ceramic Tiles
After firing, tiles can be polished, coated with sealants, or further decorated. Finishing techniques can enhance the tile's aesthetic and usability.
Exploring Design Options
The possibilities for tile designs are virtually limitless. You can explore various techniques such as:
- Hand-Painting: For unique, personalized designs.
- Stenciling: For consistent patterns across multiple tiles.
- Decal Application: For intricate images and designs.
Case Studies and Examples
Many artisans and small businesses have successfully incorporated tile-making into their craft. For example:
- Artisan A: Focuses on eco-friendly materials.
- Business B: Specializes in custom home installations.
Expert Insights and Tips
According to ceramicists, the key to successful tile-making lies in patience and practice. Here are some expert tips:
- Always test your glazes on a sample tile before applying them to your final pieces.
- Maintain a consistent thickness across tiles for even firing.
FAQs
1. What type of clay is best for making ceramic tiles?
Stoneware and earthenware are popular choices due to their durability and ease of use.
2. How long does it take to make ceramic tiles?
The entire process can take anywhere from a few days to a week, depending on drying and firing times.
3. Do I need a kiln to make ceramic tiles?
Yes, a kiln is essential for firing the tiles and transforming the clay into durable ceramic.
4. Can I make ceramic tiles without a potter's wheel?
Yes, you can use hand-building techniques to shape tiles without a potter's wheel.
5. What safety precautions should I take?
Always wear a mask when working with dust and glazes, and ensure proper ventilation in your workspace.
6. How do I store unglazed tiles?
Store unglazed tiles in a cool, dry place, away from direct sunlight and moisture.
7. Can I paint ceramic tiles?
Yes, you can paint ceramic tiles with special ceramic paint, but they need to be sealed properly for durability.
8. How do I clean my ceramic tiles?
Regular cleaning with mild soap and water is recommended; avoid harsh chemicals that can damage the glaze.
9. Are handmade ceramic tiles more expensive than factory-made?
Generally, handmade tiles are more expensive due to the labor-intensive process and unique designs.
10. Can I repair broken ceramic tiles?
Yes, broken tiles can often be repaired with tile adhesive, but the repair may be visible.
Random Reads
- How to quickly make a table for wordpad
- How to quickly show desktop on mac
- How to upload files on mediafire
- How to upset siri
- How to recaulk kitchen counter backsplash
- How to see python version
- How to see hours played on ps4
- How to trace the location of a phone number
- How to thaw a frozen pipe
- How to use bittorrent