Mastering Minecraft: A Comprehensive Guide to Crafting Potions

-
Quick Links:
- Introduction
- Understanding Potions in Minecraft
- The Brewing Process
- Essential Ingredients for Potion Making
- Step-by-Step Guide to Making Potions
- Advanced Potions and Techniques
- Potion Effects Explained
- Case Studies: Potions in Action
- Expert Insights on Potion Making
- FAQs
Introduction
In the expansive world of Minecraft, players are given the freedom to explore, build, and survive. Among the many mechanics you can master, potion-making stands out as one of the most intricate and rewarding. This guide will walk you through everything you need to know about crafting potions, from the basic ingredients to advanced techniques that can transform your gameplay.
Understanding Potions in Minecraft
Potions in Minecraft are consumable items that provide players with numerous effects, ranging from healing to enhanced strength. Understanding how potions work is crucial for any player looking to survive in the game’s challenging environments.
Types of Potions
- Healing Potions
- Strength Potions
- Speed Potions
- Invisibility Potions
- Poison Potions
The Brewing Process
The brewing process is central to potion-making in Minecraft. You will need a brewing stand, which is crafted using three cobblestones and one blaze rod. Here’s how to set up your brewing station:
- Place the brewing stand on a solid block.
- Right-click the brewing stand to access the brewing interface.
- Add blaze powder to fuel the brewing stand.
Essential Ingredients for Potion Making
To create potions, you will need several key ingredients:
- Nether Wart: The base ingredient for most potions.
- Water Bottles: The container for your potions.
- Blaze Powder: Used to fuel the brewing process.
- Specific Ingredients: Depending on the potion you want to create (e.g., ghast tears for healing, spider eyes for poison).
Step-by-Step Guide to Making Potions
Follow these steps to brew your first potion:
1. Gather Ingredients
Ensure you have all the necessary ingredients, including water bottles, nether wart, and your desired potion ingredient.
2. Place Water Bottles in the Brewing Stand
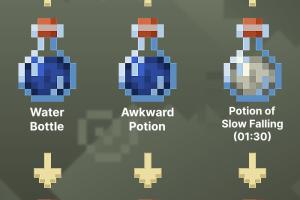
Fill three glass bottles with water and place them in the brewing stand.
3. Add Nether Wart
Add nether wart to the brewing stand to create an awkward potion, which serves as the base for most potions.
4. Add Your Desired Ingredient
Once the awkward potion is brewed, add your desired ingredient (e.g., ghast tear for a healing potion).
5. Wait for the Brewing Process
Wait for the brewing to complete, and you will have your potion ready!
Advanced Potions and Techniques
As you become more proficient in potion-making, you can experiment with advanced techniques, such as:
- Extended Durations: Add redstone dust to extend the duration of your potion effects.
- Enhanced Effects: Use glowstone dust to strengthen your potion effects.
- Splash Potions: Add gunpowder to create potions that can be thrown.
Potion Effects Explained
Understanding the effects of potions is essential for strategy:
| Potion Type | Effect | Duration |
|---|---|---|
| Healing | Restores health | Instant |
| Strength | Increases attack damage | 3-8 minutes |
| Speed | Increases movement speed | 3-8 minutes |
| Invisibility | Makes player invisible | 3-8 minutes |
| Poison | Deals damage over time | 45 seconds |
Case Studies: Potions in Action
To demonstrate the effectiveness of potions, let’s examine a few case studies where players utilized potions in various scenarios:
Case Study 1: The Nether Expedition
In a recent expedition to the Nether, players armed with fire resistance potions were able to traverse lava lakes with ease, gathering valuable resources without fear of burning.
Case Study 2: The Ender Dragon Battle
During a battle with the Ender Dragon, players equipped with strength and speed potions were able to defeat the dragon much quicker, showcasing the importance of preparation.
Expert Insights on Potion Making
Experts in the Minecraft community emphasize the importance of experimentation. By trying different combinations of ingredients and understanding potion effects, players can create customized solutions for their gameplay challenges.
FAQs
1. What is the first potion I should learn to make in Minecraft?
The healing potion is a great starting point as it provides immediate health recovery.
2. Can I make potions without a brewing stand?
No, a brewing stand is required to make potions in Minecraft.
3. What happens if I add the wrong ingredient?
If the wrong ingredient is added, you may end up with a potion that has no useful effect or a completely different potion.
4. How do I extend the duration of my potions?
Add redstone dust to your potions to extend their duration.
5. Can potions be stacked in my inventory?
No, potions cannot be stacked, but you can carry multiple different potions in your inventory.
6. What is the benefit of making splash potions?
Splash potions can be thrown to affect other players or mobs within a radius, making them useful in combat.
7. Are there potions that can harm other players?
Yes, potions like poison and harming can be used against other players in PvP scenarios.
8. How do I make a potion of weakness?
Add a fermented spider eye to an awkward potion to create a potion of weakness.
9. Can potions be enchanted?
No, potions themselves cannot be enchanted, but they can provide enhancements to your character when consumed.
10. Where can I find ingredients for potions?
Ingredients can be found in various locations throughout the game, including the Nether and by defeating specific mobs.