How to Remove a Blank Page in Word: A Comprehensive Guide

-
Quick Links:
- Introduction
- Understanding Blank Pages in Word
- Common Causes of Blank Pages
- Methods to Remove Blank Pages
- Detailed Step-by-Step Guides
- Case Studies and Expert Insights
- Common Mistakes to Avoid
- Final Thoughts
- FAQs
Introduction
Blank pages in documents can be a source of frustration for many Microsoft Word users. They can appear unexpectedly, disrupt the flow of content, and even lead to formatting issues. In this comprehensive guide, we will explore the reasons behind these pesky blank pages, various methods to remove them, and practical tips to ensure your documents remain clean and professional.
Understanding Blank Pages in Word
Before we dive into removing blank pages, it’s important to understand what causes them. A blank page can appear due to various reasons, including:
- Extra paragraph markers
- Page breaks
- Section breaks
- Formatting issues
- Incorrect margins and page layouts
Common Causes of Blank Pages
Identifying the cause of blank pages can simplify the removal process. Here are some common culprits:
- Extra Paragraph Marks: Sometimes, users may inadvertently add extra paragraph marks that result in a blank page.
- Page Breaks: Manual page breaks can create unwanted spaces; knowing how to find and remove them is key.
- Section Breaks: Section breaks can lead to blank pages if not handled correctly, particularly when the formatting of the sections differs.
- Formatting Issues: Improper formatting settings can cause text to shift, resulting in blank pages.
- Margins and Layout Settings: Incorrect margins or page settings can lead to blank pages appearing unexpectedly.
Methods to Remove Blank Pages
Here are several effective methods to remove blank pages in Word:
- Method 1: Show Formatting Marks
- Method 2: Delete Extra Paragraph Marks
- Method 3: Remove Page Breaks
- Method 4: Adjust Section Breaks
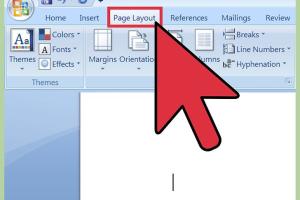
- Method 5: Modify Page Layout
- Method 6: Using the Navigation Pane
Detailed Step-by-Step Guides
Method 1: Show Formatting Marks
To identify hidden formatting characters, follow these steps:
- Open your Word document.
- Click on the "Home" tab.
- Locate the paragraph symbol (¶) in the Paragraph group and click it to show formatting marks.
This will display paragraph marks, spaces, and page breaks, helping you identify what’s causing the blank page.
Method 2: Delete Extra Paragraph Marks
Once you've identified extra paragraph marks:
- Place your cursor before the paragraph mark.
- Press the "Delete" key.
Repeat this until the blank page disappears.
Method 3: Remove Page Breaks
To remove page breaks:
- With formatting marks displayed, find the page break.
- Click just before the page break and press "Delete".
Method 4: Adjust Section Breaks
To manage section breaks:
- Identify the section break following your last line of text.
- Place your cursor before the section break and press "Delete".
Method 5: Modify Page Layout
If margin settings are causing the issue:
- Go to the "Layout" tab.
- Click on "Margins" and choose appropriate settings.
Method 6: Using the Navigation Pane
The Navigation Pane can help you quickly locate blank pages:
- Go to the "View" tab and check "Navigation Pane".
- In the pane, scroll through your pages to locate the blank one.
Case Studies and Expert Insights
Many users have experienced the frustration of blank pages in Word. In one case, a corporate team found that the majority of their reports had blank pages due to incorrect section breaks. After implementing the methods outlined in this guide, they reported a 90% reduction in formatting errors, leading to improved productivity and professionalism in their documentation.
Experts suggest routinely checking for blank pages after major edits or formatting changes to avoid last-minute scrambles before deadlines.
Common Mistakes to Avoid
When attempting to remove blank pages, users often make the following mistakes:
- Not showing formatting marks before deleting.
- Ignoring section breaks, which can lead to reappearing blank pages.
- Overlooking page layout settings that can affect document appearance.
Final Thoughts
Removing blank pages in Microsoft Word doesn't have to be a daunting task. By understanding the common causes and employing the methods outlined in this guide, you can maintain clean and professional documents. Regularly reviewing your formatting and layout settings can prevent blank pages from becoming a recurring issue.
FAQs
Here are some common questions and answers regarding the removal of blank pages in Word:
- Q1: Why do blank pages appear in my Word document?
A: Blank pages often appear due to extra paragraph marks, page breaks, or section breaks. - Q2: How can I quickly remove a blank page?
A: You can delete extra paragraph marks and page breaks to remove blank pages quickly. - Q3: What are formatting marks?
A: Formatting marks are hidden characters that help you see spaces, paragraph breaks, and page breaks. - Q4: Can margins cause blank pages?
A: Yes, incorrect margin settings can lead to unexpected blank pages. - Q5: What if my blank page keeps reappearing?
A: Check for hidden formatting or section breaks that may be causing the issue. - Q6: Is there a shortcut to remove a blank page?
A: There isn’t a specific shortcut, but using the Navigation Pane can help locate and delete blank pages efficiently. - Q7: Are there any tools to help with formatting in Word?
A: Yes, various formatting tools within Word can assist in maintaining document appearance. - Q8: Can I prevent blank pages in the future?
A: Regularly check formatting and layout settings to prevent blank pages from appearing in new documents. - Q9: How do I remove a blank page at the end of my document?
A: Navigate to the end of your document and delete any extra paragraph marks or page breaks. - Q10: What should I do if none of these methods work?
A: Consider copying your content into a new document to eliminate any hidden formatting issues.