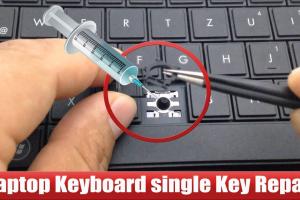
Ultimate Guide: How to Repair a Laptop Key for Optimal Performance

-
Quick Links:
- Introduction
- Common Laptop Key Issues
- Tools Needed for Repair
- Step-by-Step Repair Process
- Maintenance Tips to Prevent Future Issues
- Case Studies
- Expert Insights
- FAQs
Introduction
In today's digital age, laptops have become indispensable tools for work, education, and leisure. However, a malfunctioning laptop key can significantly hinder productivity. This comprehensive guide aims to provide you with all the necessary information to effectively repair a laptop key, whether it's a single key that’s come loose or a complete keyboard malfunction.
Common Laptop Key Issues
Understanding the common issues that arise with laptop keys is the first step in effective repair. Here are the most frequently encountered problems:
- Key Cap Removal: Keys may come off due to wear and tear or excessive force.
- Sticking Keys: Dust, debris, or liquid spills can cause keys to stick.
- Unresponsive Keys: This can indicate a deeper issue, such as a broken keyboard circuit.
- Misaligned Keys: Keys may not sit properly, affecting their functionality.
Tools Needed for Repair
Before starting the repair process, gather the following tools:
- Plastic spudger or flathead screwdriver
- Compressed air canister
- Isopropyl alcohol and cotton swabs
- Replacement keycap (if necessary)
- Tweezers
Step-by-Step Repair Process
Now that you have the necessary tools, follow these detailed steps to repair your laptop key:
Step 1: Assess the Damage
Before proceeding, identify whether the key needs a simple cleaning or a complete replacement. Inspect the key and its mechanism carefully.
Step 2: Remove the Key Cap
Using a plastic spudger, gently pry off the key cap from the base. Be cautious not to damage the clips that hold the key in place.
Step 3: Clean the Area
Use compressed air to blow out any debris under the key. For sticky keys, apply isopropyl alcohol to a cotton swab and clean the area thoroughly.
Step 4: Check the Mechanism
Inspect the key mechanism for any signs of damage. If components are broken, you may need to replace them or the entire keycap.
Step 5: Reattach the Key Cap
Carefully align the keycap over the mechanism and press down until you hear a click, indicating that it is secured in place.
Step 6: Test the Key
After reattaching the key, test its functionality. If it doesn’t work, revisit the previous steps to ensure everything is in order.
Maintenance Tips to Prevent Future Issues
To prolong the life of your laptop keys and prevent future repairs, consider the following maintenance tips:
- Regularly clean your keyboard with compressed air.
- Avoid eating or drinking near your laptop.
- Keep your laptop in a protective case when not in use.
- Use a keyboard cover to protect against spills and dust.
Case Studies
Let’s explore real-world examples of laptop key repairs:
Case Study 1: Sticky Keys on a Dell Inspiron
A user reported sticky keys after a coffee spill. The user followed the steps outlined above, successfully cleaning the affected area and reattaching the keys. After the repair, the laptop functioned as good as new.
Case Study 2: Broken Key Cap on a MacBook Pro
Another user experienced a broken key cap. They sourced a replacement key online, followed the step-by-step guidelines, and managed to restore the keyboard's functionality without professional help.
Expert Insights
We consulted with tech repair professionals to gather insights on laptop key repairs:
- Many experts recommend using a microfiber cloth to regularly clean keyboards, as it prevents the buildup of grime.
- Using a keyboard cover can save time and money in repairs by preventing damage from spills.
FAQs
Here are some frequently asked questions regarding laptop key repairs:
- Can I repair a key without professional help?
Yes, most key repairs can be done at home with the right tools and guidance. - What should I do if a key is completely missing?
You can purchase a replacement key online or from the manufacturer. - How do I know if the key mechanism is broken?
If the key does not respond after cleaning or reattaching, the mechanism may be damaged. - Is it safe to use alcohol on my keyboard?
Yes, isopropyl alcohol is safe when used correctly and in moderation. - What if my laptop has multiple keys not working?
It may indicate a larger issue, such as a keyboard circuit failure. Consider professional help. - How often should I clean my keyboard?
It’s advisable to clean your keyboard at least once a month. - Can I use water to clean my keyboard?
It’s best to avoid water; use isopropyl alcohol instead. - What tools do I need for a key repair?
Common tools include a spudger, compressed air, and isopropyl alcohol. - Are there specific repair kits for laptop keyboards?
Yes, several kits are available that include keycaps and tools for repairs. - How much does it cost to replace a laptop keyboard?
Replacement costs vary, but it typically ranges from $50 to $150 depending on the model.
For further reading, refer to these authoritative sources:
- iFixit: Laptop Keyboard Replacement Guide
- Laptop Mag: How to Repair Your Laptop Keyboard
- PC World: Repairing Your Laptop Keyboard
Random Reads
- How to make an mp3 file
- How to make bar graphs
- How to unlock disabled ipod
- How to unlock factions in rome total war
- The ultimate guide to making money in the sims 3
- Quickly change color background photoshop
- Mastering software installation debian linux
- How to remove linoleum
- How to remove mobile games on android
- How to make windows xp genuine forever