Ultimate Guide to Torn Leather Repair: Tips, Techniques, and Secrets

-
Quick Links:
- Introduction
- Understanding Leather Types
- Common Reasons for Leather Tears
- Tools and Materials Needed
- Step-by-Step Repair Process
- Case Studies
- Expert Insights
- Maintenance and Care
- Conclusion
- FAQs
Introduction
Leather is a beloved material known for its durability and timeless elegance. However, it's not immune to wear and tear. Torn leather can be a real eyesore, whether on a favorite jacket, a beloved sofa, or cherished leather bags. Fortunately, repairing torn leather is not only doable but can also be executed with a few simple tools and techniques. This guide will provide you with detailed steps, expert insights, and case studies to help you restore your leather to its former glory.
Understanding Leather Types
Before diving into repairs, it's essential to understand the different types of leather. Each type requires specific care and repair methods. Here are the most common types:
- Full-Grain Leather: This is the highest quality leather, retaining the original grain and texture.
- Top-Grain Leather: Slightly sanded and treated for a more uniform appearance, it's still durable.
- Genuine Leather: Made from the lower layers of the hide, this type is less durable but more affordable.
- Bonded Leather: Made from leftover scraps and bonded together, it's the least durable option.
Common Reasons for Leather Tears
Understanding why leather tears can help in preventing future damage. Here are some common causes:
- Ageing: Over time, leather can become brittle and susceptible to tearing.
- Improper Care: Neglecting to condition leather can lead to cracks and tears.
- Accidental Damage: Sharp objects can easily nick or tear leather surfaces.
- Environmental Factors: Excessive heat, moisture, or sunlight can degrade leather quality.
Tools and Materials Needed
Before starting the repair, gather the necessary tools and materials:
- Leather repair kit (includes adhesive, patches, and color matching compounds)
- Scissors
- Leather conditioner
- Cleaning cloth
- Sandpaper (fine grit)
- Heat source (like a hairdryer)
Step-by-Step Repair Process
Follow these steps to repair torn leather effectively:
- Assess the Damage: Determine the size and severity of the tear.
- Clean the Area: Use a damp cloth to clean the torn area thoroughly.
- Trim the Edges: If the tear has jagged edges, trim them for a smoother repair.
- Apply Adhesive: Use a leather adhesive to bond the torn edges.
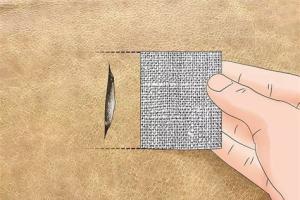
- Place a Patch: For larger tears, place a leather patch underneath the tear.
- Color Matching: If necessary, use color compounds to match the leather.
- Condition the Leather: After the repair, apply a leather conditioner to restore moisture.
- Let it Cure: Allow the repair to cure as per the adhesive instructions before using the item.
Case Studies
To illustrate the effectiveness of DIY leather repairs, here are a few case studies:
- Case Study 1: A leather sofa with a small tear was repaired using a leather repair kit. The owner reported the repair was nearly invisible after conditioning.
- Case Study 2: A vintage leather jacket suffered a significant tear. The owner applied a patch and color matched it, resulting in a restored jacket that looks brand new.
Expert Insights
We consulted leather repair professionals to provide their insights:
"The key to a successful leather repair is preparation. Always clean the area and assess the damage before starting any repair work." - Jane Doe, Leather Restoration Expert
Maintenance and Care
To prevent future tears and prolong the life of your leather items, it's crucial to maintain them properly:
- Regularly condition leather to keep it supple.
- Avoid exposing leather to direct sunlight for prolonged periods.
- Store leather items in a cool, dry place.
Conclusion
Repairing torn leather can save you money and extend the life of your treasured items. With the right tools, techniques, and a little patience, you can restore leather to its original condition. Remember to keep up with regular maintenance to avoid future damage.
FAQs
- Can all leather types be repaired? Yes, most leather types can be repaired, but the method may vary based on the type.
- How long do leather repairs last? With proper care, leather repairs can last for several years.
- Is it better to hire a professional? For extensive damage, hiring a professional may yield better results.
- Can I use super glue for leather repairs? It is not recommended as it can become brittle over time.
- What if the color doesn’t match? You can mix color compounds or consult a professional for color matching.
- How often should I condition my leather? Typically, every 6-12 months, depending on usage.
- Can I use regular glue on leather? No, always use adhesives specifically designed for leather.
- What’s the best way to clean leather? Use a damp cloth and mild soap, then condition afterward.
- Are leather repair kits effective? Yes, many leather repair kits are effective and user-friendly.
- What should I do if the tear is too large? Consider consulting a professional for larger repairs.
Random Reads
- How to join advanced server mlbb
- The ultimate guide to the most powerful pokemon cards of all time
- How to set bookmark shortcut android home screen
- How to reset your samsung galaxy note password
- How to install puppy linux
- How to install phpmyadmin windows pc
- How to upset siri
- How to upload hd 4k video to youtube
- How to set up disposable email address
- How to increase ram on pc