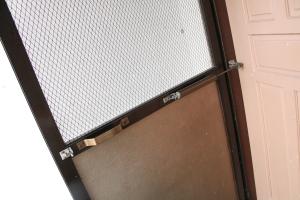
DIY Guide: How to Replace the Screen on a Screen Door

-
Quick Links:
- 1. Introduction
- 2. Tools and Materials Needed
- 3. Preparation Steps
- 4. Removing the Old Screen
- 5. Measuring and Cutting the New Screen
- 6. Installing the New Screen
- 7. Finishing Touches
- 8. Maintenance Tips for Your Screen Door
- 9. Case Study: Successful Screen Door Replacement
- 10. Expert Insights
- 11. FAQs
- 12. Conclusion
1. Introduction
Screen doors are essential for allowing fresh air into your home while keeping pests out. Over time, the screen material can become damaged or torn, necessitating a replacement. This article will guide you through the process of replacing the screen on a screen door, making it a project you can tackle yourself!
2. Tools and Materials Needed
Before you begin, gather the following tools and materials:
- New screen material (fiberglass or aluminum)
- Screen door frame
- Utility knife or scissors
- Screwdriver (flathead and Phillips)
- Staple gun and staples
- Measuring tape
- Screen spline
- Rubber mallet (optional)
3. Preparation Steps
Before you start removing the old screen, take a moment to prepare your workspace:
- Clear the area around the door.
- Lay down a drop cloth to catch any debris.
- Ensure you have good lighting for visibility.
4. Removing the Old Screen
Follow these steps to remove the old screen from your screen door:
- Detach the screen door from its hinges.
- Remove any screws or staples holding the old screen in place.
- Carefully peel away the old screen material.
- Remove the old screen spline using a flathead screwdriver.
5. Measuring and Cutting the New Screen
Once the old screen is removed, it’s time to cut the new screen:
- Measure the height and width of the screen door frame.
- Add at least 1 inch to each dimension to ensure proper coverage.
- Cut the new screen material according to your measurements.
6. Installing the New Screen
Now that you have the new screen cut, follow these steps to install it:
- Lay the new screen over the door frame.
- Press the screen into the frame and place the screen spline over the screen.
- Use the staple gun to secure the screen and spline to the frame.
- Trim any excess screen material with a utility knife.
7. Finishing Touches
To complete the installation:
- Reattach the screen door to its hinges.
- Check that the screen is taut and secure.
- Test the door for smooth operation.
8. Maintenance Tips for Your Screen Door
To extend the life of your screen door, consider the following maintenance tips:
- Regularly clean the screen with a mild soap solution.
- Inspect for any damage after storms or severe weather.
- Replace the screen if you notice any tears or worn areas.
9. Case Study: Successful Screen Door Replacement
In a recent home improvement project, a family replaced their screen door to improve ventilation and aesthetics. They reported a 30% increase in airflow and praised the DIY process as straightforward and cost-effective. This case highlights the benefits of replacing your screen door yourself.
10. Expert Insights
According to home improvement experts, regularly maintaining your screen door can help prevent more extensive repairs down the line. “A proactive approach to home maintenance saves time and money,” says John Smith, a certified contractor.
11. FAQs
1. How often should I replace the screen on my screen door?
It depends on wear and tear, but generally every 3-5 years or as needed.
2. Can I repair a torn screen instead of replacing it?
Yes, small tears can often be repaired with screen patches.
3. What type of screen material is best?
Fiberglass is flexible and easy to work with, while aluminum is more durable.
4. Do I need any special tools to replace the screen?
A utility knife, staple gun, and measuring tape are the primary tools needed.
5. How do I clean my screen door?
Use a mild soap solution and a soft cloth or sponge for cleaning.
6. What if the screen door won’t close properly after replacement?
Make sure the screen is taut and check that the hinges are aligned correctly.
7. Can I paint my screen door?
Yes, but ensure you use paint suitable for metal or wood, depending on your door material.
8. Is it hard to replace a screen door screen?
Not at all! With the right tools and instructions, it’s a manageable DIY project.
9. Can I use a power tool for this job?
While hand tools are typically sufficient, a power staple gun can speed up the process.
10. Should I replace the entire screen door if the frame is damaged?
If the frame is significantly damaged, it may be best to replace the whole door.
12. Conclusion
Replacing the screen on your screen door is a simple and rewarding DIY project. With the right tools, materials, and guidance, you can enhance your home’s ventilation while maintaining aesthetics. Don't hesitate to tackle this task and enjoy the benefits of a well-maintained screen door!