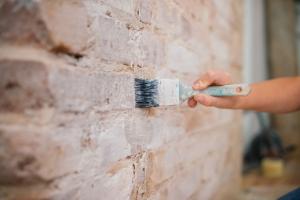
Step-by-Step Guide on How to Stain Brick for a Beautiful Finish

-
Quick Links:
- 1. Introduction
- 2. Understanding Brick and Its Properties
- 3. Types of Brick Stains
- 4. Preparation: Getting Ready to Stain
- 5. The Staining Process: Step-by-Step Guide
- 6. Finishing Touches and Maintenance
- 7. Case Studies: Successful Brick Staining Projects
- 8. Expert Insights and Tips
- 9. FAQs
1. Introduction
Staining brick is an excellent way to enhance the aesthetic appeal of your home while also protecting the structure. Whether you want to update your home’s exterior or revitalize an old brick fireplace, understanding how to stain brick effectively is key to achieving a professional-looking finish. This guide provides a detailed overview of the brick staining process, from preparation to execution, ensuring your project is a success.
2. Understanding Brick and Its Properties
Bricks are not just simple building materials; they come with unique properties that affect how they absorb stains. Understanding these properties will help you choose the right stain and application method.
- Porosity: Bricks have varying levels of porosity, which influences how stains are absorbed.
- Color: The existing color of the brick will affect the final appearance after staining.
- Texture: Smooth bricks might stain differently compared to rough textures.
3. Types of Brick Stains
There are several types of stains available for brick, each offering different benefits. Choosing the right type is crucial for achieving your desired look.
- Water-based Stains: Easier to apply and clean up, these stains penetrate the brick and provide a natural look.
- Oil-based Stains: These create a more durable finish but require more time to dry.
- Translucent Stains: Ideal for enhancing the existing color of the brick while adding a hint of color.
- Solid Stains: Offer a more opaque finish, hiding the brick’s original color.
4. Preparation: Getting Ready to Stain
Proper preparation is crucial for a successful staining project. Here’s what you need to do:
- Clean the Brick: Remove dirt, dust, and old sealants using a pressure washer or a scrub brush.
- Inspect for Damage: Repair any cracks or chips in the brick before applying the stain.
- Test a Small Area: Always test the stain on a small, inconspicuous area to see how the brick reacts.
5. The Staining Process: Step-by-Step Guide
Follow these steps to stain brick effectively:
- Gather Your Materials: You will need the chosen stain, a paintbrush or sprayer, drop cloths, and protective gear.
- Apply the Stain: Start at the top of the wall and work your way down, using even strokes.
- Monitor Drying Time: Follow the manufacturer's instructions for drying times between coats.
- Apply Additional Coats: Depending on the desired color intensity, you may need to apply multiple coats.
- Seal the Stained Brick: Once dry, consider applying a sealant to protect the finish.
6. Finishing Touches and Maintenance
After staining, it’s important to maintain the appearance of your newly stained brick:
- Regular Cleaning: Clean the surface periodically to avoid dirt build-up.
- Inspect for Wear: Check for any fading or wear and address it promptly.
- Reapply Sealant as Needed: Depending on exposure to the elements, you may need to reapply sealant every few years.
7. Case Studies: Successful Brick Staining Projects
Here are some real-world examples of successful brick staining projects:
- Project 1: A homeowner transformed a dull red brick exterior into a modern gray finish, increasing curb appeal dramatically.
- Project 2: A local business revitalized its brick storefront with a vibrant blue stain, attracting more customers.
8. Expert Insights and Tips
According to masonry experts, the key to a successful staining project lies in patience and preparation. Here are some valuable tips:
- Always read product labels for specific instructions and recommendations.
- Consider the weather; staining in dry, mild conditions yields the best results.
9. FAQs
What is the best stain for brick?
The best stain for brick depends on your desired finish. Water-based stains are often recommended for ease of use.
Can you stain old brick?
Yes, old brick can be stained effectively as long as it is properly cleaned and prepared.
How long does brick stain last?
With proper maintenance, brick stain can last several years before needing reapplication.
Do I need to seal stained brick?
It’s recommended to seal stained brick to protect it from wear and fading.
Can I change the color of my brick?
Yes, staining is an effective way to change the color of brick, allowing for a variety of aesthetic options.
Is brick staining a DIY project?
Yes, staining brick can be a DIY project if you follow the proper preparation and application steps.
How much does it cost to stain brick?
Costs can vary widely based on the size of the area and the type of stain used, but DIY projects can be cost-effective.
What tools do I need to stain brick?
You will need brushes or sprayers, drop cloths, and protective gear for staining brick.
Can I use regular paint on brick?
While you can paint brick, it’s not recommended as it can trap moisture and lead to damage. Staining is a better option.
How can I maintain stained brick?
Regular cleaning and reapplying sealant as needed will help maintain the appearance of stained brick.
Conclusion
Staining brick is a fantastic way to breathe new life into your home’s exterior or interior. By following the steps outlined in this guide, you can achieve a beautiful, long-lasting finish that enhances your property’s appeal. Remember, preparation is key, and with the right tools and techniques, you can transform your brick surfaces successfully.