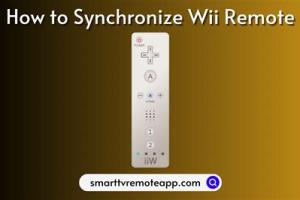
Step-by-Step Guide: How to Synchronize Your Wii Remote to the Console

-
Quick Links:
- Introduction
- What You Need
- Understanding the Wii Remote
- Synchronization Process
- Troubleshooting Common Issues
- Tips for Successful Synchronization
- Case Studies
- Expert Insights
- FAQs
Introduction
The Wii console revolutionized gaming with its motion-sensitive controls and interactive gameplay. However, synchronizing the Wii Remote to the console can be a challenge for many users. In this comprehensive guide, we will explore the steps required to effectively sync your Wii Remote, troubleshoot common issues, and provide expert insights to enhance your gaming experience.
What You Need
Before diving into the synchronization process, ensure you have the following:
- A Wii console
- A Wii Remote
- Two AA batteries (if not already installed in the Wii Remote)
Understanding the Wii Remote
The Wii Remote, or Wiimote, is the primary controller for the Nintendo Wii. It features motion-sensing technology, allowing players to control gameplay through physical movements. Understanding its components is crucial for a successful synchronization:
- Power Button: Turns the Wii Remote on and off.
- Speaker: Provides audio feedback during gameplay.
- Buttons: Includes A, B, 1, 2, plus (+), minus (-), home, and directional buttons.
- Sync Button: Located on the front of the remote, used for the synchronization process.
Synchronization Process
Follow these detailed steps to synchronize your Wii Remote with your console:
- Step 1: Power On the Wii Console
Press the power button on the front of the console. - Step 2: Install Batteries in the Wii Remote
Ensure that your Wii Remote has fresh AA batteries installed. - Step 3: Open the Battery Cover
On the back of the Wii Remote, slide the battery cover off. - Step 4: Locate the Sync Button
The sync button is located just below the batteries. - Step 5: Press the Sync Button on the Console
Open the front door of the Wii console and press the red sync button. - Step 6: Press the Sync Button on the Wii Remote
Within 20 seconds, press the sync button on the Wii Remote. The player LED will start blinking. - Step 7: Confirm Synchronization
When the LED stops blinking and stays lit, your Wii Remote is successfully synchronized. You can now use it to navigate the Wii menu.
Troubleshooting Common Issues
If you encounter issues during synchronization, consider the following troubleshooting steps:
- Check Battery Levels: Ensure your batteries are fresh and installed correctly.
- Distance from Console: Ensure that you are within a reasonable distance from the console (within 10 feet).
- Interference: Remove any potential electronic interference, such as other wireless devices.
- Reset the Wii Remote: If problems persist, reset the Wii Remote by removing the batteries for a few seconds and then reinstalling them.
Tips for Successful Synchronization
Here are some helpful tips to ensure a smooth synchronization experience:
- Always use high-quality batteries for optimal performance.
- Synchronize the Wii Remote in a well-lit area to avoid sensor issues.
- Keep your Wii console updated with the latest firmware for enhanced compatibility.
Case Studies
To better understand the synchronization process, let's look at some real-world case studies. These examples will provide insights into common challenges and solutions encountered by gamers.
Case Study 1: Family Game Night Challenges
During a family game night, the Johnson family struggled to sync their Wii Remotes. After multiple attempts, they realized that the batteries were low. Replacing the batteries led to immediate success.
Case Study 2: Wireless Interference
In another instance, a gamer experienced continuous disconnection during gameplay. After troubleshooting, they discovered that a nearby wireless router was causing interference. Relocating the router resolved the issue.
Expert Insights
Experts recommend regular maintenance of your Wii Remote. Here are some insights:
- Keep the sensor bar clean for optimal tracking.
- Store your Wii Remote in a cool, dry place to avoid damage.
- Regularly check for software updates for your Wii console for improved performance.
FAQs
1. How do I know if my Wii Remote is synced?
The player LED lights will stay lit when the remote is successfully synced.
2. What should I do if my Wii Remote won’t sync?
Check battery levels, ensure you are within range, and remove any potential interference.
3. Can I sync multiple Wii Remotes to one console?
Yes, you can sync up to four Wii Remotes to a single Wii console.
4. What if my Wii Remote keeps disconnecting?
Replace the batteries and check for wireless interference.
5. Is there a limit to how far the Wii Remote can be from the console?
Yes, the effective range is typically within 10 feet.
6. Does it matter which player slot I sync to?
No, you can sync to any player slot, but the first synced remote will be Player 1.
7. Can I use a Wii Remote on other devices?
Some devices may support Wii Remotes, but compatibility can vary.
8. How often should I replace the batteries?
Replace batteries when you notice decreased responsiveness or when the LED indicators start flashing.
9. Does the Wii Remote work with the Wii U?
Yes, Wii Remotes are compatible with the Wii U console.
10. What if my Wii Remote is damaged?
If your Wii Remote is damaged, it may need to be repaired or replaced.
Random Reads
- How to reroof your house
- How to replace shut off valves
- How to open pages file on android
- How to open pack a punch in tranzit
- How to install vertical metal siding
- How to reboot cable box
- How to recaulk kitchen counter backsplash
- Mastering graphic cropping in microsoft publisher
- How to make google maps default iphone
- How to make godzilla in little alchemy