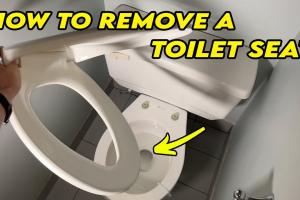
Complete Guide: How to Easily Remove a Toilet Seat Without Stress

-
Quick Links:
- Introduction
- Tools Needed for Toilet Seat Removal
- Step-by-Step Guide to Removing a Toilet Seat
- Troubleshooting Common Issues
- Real-World Case Studies
- Expert Insights on Toilet Maintenance
- FAQs
- Conclusion
Introduction
Removing a toilet seat may seem like a simple task, but for many, it can become an unexpected challenge. Whether you're looking to replace an old, worn-out seat or simply need to clean around the hinges, knowing how to take a toilet seat off correctly is essential. This comprehensive guide will walk you through the process step-by-step, ensuring you have all the tools and knowledge needed to complete the task efficiently.Tools Needed for Toilet Seat Removal
Before diving into the removal process, gather the necessary tools. Here’s what you’ll need:- Adjustable Wrench or Pliers
- Screwdriver (Flathead or Phillips, depending on your toilet)
- Socket Wrench (if applicable)
- Utility Knife (for stubborn seals)
- Cleaning Cloth
- Bucket (to catch any water)
Step-by-Step Guide to Removing a Toilet Seat
Follow these steps to successfully remove your toilet seat:Step 1: Prepare the Area
Before you start, ensure you have enough space to work. Clear any items from around the toilet and place a bucket underneath to catch any water that may leak.Step 2: Identify the Type of Toilet Seat
Toilet seats generally come in two types: those that are bolted down with nuts and those that have quick-release mechanisms. Understanding which type you have will guide your removal process.Step 3: Remove the Bolts
- **For Standard Bolts:** - Locate the bolts at the back of the toilet seat. - Use your screwdriver to unscrew the plastic caps (if applicable) covering the nuts. - With your wrench or pliers, hold the nut while turning the screw counterclockwise to loosen it. - **For Quick-Release Mechanisms:** - If your seat has a quick-release mechanism, simply press the release buttons or pull the tabs to detach the seat from the hinges.Step 4: Clean the Area
Once the seat is off, take the opportunity to clean the area thoroughly. Use a disinfectant to wipe down the toilet rim and hinges.Step 5: Install the New Seat (if applicable)
If you're replacing the seat, follow the manufacturer’s instructions for installation, which usually involves reversing the removal process.Troubleshooting Common Issues
Despite being a straightforward task, several issues may arise. Here are some common problems and solutions: - **Stuck Bolts:** If the bolts are rusted or stuck, apply penetrating oil and let it sit for a few minutes before attempting to unscrew again. - **Broken Hinges:** If the hinges are broken, you may need to replace them along with the toilet seat. - **Difficult Access:** If you cannot reach the bolts, consider using a socket wrench or a flexible extension tool.Real-World Case Studies
**Case Study 1: The Stubborn Bolts** John, a homeowner, faced a stubborn toilet seat that wouldn’t budge due to rust. After applying a penetrating oil and letting it sit for an hour, he successfully removed the seat without damaging the toilet. **Case Study 2: Quick-Release Success** Sarah, an apartment renter, had a quick-release toilet seat. She pressed the buttons and removed the seat in under a minute, making it easy for her to clean the toilet.Expert Insights on Toilet Maintenance
Experts recommend regular checks on toilet components. "Replacing a toilet seat every few years can prevent buildup and ensure hygiene," says plumbing expert Dr. Lisa Mendez. Regular maintenance can save you from larger plumbing issues down the line.FAQs
- How often should I replace my toilet seat? - It's advisable to replace your toilet seat every 3-5 years for hygiene and comfort.
- What if my toilet seat is cracked? - A cracked toilet seat should be replaced immediately to prevent injury.
- Can I use any tools to remove the toilet seat? - Using the right tools like a wrench or screwdriver is crucial for a proper removal.
- What if my toilet seat doesn't have visible screws? - Look for quick-release mechanisms or hidden screws under protective caps.
- Is it necessary to turn off the water supply? - Turning off the water is not necessary for removing the seat, but it’s a good precaution if you're working near plumbing.
- How do I clean the toilet seat hinges? - Use a disinfectant wipe or cloth to clean around the hinges after removing the seat.
- Can I replace the toilet seat myself? - Yes, with the right tools and instructions, replacing the toilet seat is a DIY task.
- What are the signs that my toilet seat needs replacing? - Signs include cracks, discoloration, or looseness of the seat.
- Do all toilet seats fit all toilets? - No, toilet seats come in various shapes and sizes; ensure you select one that fits your toilet model.
- Can I put a wooden toilet seat on a plastic toilet? - Yes, you can, as long as the mounting hardware is compatible.
Conclusion
Taking a toilet seat off is a straightforward process that can save you time and money in maintenance. By following this guide, you can ensure that your toilet remains clean and functional. Remember, regular check-ups and maintenance are key to avoiding plumbing issues in the future.Random Reads