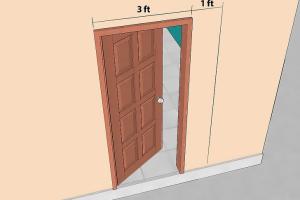
Transform Your Home: A Comprehensive Guide on How to Widen a Doorway

-
Quick Links:
- Introduction
- Why Widen a Doorway?
- Planning Your Project
- Tools and Materials Needed
- Step-by-Step Guide to Widening a Doorway
- Case Studies
- Expert Insights
- Safety Considerations
- Cost Analysis
- Common Mistakes to Avoid
- FAQs
Introduction
Widening a doorway can significantly enhance the accessibility and aesthetic appeal of your home. Whether for accommodating furniture, improving the flow of space, or making your home more accessible, this guide will walk you through every step of the process.Why Widen a Doorway?
There are several compelling reasons to consider widening a doorway:- Accessibility: Wider doorways make it easier for wheelchairs, strollers, and large furniture to pass through.
- Space Optimization: An open space can create a more inviting environment.
- Improved Flow: Widened doorways enhance the connection between rooms, making your home feel larger.
- Aesthetic Appeal: A wider doorway can serve as a design feature, improving the overall look of your interior.
Planning Your Project
Before you start, it’s essential to plan your project carefully. Consider the following:- Assess Your Space: Measure the existing doorway and determine how much wider you want to go.
- Check for Structural Walls: Ensure that the wall you are widening is not a load-bearing wall. Consult a structural engineer if unsure.
- Permits: Check local building codes and obtain necessary permits.
Tools and Materials Needed
Gather the following tools and materials to ensure a smooth project:- Reciprocating saw
- Drywall saw
- Measuring tape
- Stud finder
- Level
- Framing lumber
- Construction adhesive
- Wood screws
- Safety goggles and gloves
Step-by-Step Guide to Widening a Doorway
Here’s a detailed guide to help you through the process:Step 1: Measure and Mark
Start by measuring the width you want for your new doorway. Mark the measurements on the wall with a pencil.Step 2: Turn Off Utilities
Before cutting into the wall, ensure all electrical and plumbing lines are turned off or marked to avoid accidents.Step 3: Remove the Door Frame
Carefully remove the existing door frame using your reciprocating saw. Cut through the frame and remove any nails.Step 4: Cut the Wall
Using a drywall saw, cut along your marked lines. Ensure you are cautious and cut only the drywall.Step 5: Check for Structural Elements
Once the drywall is out, check for any studs or structural elements. If your wall is load-bearing, you may need to install a header.Step 6: Install a Header (if applicable)
For load-bearing walls, install a header using framing lumber to carry the weight above the doorway.Step 7: Frame the New Opening
Add new studs to frame the wider opening. Ensure everything is level and secure.Step 8: Replace Drywall
Install new drywall around the framed opening. Tape and mud the seams for a smooth finish.Step 9: Paint and Finish
Once the drywall is dry, paint it to match your interior. Add trim around the doorway for a polished look.Case Studies
1. **Case Study 1: A Family Home Renovation** - A family in California widened their kitchen doorway to accommodate a larger dining table. The project improved their dining experience and made the space feel more open. 2. **Case Study 2: Accessible Living** - A couple with mobility challenges widened the doorway to their bathroom, making it wheelchair accessible. This project increased their comfort and independence at home.Expert Insights
According to home improvement expert John Doe, "Widening a doorway can be a straightforward DIY project if you plan appropriately. Always prioritize safety and consult professionals when in doubt."Safety Considerations
- Always wear safety goggles and gloves. - Ensure your workspace is clear of debris. - Be cautious while using power tools.Cost Analysis
Widening a doorway can range from $300 to $2,000 depending on: - Whether it’s a DIY project or requires professional help. - The cost of materials. - Permits needed.Common Mistakes to Avoid
- Not checking if the wall is load-bearing. - Underestimating the project’s complexity. - Failing to measure accurately.FAQs
1. How much does it cost to widen a doorway?
Costs can vary widely based on location, size, and whether you do it yourself or hire professionals.
2. Are there any permits required?
Yes, check with local building codes to determine if permits are necessary for your project.
3. Can I widen a doorway without professional help?
Yes, if you have basic DIY skills, you can widen a doorway yourself. However, consult a professional if you're unsure about structural issues.
4. What tools will I need?
You will need a reciprocating saw, drywall saw, measuring tape, and safety gear.
5. How long does the process take?
Widening a doorway can take a few hours to a couple of days, depending on your experience and the complexity of the project.
6. Can I widen a load-bearing wall?
Yes, but it requires additional support, such as installing a header. Consult an engineer or contractor.
7. Will widening a doorway affect my home’s value?
Properly widening a doorway can enhance your home's appeal and potentially increase its value.
8. What if I need to move electrical outlets or plumbing?
You may need to hire a licensed electrician or plumber to ensure safety and compliance with codes.
9. How can I make my widened doorway more decorative?
Consider adding custom trim, a new door style, or decorative molding to enhance the appearance.
10. Is it worth widening a doorway?
If it enhances accessibility and improves the flow of your home, it is often a worthwhile investment.
For more information, consider visiting these resources:
Random Reads
- Yahoo account hacked guide
- Yahoo account recovery
- Xbox 360 towel trick
- Simple steps to make tables in excel
- How to oil ceiling fan
- The easy way to share an internet connection over ethernet or wifi
- How to read histograms
- How to hide porn on ipod touch iphone
- How to hide rows in excel
- How to stretch carpet