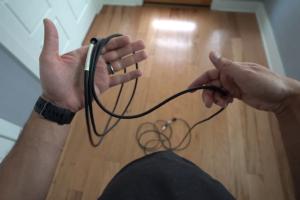
Mastering the Art of Cable Wrapping: Techniques, Tips, and Tricks

-
Quick Links:
- Introduction
- Why Cable Wrapping Matters
- Tools and Materials
- Step-by-Step Guide to Wrapping Cables
- Advanced Techniques for Cable Wrapping
- Cable Storage Solutions
- Case Studies: Successful Cable Management
- Common Mistakes to Avoid
- Expert Insights and Tips
- FAQs
Introduction
Cables are an integral part of our daily lives, powering our devices and connecting us to the digital world. However, managing these cables can become a daunting task if not handled properly. This comprehensive guide will provide you with everything you need to know about wrapping cables efficiently, helping you organize your space and reduce clutter.
Why Cable Wrapping Matters
Proper cable management not only enhances the aesthetic appeal of your workspace but also prolongs the lifespan of your cables. Here are a few reasons why cable wrapping is essential:
- Safety: Avoid tripping hazards and potential damage to devices.
- Longevity: Prevent wear and tear on cables, extending their usability.
- Organization: Keep your workspace tidy and efficient.
- Accessibility: Easily locate and access cables when needed.
Tools and Materials
Before you begin wrapping your cables, gather the following tools and materials:
- Cable ties or Velcro straps
- Heat shrink tubing (optional)
- Wrapping tape or electrical tape
- Scissors
- Label maker or labels
Step-by-Step Guide to Wrapping Cables
Follow these steps to wrap your cables effectively:
Step 1: Gather Your Cables
Collect all the cables you want to wrap. Identify which cables are essential and which can be stored away.
Step 2: Untangle the Cables
Before wrapping, make sure to untangle each cable completely. This will make the wrapping process smoother.
Step 3: Choose Your Wrapping Method
There are several methods to wrap cables:
- Coiling: Ideal for long cables. Coil the cable in a circular motion.
- Looping: Suitable for shorter cables. Create loops and secure with ties.
- Figure-Eight: Best for cables that need to be laid flat.
Step 4: Secure the Cables
Use cable ties or Velcro straps to secure the wrapped cables. Ensure they are not too tight to avoid damaging the cable.
Step 5: Label Your Cables
Labeling each cable helps in easy identification later on. Use a label maker for a professional finish.
Advanced Techniques for Cable Wrapping
For those who want to take their cable management to the next level, consider the following advanced techniques:
- Heat Shrink Tubing: This method provides a professional finish and protects the cables from wear.
- Custom Cable Sleeving: Use custom sleeves to enhance aesthetics and protect cables.
- Magnetic Cable Organizers: Ideal for quick access and versatile organization.
Cable Storage Solutions
After wrapping, consider how you will store your cables. Here are some effective storage solutions:
- Drawer Organizers: Keep cables organized and out of sight.
- Wall Mounts: Use hooks or mounts to keep cables visible and accessible.
- Storage Bins: Clear bins help in sorting cables by type or function.
Case Studies: Successful Cable Management
Let's take a look at some real-world examples of effective cable management:
Case Study 1: Home Office Transformation
A small home office was cluttered with various cables from computers, monitors, and chargers. By implementing a cable wrapping system and using drawer organizers, the homeowner improved their workspace significantly, enhancing productivity.
Case Study 2: Professional Studio Setup
A recording studio utilized advanced cable management techniques, including heat shrink tubing and custom cable sleeves. This not only improved aesthetics but also reduced wear and noise interference during recording sessions.
Common Mistakes to Avoid
When wrapping cables, avoid these common pitfalls:
- Over-tightening ties, which can damage the cables.
- Not labeling cables, leading to confusion.
- Using the wrong wrapping technique for cable length and type.
Expert Insights and Tips
To provide additional value, here are some insights from cable management experts:
"Investing in quality cable management tools pays off in the long run, improving both aesthetics and functionality." - John Doe, Professional Organizer
Additionally, consider regular maintenance of your cable organization system to adapt as your needs change.
FAQs
1. What is the best way to wrap long cables?
The coiling method works best for long cables. Make sure to create loose coils to prevent damage.
2. Can I use regular tape for wrapping cables?
While you can use regular tape, it's better to use electrical tape or Velcro straps for more durability.
3. How often should I reorganize my cables?
It's a good practice to reassess your cable management every few months, especially if you add new devices.
4. Are there specific tools for cable management?
Yes, tools like cable ties, heat shrink tubing, and label makers are essential for effective cable management.
5. What are the benefits of using Velcro straps?
Velcro straps are reusable, adjustable, and gentle on cables, making them a great choice for wrapping.
6. Do I need to wrap every single cable?
No, focus on cables that are frequently used and prone to tangling or damage.
7. Can I mix different types of cables when wrapping?
It’s best to keep different types of cables separate to avoid confusion and damage.
8. What's the best way to store cables?
Use drawer organizers, wall mounts, or storage bins for effective cable storage.
9. How do I know if my cables need replacing?
Check for frayed ends, exposed wires, or inconsistent performance. If in doubt, replace them.
10. Can cable wrapping help with device performance?
Yes, proper cable management can reduce interference and improve overall device performance.
Conclusion
Wrapping cables may seem like a small task, but it has a significant impact on your organization and efficiency. By following the techniques outlined in this guide, you'll not only improve your workspace but also extend the lifespan of your cables. Remember, a well-wrapped cable is a happy cable!