Mastering Command Strips: The Easiest Ways to Apply Hooks at Home

-
Quick Links:
- Introduction
- What Are Command Strips?
- Types of Command Strips and Hooks
- Preparing Your Wall
- Step-by-Step Guide to Applying Command Strips
- Common Mistakes to Avoid
- Advanced Applications
- Case Studies and Real-World Examples
- Expert Insights
- FAQs
Introduction
Command Strips and Hooks have revolutionized the way we decorate and organize our homes. They offer a simple, damage-free solution for hanging pictures, artwork, and more. In this article, we will explore the easiest ways to apply these handy tools, ensuring your decor is not only stylish but also secure.
What Are Command Strips?
Command Strips are adhesive strips designed for mounting objects on walls without causing damage. They come in various sizes and weights, allowing for versatile applications. The strips use a unique technology that allows them to hold strong yet come off cleanly.
Types of Command Strips and Hooks
Understanding the different types of Command Strips and Hooks is crucial for effective application. Here are some common variations:
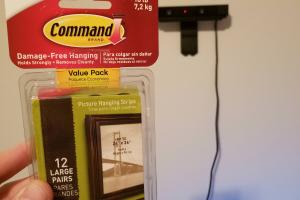
- Picture Hanging Strips: Designed for hanging frames and artwork.
- Damage-Free Hanging Strips: Suitable for lightweight items.
- Outdoor Strips: Specifically made for outdoor conditions.
- Utility Hooks: Great for organizing items in kitchens and bathrooms.
Preparing Your Wall
Before applying Command Strips or Hooks, proper wall preparation is essential:
- Clean the Surface: Use rubbing alcohol to remove dust and oils.
- Choose the Right Location: Ensure the area is suitable for the weight of the object.
- Temperature Considerations: Apply in temperatures above 50°F for best results.
Step-by-Step Guide to Applying Command Strips
Follow this detailed guide to ensure successful application:
Step 1: Gather Your Materials
- Command Strips or Hooks
- Rubbing Alcohol
- Measuring Tape (optional)
- Pencil (for marking)
Step 2: Measure and Mark
Use the measuring tape to find the optimal height for your items. Mark the spot lightly with a pencil.
Step 3: Prepare the Strips
Take the Command Strip and separate the two pieces. Press one piece to the back of your item and the other on the wall.
Step 4: Press and Hold
Press the item against the wall firmly for about 30 seconds. Ensure it is secure before releasing.
Step 5: Wait 1 Hour
For the best hold, wait at least one hour before hanging any items on the hook or strip.
Common Mistakes to Avoid
- Not Cleaning the Surface: Skipping this step can result in poor adhesion.
- Overloading: Always check weight limits.
- Ignoring Temperature Guidelines: Extreme temperatures can affect adhesion.
Advanced Applications
Command Strips can be used in innovative ways:
- Creating a Gallery Wall: Use multiple strips to arrange pictures.
- Hanging Seasonal Decor: Easily switch out decor for holidays.
- Organizing Cables: Keep cords tidy and out of sight.
Case Studies and Real-World Examples
Here are a few notable examples of successful applications:
Case Study 1: The Gallery Wall Transformation
A family transformed their living room using Command Strips to create a stunning gallery wall, using various frame sizes and layouts.
Case Study 2: Seasonal Decor Switch
Another household used Command Hooks to easily switch out decor for different seasons, showcasing how adaptable these tools can be.
Expert Insights
Interior designers recommend Command Strips for their versatility, emphasizing the importance of following the manufacturer’s guidelines for optimal results. "These products are a game changer for renters," says designer Emily Henderson.
FAQs
1. Can Command Strips be reused?
No, Command Strips are designed for one-time use.
2. How do I remove Command Strips without damaging the wall?
Pull the tab straight down, parallel to the wall, to minimize damage.
3. What surfaces do Command Strips work on?
They work on painted walls, wood, tiles, and more, but not on wallpaper.
4. Can I use Command Strips outdoors?
Yes, but ensure you use outdoor-specific strips.
5. What is the weight limit for Command Strips?
Weight limits vary by product; check packaging for specifics.
6. How long do Command Strips last?
With proper application, they can last for years.
7. Will Command Strips damage paint?
They are designed to be removed without damaging paint, but results may vary.
8. Can I use Command Strips on textured walls?
They perform best on smooth surfaces; textured walls may not hold as well.
9. How do I know if I have applied them correctly?
Ensure the strips are securely pressed and wait an hour before hanging items.
10. Are there any special tips for using Command Hooks?
Always follow the weight limit and ensure the surface is clean before application.
Random Reads
- How to store dry ice
- How to store headphones
- How to install or remove rpm package
- Mastering your honeywell thermostat
- Mastering vuze vpn socks proxy setup
- How to use cmd beginner
- How to use clan chat in runescape
- How to replace shut off valves
- How to replace smoke detectors
- Using latitude longitude coordinates to find address