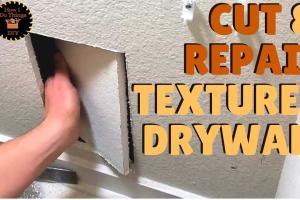
Mastering Textured Drywall Repair: Blend Seams Seamlessly

-
Quick Links:
- 1. Introduction
- 2. Understanding Textured Drywall
- 3. Common Drywall Textures
- 4. Tools and Materials Needed
- 5. Step-by-Step Guide to Repairing Textured Drywall
- 6. Techniques for Blending in the Repair
- 7. Finishing Touches
- 8. Case Studies and Examples
- 9. Expert Insights on Drywall Repair
- 10. FAQs
1. Introduction
Textured drywall can add a unique charm to your home, but over time, it is prone to wear and damage. From accidental dents to water stains, repairs are inevitable. In this guide, we'll cover everything you need to know about repairing textured drywall so that your walls look as good as new.
2. Understanding Textured Drywall
Textured drywall surfaces have a pattern created during installation. These textures can hide imperfections and add character to a room. However, they can be tricky to repair without leaving visible marks or uneven surfaces. Understanding the basics of your drywall texture is crucial for successful repairs.
3. Common Drywall Textures
Several types of textures are commonly found in homes, including:
- Knockdown: A popular texture that involves spraying joint compound and then flattening it.
- Popcorn: A bumpy, raised texture often used on ceilings.
- Skip Trowel: A hand-applied texture that leaves a distinctive pattern.
- Slap Brush: A texture created by dragging a brush through wet compound.
4. Tools and Materials Needed
Before you start your repair, gather the following tools and materials:
- Drywall patching compound
- Sandpaper (various grits)
- Putty knife
- Texture spray or brush (depending on your wall texture)
- Masking tape
- Drop cloths
5. Step-by-Step Guide to Repairing Textured Drywall
Follow these steps to effectively repair your textured drywall:
Step 1: Prepare the Area
Clear the area of furniture and cover the floor with drop cloths. Use masking tape to protect any adjacent surfaces.
Step 2: Clean the Damage
Remove any loose debris around the damaged area. If the damage is caused by water, ensure the area is completely dry before proceeding.
Step 3: Apply Patching Compound
Using a putty knife, apply a layer of patching compound to the damaged area, ensuring it is slightly higher than the surrounding texture.
Step 4: Texture the Patch
Once the patch is dry, use your texture spray or brush to replicate the surrounding texture. This may require practice to get it just right.
Step 5: Allow to Dry
Let the repaired area dry completely before moving on to sanding.
Step 6: Sand if Necessary
Lightly sand the area with fine-grit sandpaper to smooth out any rough edges. Be careful not to sand too much of the surrounding texture.
Step 7: Paint the Area
Once the patch is dry and smooth, apply paint that matches the surrounding area. A good quality paint will help the repair blend in seamlessly.
6. Techniques for Blending in the Repair
Blending a repair seamlessly into textured drywall can take some finesse. Here are some tips:
- Use a spray texture to match the existing pattern.
- Experiment on a test piece of drywall before applying to the wall.
- Layer textures if necessary to achieve a more authentic look.
7. Finishing Touches
After your patch is painted and dry, step back and assess the repair. You may want to add another coat of paint or a clear finish to protect the area.
8. Case Studies and Examples
Consider these examples of successful textured drywall repairs:
Case Study 1: Knockdown Texture Repair
A homeowner successfully repaired a knockdown texture by applying a thin layer of joint compound and using a knockdown knife to create the texture pattern.
Case Study 2: Popcorn Ceiling Repair
After a water leak, a homeowner matched their popcorn texture by using a spray can designed for popcorn ceilings, achieving a perfect blend.
9. Expert Insights on Drywall Repair
We consulted with drywall experts who provided these insights:
"Take your time to match the texture. It's all about patience and practice." - John Doe, Drywall Specialist
"Don't rush the drying process; it can lead to cracks and uneven textures." - Jane Smith, Renovation Expert
10. FAQs
What is the best way to repair textured drywall?
The best way involves cleaning the area, applying a patching compound, recreating the texture, and painting over the repair.
Can I repair drywall myself?
Yes, with the right tools and techniques, most homeowners can successfully repair drywall.
How long does it take for drywall repair to dry?
Drying time can vary, but typically, it takes around 24 hours for patches to dry completely.
What if my texture repair doesn't match?
Consider using a texture spray that matches your existing walls, or consult a professional for a perfect blend.
How can I prevent future damage to my textured drywall?
Regular maintenance, proper cleaning, and avoiding heavy impacts can help prevent damage.
Is it necessary to paint after a repair?
Yes, painting helps to blend the repair and protects the drywall.
Can I use a regular paint roller on textured drywall?
It's best to use a roller designed for textured surfaces to get an even coat.
What if I don’t have the same type of texture?
You can create a new texture style, but it may not blend perfectly with existing textures.
How can I match the paint color?
Use paint samples or consult a hardware store for assistance in matching your paint color.
Is it worth hiring a professional for drywall repair?
If you're not confident in your skills, hiring a professional can ensure a seamless repair.
What tools are essential for drywall repair?
Essential tools include a putty knife, sandpaper, texture spray, and a paint roller.
Conclusion
Repairing textured drywall may seem challenging, but with the right tools and techniques, anyone can master this skill. Remember to take your time to ensure that your repairs blend seamlessly with the existing texture.