Step-by-Step Guide to Safely Remove a Light Fixture Without Risk

-
Quick Links:
- Introduction
- Safety First: Essential Precautions
- Tools Required for Light Fixture Removal
- Step-by-Step Guide to Removing a Light Fixture
- Common Light Fixture Types and Their Removal
- Case Studies: Successful Light Fixture Removals
- Expert Insights on Light Fixture Safety
- FAQs
Introduction
Removing a light fixture may seem like a simple task, but it requires careful consideration and safety precautions. This comprehensive guide will walk you through the process of safely removing a light fixture, ensuring that you can tackle this home improvement project confidently and efficiently.
Safety First: Essential Precautions
Before you begin, it's crucial to prioritize safety. Here are some essential precautions to follow:
- Always turn off the power at the circuit breaker before working on any electrical fixture.
- Use insulated tools to reduce the risk of electrical shock.
- Wear safety goggles and gloves to protect yourself from debris and sharp edges.
- Ensure the area is well-lit to avoid accidents.
Tools Required for Light Fixture Removal
Gather the following tools before you start:
- Flathead and Phillips screwdrivers
- Insulated wire cutters
- Voltage tester
- Step ladder (if needed)
- Electrical tape
- Protective eyewear
Step-by-Step Guide to Removing a Light Fixture
Follow these steps to safely remove your light fixture:
Step 1: Turn Off the Power
Locate your circuit breaker box and turn off the power to the light fixture you will be removing. Use a voltage tester to confirm that no electricity is flowing to the fixture.
Step 2: Prepare for Removal
Use a step ladder to reach the fixture if needed. Clear the area beneath the fixture to avoid any accidents.
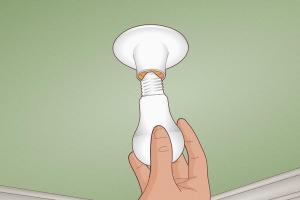
Step 3: Remove the Light Bulbs
Carefully unscrew and remove any bulbs from the fixture. Place them in a safe location to prevent breakage.
Step 4: Detach the Fixture from the Ceiling
Using your screwdriver, remove the screws holding the fixture in place. Keep these screws in a safe spot for reinstallation.
Step 5: Disconnect the Wires
Once the fixture is free, you’ll need to disconnect the wiring. Carefully unscrew the wire nuts and separate the wires. Make sure to note which wires connect to each other for future reference.
Step 6: Cap the Wires
Use electrical tape to cap off the exposed wires. This step is crucial for safety, especially if you plan to leave the wires hanging temporarily.
Step 7: Remove the Mounting Bracket
If applicable, remove the mounting bracket attached to the ceiling. This may require additional screws.
Common Light Fixture Types and Their Removal
Different types of light fixtures may have specific requirements for removal. Here are a few common types:
Ceiling Mount Fixtures
These are typically secured with screws and may have additional wiring inside a junction box. Follow the general steps outlined above for safe removal.
Recessed Lighting
For recessed lights, you may need to squeeze the springs holding the light in place, allowing you to pull it down. Disconnect the wiring as before.
Pendant Lights
Pendant lights often have a more complex mounting system. Ensure that you understand how your specific model is attached before attempting removal.
Case Studies: Successful Light Fixture Removals
Here are a couple of examples of light fixture removals that illustrate the process:
Case Study 1: Removing a Ceiling Fan
A homeowner successfully removed a ceiling fan by following safety precautions, turning off the power, and carefully detaching the fan blades before unscrewing the fixture. This case emphasizes the importance of having assistance when dealing with heavier fixtures.
Case Study 2: Changing a Chandelier
In another example, a homeowner replaced a chandelier. They noted the need to use a sturdy ladder and to secure the old fixture with a helper while disconnecting the wires. This case highlights the need for teamwork during complicated removals.
Expert Insights on Light Fixture Safety
According to electrical safety experts, it’s essential to understand the wiring and types of fixtures in your home. Regular inspections of light fixtures can prevent accidents and ensure safety.
Additionally, hiring a licensed electrician for complicated fixtures or if you feel unsure about the process is always recommended.
FAQs
1. How can I tell if the power is off?
Use a voltage tester to check if there is any electrical current in the wires before touching them.
2. Is it safe to remove a light fixture on my own?
If you follow safety precautions and feel confident, it is generally safe. However, if in doubt, consult a professional.
3. What should I do if the fixture is heavy?
Enlist the help of a friend to support the fixture while you unscrew it to avoid injury.
4. Can I reuse the wiring when installing a new fixture?
Yes, as long as the wiring is in good condition. Inspect for any damage before reuse.
5. Are there specific tools needed for different types of fixtures?
While most require basic tools, some may need specialty tools depending on the mounting method.
6. What if I encounter unexpected wiring?
If you find unfamiliar wiring or multiple wires, it's best to consult an electrician.
7. How can I prevent electrical shocks?
Always ensure the power is off and use insulated tools during your work.
8. Can I change a light fixture without turning off the power?
It's strongly advised against; always turn off the power for safety.
9. What should I do with old fixtures?
Consider recycling them or donating if they are still in good condition.
10. How often should I check my light fixtures?
Regular inspections every few months can help identify any potential issues early.