
Looking to add or remove Bluetooth devices on your Windows 10 or 11 system? Look no further! In this article, we’ll guide you through the process, step-by-step. Whether you need to connect your wireless headphones, keyboard, or any other Bluetooth-enabled device, we’ve got you covered.
Setting up Bluetooth devices on your Windows operating system is easier than you might think. With a few simple clicks, you’ll be wirelessly connected and ready to go. We’ll provide clear instructions and useful tips to ensure a seamless experience.
In this article, we’ll cover everything you need to know, from accessing the Bluetooth settings to pairing and unpairing devices. We’ll also address any common issues you may encounter along the way, with solutions to troubleshoot connectivity problems. So, whether you’re a Windows 10 or Windows 11 user, you can confidently navigate the Bluetooth landscape.
Stay tuned for our comprehensive guide on how to add or remove Bluetooth devices on Windows 10 and 11, and take full advantage of the wireless capabilities of your PC or laptop.
Adding a Bluetooth Device on Windows 10 and 11
Bluetooth technology has revolutionized the way we connect and use our devices. Whether you want to connect a wireless mouse, speakers, or your smartphone, Windows 10 and 11 make it easy to add Bluetooth devices. Here’s how:
Step-by-step guide to adding a Bluetooth device on Windows 10
- Go to the Start menu and click on the Settings icon (gear-shaped).
- In the Settings window, select “Devices.”
- On the left-hand side of the Devices window, click on “Bluetooth & other devices.”
- Ensure that Bluetooth is turned on by toggling the switch to the “On” position.
- Click on the “Add Bluetooth or other device” button.
- In the Add a device window, select “Bluetooth.”
- Windows will now start searching for available Bluetooth devices.
- On your Bluetooth device, make sure it is in pairing mode (consult the device’s manual if you’re not sure how to do this).
- Once your device appears on the list of available devices, click on it to initiate the pairing process.
- Follow any on-screen instructions to complete the pairing process.
- Once the device is successfully paired, it will be listed under “Bluetooth & other devices” in the Settings window.

Congratulations! You have successfully added a Bluetooth device to your Windows 10 system. Enjoy the wireless freedom it brings!
Step-by-step guide to adding a Bluetooth device on Windows 11
Windows 11 introduces a fresh and intuitive interface for adding Bluetooth devices. Follow these steps to connect your Bluetooth device:
- Click on the Start button and select the Settings icon (gear-shaped).
- In the Settings window, choose “Bluetooth & devices” from the left-hand menu.
- Make sure Bluetooth is turned on by toggling the switch to the “On” position.
- Click on the “Add device” button.
- Windows will start searching for available Bluetooth devices.
- Put your Bluetooth device in pairing mode (refer to the device’s manual for instructions).
- Click on your device to start the pairing process.
- Follow any on-screen instructions to complete the pairing.
- Once the device is successfully paired, it will show up under “Bluetooth & devices” in the Settings window.

That’s it! You have successfully added a Bluetooth device to your Windows 11 system. Enjoy the seamless wireless connectivity!
Troubleshooting common issues when adding a Bluetooth device
While adding a Bluetooth device is generally straightforward, you may encounter some common issues. Here are a few troubleshooting tips:
- Ensure that Bluetooth is turned on both on your Windows system and the device you’re trying to connect.
- Make sure your device is in pairing mode and within range of your Windows system.
- Restart your Windows system and try again.
- Update your Bluetooth drivers. You can do this by going to the manufacturer’s website and downloading the latest drivers.
- If you’re still experiencing issues, try removing any existing Bluetooth devices from your system and start fresh.
Removing a Bluetooth Device on Windows 10 and 11
Sometimes, you may need to remove a Bluetooth device from your Windows system. Whether you want to replace it with a new device or simply no longer need it, removing a Bluetooth device is a simple process. Here’s how:
Step-by-step guide to removing a Bluetooth device on Windows 10
- Go to the Start menu and click on the Settings icon (gear-shaped).
- In the Settings window, select “Devices.”
- On the left-hand side of the Devices window, click on “Bluetooth & other devices.”
- Under “Audio devices,” “Printers & scanners,” or “Other devices,” locate the device you want to remove.
- Click on the device to expand its options.
- Click on the “Remove device” button.
- A confirmation prompt will appear. Click “Yes” to confirm the removal.
- The device will be removed from the list of connected devices.

You have successfully removed a Bluetooth device from your Windows 10 system. Repeat these steps for any additional devices you wish to remove.
Step-by-step guide to removing a Bluetooth device on Windows 11
Removing a Bluetooth device on Windows 11 is a breeze. Follow these steps to remove a device from your system:
- Click on the Start button and select the Settings icon (gear-shaped).
- In the Settings window, choose “Bluetooth & devices” from the left-hand menu.
- Under “Audio & video devices,” “Input devices,” or “Other devices,” locate the device you want to remove.
- Click on the device to expand its options.
- Click on the “Remove device” button.
- Confirm the removal by clicking “Yes” in the prompt that appears.
- The device will be removed from your Windows 11 system.

That’s it! You have successfully removed a Bluetooth device from your Windows 11 system. Repeat these steps for any other devices you want to remove.
Troubleshooting common issues when removing a Bluetooth device
If you encounter any issues when removing a Bluetooth device, try the following troubleshooting tips:
- Restart your Windows system and try again.
- Ensure that the device you’re trying to remove is within range.
- If you’re unable to remove a device, try disabling and re-enabling Bluetooth on your system.
- If all else fails, consult the device’s manual or contact the manufacturer for further assistance.
Final Tips for Managing Bluetooth Devices on Windows
Congratulations! You now know how to add and remove Bluetooth devices on both Windows 10 and 11. With these simple steps, you can easily connect and disconnect Bluetooth devices to enhance your productivity and entertainment.
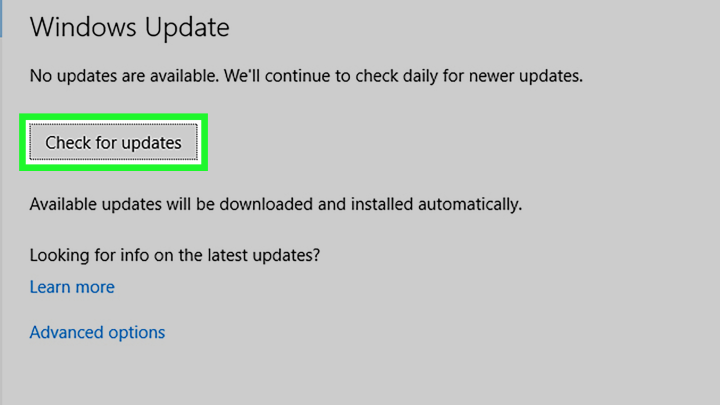
Remember, keeping your Bluetooth devices up to date with the latest firmware and drivers is crucial for optimal performance. Regularly check for updates from the device manufacturer’s website or use Windows Update to ensure you’re using the latest software.
Additionally, it’s a good practice to remove any unused or unwanted Bluetooth devices from your system. This helps maintain a clean and organized Bluetooth ecosystem, minimizing potential conflicts or connectivity issues.
By following the step-by-step guides and troubleshooting tips provided in this article, you can confidently manage your Bluetooth devices on Windows 10 and 11. Enjoy the wireless convenience and freedom that Bluetooth technology brings to your computing experience! If you have any question, you can click to Visit Our Discussion Board.

Nishant Verma is a senior web developer who love to share his knowledge about Linux, SysAdmin, and more other web handlers. Currently, he loves to write as content contributor for ServoNode.