
This tutorial here brings you step by step guidelines to create Ubuntu live USB stick in a Windows system. With the help of bootable Ubuntu USB stick, you can easily experience the Linux platform on Windows or install the new OS alongside Windows as well. To Create Ubuntu live disk on Ubuntu, refer to our previous article.
Overview
Creating a bootable Ubuntu USB stick in Windows is very easy as we discussed earlier in our previous post How to create Ubuntu Live USB stick in Ubuntu. Let’s discuss first that how a bootable Ubuntu disk can be useful to you. The benefits include:
- Install or upgrade Ubuntu to latest version
- Experience the Ubuntu platform without installing it on a machine.
- Use Linux platform anytime on the go, and probably on any computer.
- You can also fix or repair a system running Ubuntu OS if seem broken.
Prerequisites
Before you start to create a live Ubuntu USB stick on windows, we suggest you to meet some simple requirements that includes:
- Minimum 4GB free space on USB/Flash drive
- MS Windows XP, and later released versions.
- A USB stick writing utility (We recommend you to use Rufus, as the open source tool)
- The latest version of Ubuntu ISO file. To download the latest ISO file, click here.
Note: It’s recommended to download the ISO file and RUFUS tool in the Downloads folder on your Windows. For those who are going to create bootable Ubuntu stick on Windows XP or Vista, are suggested to download RUFUS 2.18 version as later releases will not support your operating system.
Steps to make Ubuntu Live USB disk on Windows
Till now, we hope you are all ready with ISO file, USB stick with more than 4GB space, RUFUS tool, and more other requirements as discussed above. So, let’s start to create Ubuntu bootable USB disk now with steps here.
Step 1: Select correct USB drive
- Navigate to Downloads folder in Windows and execute the downloaded Rufus tool.
- Plug your USB stick in the USB port.
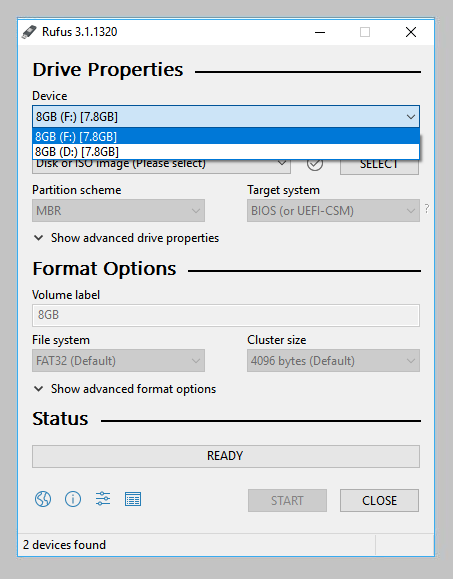
- Rufus will automatically set the inserted USB device in the Device list.
- In case if you notice the selected USB drive is not the one you want to make bootable, you can also change the same from Device list.
Step 2: Selection of proper Boot and Partition options
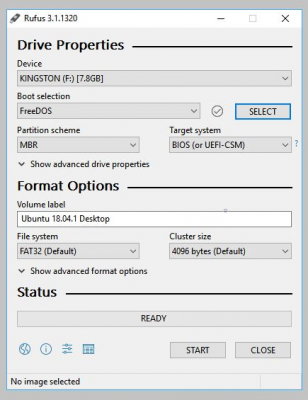
Once, the correct USB is loaded, the next step is to choose the right Boot option in the utility. Since, we have to create Ubuntu bootable live USB, we will select FreeDOS as Boot selection option.
In the Partition scheme field, select MBR as the option, while choosing BIOS (or UEFI-CSM) in the Target system field is recommended, as mentioned in the image below:
Step 3: Choose the latest Ubuntu ISO file
In this step, click on the Select button on the right to Boot selection, and the option will open Downloads folder by default. Since you have downloaded Ubuntu ISO in the same directory, the ISO file will appear before you as well.
So, just select the ISO file, and click on Open button

Step 4: Start writing the ISO
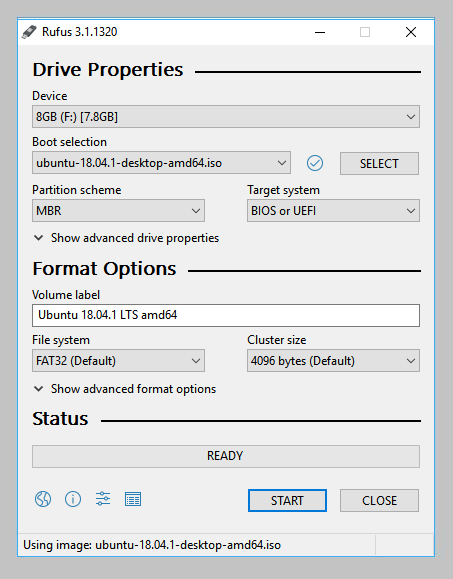
After the selection of correct ISO file, we suggest you leave all other parameters unmodified with their default values, and hit the START button at the bottom of screen to start ISO writing process.
Step 5: Download additional files
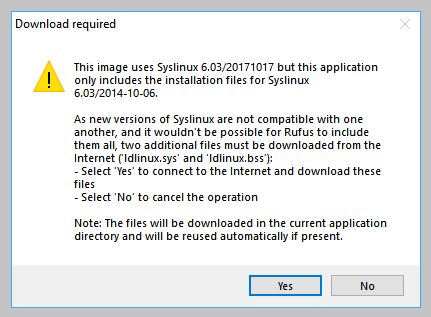
While writing the ISO files, it’s expected that Rufus may require some more additional files to complete writing process. In order to download those files, it will prompt you a message like one below. Just click on Yes to proceed.
Step 6: Selection of recommended write mode
After the Rufus downloads the additional files for writing process, the tool will then prompt that it has detected the Ubuntu ISO as an ISOHybrid image. His actually indicates that the image can be used as a source for both the DVD and USB stick as well, and need no conversion.
So, you will be asked either to write in ISO Image mode or in DD Image mode. We suggest you choose the first option, which is also the recommended one, as mentioned.
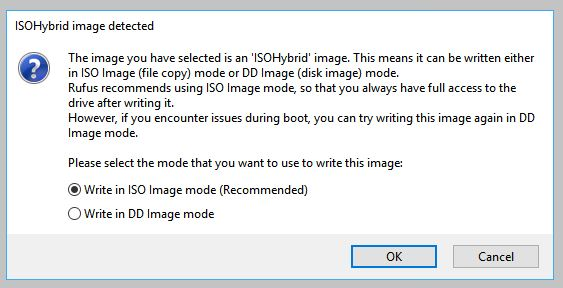
After the selection of correct mode, the Rufus will warn you about double checking the USB drive as further writing process will wipe out all files from the disk. If you want to continue, just click on OK button.
Step 7: Start writing ISO on USB disk
After the correct selection of all discussed elements in the steps above, the Rufus will now start writing the ISO image into selected USB drive. You can see the progress as well in the progress bar. The complete writing process may vary depending upon your system configuration and speed.
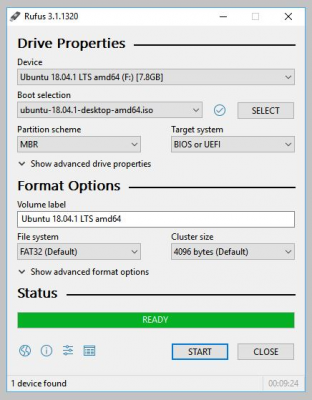
Once the writing process is complete, the Rufus Status bar will turn fully green with READY written in the middle of bar. Just select the Close button in the bottom right corner as you have successfully created Ubuntu bootable disk on Windows.
Conclusion: In this tutorial, we have easily discussed how to write or create Ubuntu bootable live USB disk on a Windows system. If you liked this tutorial, do share it with your friends. If you want to suggest an edit to this article, click on Suggest US to report your edit.

Nishant Verma is a senior web developer who love to share his knowledge about Linux, SysAdmin, and more other web handlers. Currently, he loves to write as content contributor for ServoNode.


