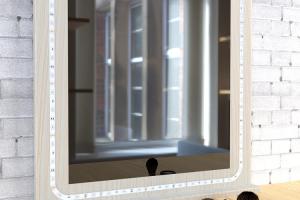
Transform Your Space: A Complete Guide to Adding LED Light Strips Behind Your Mirror

-
Quick Links:
- Introduction
- Benefits of LED Light Strips Behind Mirrors
- Types of LED Light Strips
- Tools and Materials Needed
- Step-by-Step Guide
- Case Studies
- Expert Insights
- Maintenance and Care
- FAQs
Introduction
Adding LED light strips to the back of a mirror is not only a trendy way to enhance your decor but also offers practical benefits such as improved lighting for makeup application, increased ambiance, and a modern aesthetic. This comprehensive guide will walk you through everything you need to know about installing LED light strips behind your mirror.
Benefits of LED Light Strips Behind Mirrors
- Enhanced Visibility: Proper lighting is crucial for tasks like grooming, applying makeup, and shaving.
- Energy Efficiency: LED lights consume less power than traditional bulbs, making them an eco-friendly option.
- Customizable Ambiance: LED light strips come in various colors and brightness levels, allowing for a tailored atmosphere.
- Easy Installation: Many LED strips come with adhesive backing, making installation straightforward.
Types of LED Light Strips
Before diving into the installation process, it's essential to understand the types of LED light strips available:
- RGB LED Strips: These strips can change colors and are ideal for creating mood lighting.
- Single Color LED Strips: Perfect for a consistent light tone, typically used for tasks requiring focused lighting.
- Smart LED Strips: These can be controlled via smartphones or smart home devices, offering advanced features like scheduling and color changing.
Tools and Materials Needed
Gather the following tools and materials before you begin the installation:
- LED light strips
- Measuring tape
- Scissors (if needed for cutting strips)
- Cleaning supplies (isopropyl alcohol and cloth)
- Power adapter or plug (if not included with strips)
- Optional: dimmer switch or smart home integration
Step-by-Step Guide
Follow these steps to successfully add LED light strips to the back of your mirror:
Step 1: Measure the Mirror
Use a measuring tape to determine the dimensions of your mirror. This will help you decide how much LED strip you need.
Step 2: Clean the Surface
Thoroughly clean the back of the mirror where the LED strips will be applied. Use isopropyl alcohol and a cloth to ensure a smooth adhesion.
Step 3: Cut the LED Strips (if necessary)
If your LED strips are longer than needed, cut them at designated points. Most strips have marks indicating where they can be safely cut.
Step 4: Attach the LED Strips
Peel the adhesive backing off the LED strip and carefully press it onto the back of the mirror, starting from one corner and working your way around.
Step 5: Connect to Power
Plug in the LED strip to the power adapter. Ensure that all connections are secure and that the power source is stable.
Step 6: Test the Lights
Turn on the LED lights to ensure they are functioning correctly. Adjust the brightness and colors if you have a smart or RGB strip.
Step 7: Final Adjustments
Make any necessary adjustments to the placement of the LED strips for optimal lighting.
Case Studies
Here are a couple of real-life examples of how individuals have transformed their spaces using LED light strips behind mirrors:
- Case Study 1: A homeowner in a small apartment added LED strips to a wall-mounted mirror, creating a stunning focal point in her compact bathroom. The result was not only visually appealing but also functional, allowing for better lighting during makeup application.
- Case Study 2: In a shared living space, a couple installed RGB LED strips behind their mirror to create a customizable atmosphere for movie nights and gatherings. The ability to change colors easily enhanced their social experiences.
Expert Insights
We consulted interior design experts to gain insights into the best practices for installing LED lights behind mirrors:
- Lighting Designer, Jane Doe: "Consider the color temperature of your LED strips. Warmer tones (around 2700K) are more flattering and provide a cozy ambiance, while cooler tones (5000K+) are great for tasks that require accuracy."
- Home Improvement Specialist, John Smith: "Always ensure the LED strips are rated for the environment they’re placed in. For bathrooms, choose moisture-resistant strips to avoid damage."
Maintenance and Care
To ensure your LED lights last long and perform well, follow these maintenance tips:
- Regularly dust the mirror and LED strips to prevent buildup.
- Check connections periodically to ensure they are secure.
- If using smart LED strips, keep the app updated for optimal performance.
FAQs
- Q1: Can I use LED light strips in a bathroom? A1: Yes, but ensure they are moisture-resistant to prevent damage.
- Q2: How do I power my LED light strips? A2: They can be powered by a standard outlet through an adapter.
- Q3: Can I cut LED light strips? A3: Yes, but only at designated cutting points marked on the strip.
- Q4: Are LED light strips dimmable? A4: Many LED strips are dimmable, especially smart or RGB options.
- Q5: How long do LED light strips last? A5: Quality LED light strips can last up to 50,000 hours.
- Q6: Do I need special tools to install LED strips? A6: No special tools are necessary, but a measuring tape and scissors may be helpful.
- Q7: What is the best color temperature for bathroom lighting? A7: Warmer tones around 2700K are ideal for flattering and cozy lighting.
- Q8: Can I connect multiple LED strips together? A8: Yes, as long as they are compatible and the power source can handle the load.
- Q9: Are LED strips safe for home use? A9: Yes, they are safe when installed according to manufacturer guidelines.
- Q10: How do I clean LED light strips? A10: Dust them gently with a soft cloth to avoid damage.
Random Reads