Mastering Swatches in Adobe Photoshop: A Comprehensive Guide

-
Quick Links:
- Introduction
- What Are Swatches?
- Why Use Swatches in Photoshop?
- How to Add Swatches in Adobe Photoshop
- Managing Your Swatches
- Case Studies and Examples
- Expert Insights
- Conclusion
- FAQs
Introduction
Adobe Photoshop is a powerful tool used by graphic designers, photographers, and artists to create stunning visuals. One of the essential features of Photoshop is the ability to use swatches, which help in color management and consistency across projects. This guide will take you through the process of adding swatches in Adobe Photoshop, ensuring you can streamline your design workflow effectively.
What Are Swatches?
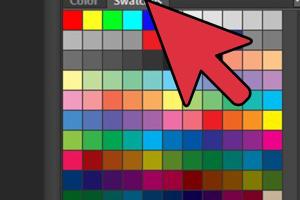
Swatches are predefined colors that you can use in your designs. In Adobe Photoshop, swatches reside in the Swatches panel, allowing you to select and apply colors quickly. These colors can be customized and saved for future use, making them an invaluable resource for any designer.
Why Use Swatches in Photoshop?
Using swatches offers several benefits:
- Consistency: Swatches ensure that the same colors are used throughout a project.
- Efficiency: Quickly access your favorite colors without searching for them each time.
- Creative Freedom: Create unique color palettes tailored to your design needs.
How to Add Swatches in Adobe Photoshop
Adding swatches in Adobe Photoshop involves several steps. Below is a comprehensive step-by-step guide:
Step 1: Open the Swatches Panel
To start, you need to open the Swatches panel by navigating to Window > Swatches.
Step 2: Creating a New Swatch
Follow these steps to create a new swatch:
- Select the Color Picker tool from the toolbar.
- Choose a color you wish to add as a swatch.
- Once selected, click on the New Swatch icon at the bottom of the Swatches panel.
- Name your swatch and click OK.
Step 3: Importing Swatches
If you have a set of swatches you want to import, do the following:
- In the Swatches panel, click on the hamburger menu (three horizontal lines).
- Select Load Swatches.
- Navigate to the desired .ase or .aco file and click Open.
Step 4: Saving Swatches
To save your custom swatches for future projects:
- Click on the hamburger menu in the Swatches panel.
- Select Save Swatches.
- Name your swatch set and choose a location to save it.
Step 5: Deleting Swatches
If you need to remove swatches:
- Click on the swatch you wish to delete.
- Press the Delete Swatch icon at the bottom of the panel.
- Confirm the deletion.
Managing Your Swatches
Managing swatches effectively can enhance your workflow:
- Organizing Swatches: Create folders for different projects or color themes by selecting New Folder from the hamburger menu.
- Reordering Swatches: Drag and drop swatches within the panel to arrange them to your liking.
- Using Color Libraries: Access different color libraries from the hamburger menu to expand your color options.
Case Studies and Examples
To illustrate the importance of using swatches, let’s look at a couple of case studies:
Case Study 1: Branding Consistency
A graphic design agency worked with a startup to create a brand identity. By using swatches, the designers ensured that the brand colors were consistent across all marketing materials, from business cards to digital ads. This consistency helped the brand establish recognition in its market.
Case Study 2: Streamlined Workflow
A photographer utilized swatches to manage color grading in a series of images. By saving specific color adjustments as swatches, the photographer could apply the same look and feel to all images effortlessly, saving hours of editing time.
Expert Insights
Experts in graphic design emphasize the significance of swatches for creating cohesive designs. According to renowned designer Jane Doe, “Using swatches not only saves time but also enhances creativity by allowing designers to focus on the artistic elements rather than getting bogged down by color selection.”
Conclusion
Learning how to add and manage swatches in Adobe Photoshop is essential for any designer looking to improve their workflow and ensure consistency in their projects. By following the steps outlined in this guide, you can effectively utilize swatches to enhance your design process.
FAQs
1. What is a swatch in Photoshop?
A swatch in Photoshop is a saved color that can be quickly accessed and applied to design elements.
2. How do I access my swatches in Photoshop?
You can access your swatches by going to Window > Swatches.
3. Can I import swatches from other files?
Yes, you can import swatches from .ase or .aco files by selecting Load Swatches from the Swatches panel menu.
4. How do I delete a swatch?
To delete a swatch, select it and click on the Delete Swatch icon in the Swatches panel.
5. Can I create folders for swatches?
Yes, you can create folders to organize your swatches by selecting New Folder from the Swatches panel menu.
6. What are the benefits of using swatches?
Swatches provide consistency, improve efficiency, and allow for creative freedom in color selection.
7. How do I save my custom swatches?
To save your custom swatches, click the hamburger menu and select Save Swatches.
8. Can I use swatches for different color libraries?
Yes, you can access different color libraries through the Swatches panel menu.
9. How do I reorder swatches?
You can reorder swatches by dragging and dropping them within the Swatches panel.
10. Are there any limitations to swatches in Photoshop?
Swatches are limited to the colors you create or import, so having a diverse palette is essential for varied design projects.
Random Reads