Ultimate Guide: How to Clear the Opening on a Spray Can

-
Quick Links:
- Introduction
- Why Spray Can Openings Get Clogged
- Tools Needed
- Step-by-Step Guide to Clear the Opening
- Preventive Measures
- Case Studies
- Common Mistakes to Avoid
- Expert Insights
- FAQs
Introduction
Spray cans are a popular choice for a variety of tasks, from painting to adhesive applications. However, a clogged spray can opening can be incredibly frustrating. Not only does it prevent the proper application of the product, but it can also lead to waste and increased costs. In this comprehensive guide, we will explore the reasons behind clogged spray can openings, the tools you need to fix them, and preventive measures to ensure your spray can remains functional. Let’s dive in!
Why Spray Can Openings Get Clogged
Understanding the reasons behind clogging can help you avoid it in the first place. Here are some common causes:
- Dry Paint Residue: Paint can dry quickly, especially if the can is left exposed to air.
- Improper Storage: Storing spray cans in extreme temperatures can affect the internal pressure and the paint viscosity.
- Infrequent Use: If a spray can sits unused for a long time, the propellant can degrade, affecting the spray mechanism.
- Humidity: High humidity levels can cause condensation inside the can, which can contribute to clogging.
Tools Needed
Before you begin the clearing process, gather the following tools:
- Warm water
- Paper towels or cloth
- Pin or needle
- Acetone or paint thinner
- Protective gloves
- Safety goggles
Step-by-Step Guide to Clear the Opening
1. Safety First
Before starting, ensure you’re in a well-ventilated area. Wear gloves and goggles to protect yourself from any residue or paint fumes.
2. Soak the Nozzle
Fill a bowl with warm water and submerge the spray can nozzle. Let it soak for about 10-15 minutes to soften any dried paint.
3. Use a Pin or Needle
After soaking, remove the nozzle and use a pin or needle to gently poke through the opening. Be careful not to push too hard, as this can damage the nozzle.
4. Clean with Acetone or Paint Thinner
Dip a cloth in acetone or paint thinner and wipe the nozzle thoroughly. This will help dissolve any remaining residue. Make sure to clean the straw as well.
5. Rinse and Dry
Rinse the nozzle under warm water to remove any solvents, and then dry it with a paper towel.
6. Reattach and Test
Reattach the nozzle to the spray can and test it out. If the spray is still clogged, repeat the process.
Preventive Measures
To keep your spray cans functioning effectively, consider the following preventive measures:
- Store spray cans in a cool, dry place.
- Always shake the can before use to keep the paint mixed.
- After each use, spray a short burst into the air to clear the nozzle.
- Keep the nozzle clean and free of paint buildup.
Case Studies
Case Study 1: DIY Home Painter
A local DIY enthusiast shared their experience with clogged spray cans. After experiencing repeated clogs, they adopted a routine of cleaning the nozzle after each use, which significantly reduced their issues.
Case Study 2: Professional Painter
A professional painter noted that they always keep a few spare nozzles on hand. They found that replacing a clogged nozzle often saved time compared to trying to clean it.
Common Mistakes to Avoid
- Not shaking the can before use.
- Using the can in cold weather.
- Allowing paint to dry on the nozzle.
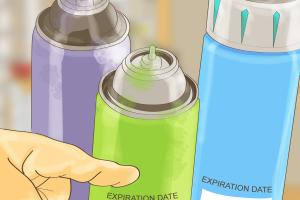
- Ignoring the expiration date on the can.
Expert Insights
Experts recommend investing in high-quality spray cans with better nozzle designs to minimize clogging issues. Additionally, they suggest regularly maintaining your tools to prolong their lifespan.
FAQs
1. How do I know if my spray can is clogged?
If paint does not come out when you press the nozzle, or if the spray is inconsistent, the can may be clogged.
2. Can I use any solvent to clean the nozzle?
While acetone and paint thinner are effective, ensure that the solvent is compatible with the paint in the can.
3. What if the nozzle is damaged?
In cases of severe damage, replacing the nozzle with a new one is often the best solution.
4. Is it safe to use a clogged spray can?
Using a clogged spray can can lead to uneven application and potential damage to surfaces. It’s best to clear the clog first.
5. Can I store spray cans upside down?
No, storing spray cans upside down can lead to leaks and further clogging issues.
6. How often should I clean my spray can nozzle?
It's advisable to clean the nozzle after each use, especially if the can is not going to be used for an extended period.
7. Can I reuse a spray can that has been sitting for years?
It’s generally not recommended to use old spray cans, as the paint may have degraded. Always check the expiration date.
8. What are the signs of a malfunctioning spray can?
Signs include inconsistent spray patterns, sputtering, or no spray at all. Regular maintenance can prevent these issues.
9. How can I ensure a smooth spray experience?
Make sure to shake the can well before use, store it correctly, and clean the nozzle regularly.
10. Are there eco-friendly alternatives to traditional spray cans?
Yes, there are eco-friendly spray paints available that use different propellants and are less harmful to the environment.