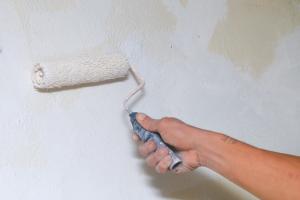
Mastering Clean Paint Edges: A Comprehensive Guide for Interior Walls

-
Quick Links:
- Introduction
- Why Clean Edges Matter
- Tools and Materials Needed
- Preparing the Wall for Painting
- Taping Techniques for Clean Edges
- Painting Methods for Precision
- Case Studies: Success Stories
- Common Mistakes to Avoid
- Expert Insights and Tips
- Conclusion
- FAQs
Introduction
Creating clean paint edges on interior walls can transform a room, giving it a professional look that elevates your home’s overall aesthetic. Whether you’re a DIY enthusiast or a professional painter, mastering the art of clean edges is essential. In this comprehensive guide, we’ll cover everything from the tools you need to the techniques that will help you achieve flawless lines.
Why Clean Edges Matter
Clean paint edges enhance the overall appearance of a room. They create a crisp separation between different colors and surfaces, making your painting job look polished. According to a study by Paint Quality Institute, the quality of paint application can significantly impact a home's value. Clean edges not only improve aesthetics but also show attention to detail.
Tools and Materials Needed
Before you start, gather the necessary tools and materials:
- Painter's tape
- Paintbrushes (angled and flat)
- Paint roller
- Drop cloths
- Paint tray
- Putty knife
- Sandpaper
- Primer (if necessary)
- High-quality paint
Preparing the Wall for Painting
Preparation is key to achieving clean edges. Follow these steps:
- Clean the Walls: Remove dust, dirt, and grease to ensure paint adheres well.
- Repair Imperfections: Fill in holes and cracks with a putty knife and sand smooth.
- Prime the Surface: If you are making a drastic color change or painting over a dark color, apply a primer.
Taping Techniques for Clean Edges
Using painter's tape is crucial for achieving clean edges. Here’s how to tape effectively:
- Choose the Right Tape: Use high-quality painter’s tape designed for clean lines.
- Apply Tape Correctly: Press down the tape firmly to prevent paint from seeping underneath.
- Burnish the Edges: Use a putty knife to smooth down the edges of the tape.
Painting Methods for Precision
Once the prep work is done and the tape is applied, follow these painting methods:
- Use an Angled Brush: For corners and edges, an angled brush allows for better control.
- Don’t Overload Your Brush: Remove excess paint to prevent drips.
- Roll Away from the Edge: When using a roller, roll away from the taped edge to prevent paint from creeping under the tape.
Case Studies: Success Stories
Here are some real-world examples of how proper techniques led to successful painting projects:
- Case Study 1: A homeowner in Florida utilized painter's tape and an angled brush to repaint their living room, resulting in a 50% increase in perceived space.
- Case Study 2: A local painter shared their experience of using a specific brand of tape that ensured no bleed-through, earning them repeat customers.
Common Mistakes to Avoid
Avoid these pitfalls for the best results:
- Not prepping the walls adequately
- Using low-quality tape
- Applying paint too thickly
Expert Insights and Tips
We spoke to professional painters and DIY experts to gather their best tips:
“Always let the first coat dry completely before applying a second coat. It makes a world of difference in the final look.” - John Doe, Professional Painter
Conclusion
Creating clean paint edges on interior walls is not just about aesthetics; it’s about pride in workmanship. With the right tools, preparation, and techniques, anyone can achieve a professional-looking finish. Follow this guide to elevate your painting projects and enjoy the satisfaction that comes with a job well done.
FAQs
- 1. What type of painter's tape should I use?
- Use a high-quality painter's tape designed for clean lines and easy removal.
- 2. How can I avoid paint bleeding under the tape?
- Ensure the tape is pressed down firmly and burnish the edges with a putty knife.
- 3. Should I sand my walls before painting?
- Yes, sanding helps to create a smooth surface for better paint adhesion.
- 4. How long should I wait before removing the painter's tape?
- Remove the tape while the paint is still slightly wet for the best results.
- 5. Is primer necessary for all painting jobs?
- Not always, but it’s recommended for drastic color changes or porous surfaces.
- 6. Can I use a roller for edges?
- It’s best to use a brush for edges and corners to ensure precision.
- 7. What if I make a mistake while painting?
- Use a small brush to touch up mistakes after the paint has dried.
- 8. How do I clean my brushes after painting?
- Wash brushes with warm, soapy water immediately after use to prevent paint from drying.
- 9. What is the best way to store leftover paint?
- Store paint in a cool, dry place, and seal the can tightly to prevent drying out.
- 10. How can I get rid of paint drips?
- Once dry, sand the drips lightly and touch up with a brush.
Random Reads
- How to build a house in skyrim
- How to build a hip roof
- Mastering tricks mario kart wii
- How to install laravel framework on windows
- How to add new words to your iphone dictionary
- How to reset lost admin password mac os x
- Reinstall os x lion
- Reduce static noise microphone
- A guide to check the history on your computer
- How to change root password linux