Ultimate Guide to Installing Doorstops: A Comprehensive Step-by-Step Approach

-
Quick Links:
- 1. Introduction
- 2. Types of Doorstops
- 3. Tools Required
- 4. Preparation Steps
- 5. Step-by-Step Installation Guide
- 6. Tips for Successful Installation
- 7. Common Mistakes to Avoid
- 8. Maintenance of Doorstops
- 9. Case Studies
- 10. FAQs
- 11. Conclusion
1. Introduction
Doorstops are essential for protecting walls and doors from damage while adding a touch of style to your space. Whether you're dealing with a swinging door or simply want to keep your door open, installing the right doorstop is crucial. In this comprehensive guide, we will walk you through the process of installing a doorstop, covering everything from types and tools to step-by-step instructions and maintenance tips.
2. Types of Doorstops
There are several types of doorstops available, each catering to different needs and aesthetics:
- Wall-mounted doorstops: These are fixed to the wall and stop the door from hitting it.
- Floor-mounted doorstops: Installed on the floor, these prevent the door from swinging too far.
- Spring doorstops: Flexible and often made from rubber, they absorb impact when the door is opened.
- Magnetic doorstops: Use magnets to hold the door in place, allowing for easy release.
- Kick-down doorstops: These are foot-operated and can hold the door open securely.
3. Tools Required
Before you begin, gather the following tools for the installation:
- Drill
- Screwdriver
- Measuring tape
- Pencil or marker
- Level
- Stud finder (if installing wall-mounted doorstops)
4. Preparation Steps
Before starting the installation process, it’s important to prepare adequately:
- Determine the best location for your doorstop.
- Measure the height from the floor to mark the installation point.
- Use a stud finder to locate wall studs if necessary.
- Gather all required tools and materials.
5. Step-by-Step Installation Guide
Follow the steps below for a successful installation of your doorstop:
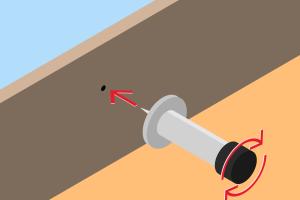
5.1 Installing a Wall-mounted Doorstop
- Use a measuring tape to mark the installation height on the wall.
- Drill a pilot hole at the marked location.
- Insert the wall anchor into the pilot hole if necessary.
- Align the doorstop with the anchor and secure it with screws.
- Check for proper alignment using a level.
5.2 Installing a Floor-mounted Doorstop
- Mark the installation point on the floor, considering door clearance.
- Drill holes for screws at the marked point.
- Position the doorstop and secure it with screws.
- Test the door’s movement to ensure it operates smoothly.
6. Tips for Successful Installation
To ensure your doorstop works effectively, consider the following tips:
- Choose a doorstop that matches your door style and interior décor.
- Double-check measurements before drilling any holes.
- Use a level to ensure the doorstop is installed straight.
- Consider the weight and material of your door when selecting a doorstop.
7. Common Mistakes to Avoid
When installing a doorstop, avoid these common pitfalls:
- Not measuring the height correctly, leading to improper installation.
- Forgetting to use a stud finder for wall-mounted doorstops.
- Over-tightening screws, which can damage the wall or floor.
- Neglecting to check door clearance after installation.
8. Maintenance of Doorstops
Regular maintenance can prolong the life of your doorstop:
- Check for loose screws and tighten them as necessary.
- Inspect for any damage or wear, especially in high-traffic areas.
- Clean the doorstop regularly to remove dust and debris.
9. Case Studies
Here are a couple of case studies that illustrate the successful installation of doorstops:
9.1 Residential Installation
A homeowner in a suburban neighborhood installed wall-mounted doorstops in their newly renovated home. The doorstops not only protected the walls but also added a modern touch to the interior. Feedback indicated a significant decrease in wall damage from swinging doors.
9.2 Commercial Installation
A local café owner opted for kick-down doorstops in their establishment. This choice allowed for easy access while securing doors open during busy hours. Customers appreciated the convenience, leading to higher foot traffic.
10. FAQs
Here are some frequently asked questions about doorstop installation:
- Q: Can I install a doorstop on a concrete floor?
A: Yes, you can use masonry screws to install a floor-mounted doorstop on concrete. - Q: How do I select the right type of doorstop for my needs?
A: Consider the door's weight, usage frequency, and aesthetic preferences. - Q: What if my doorstop doesn't hold the door in place?
A: Check for proper installation and ensure the doorstop is suitable for your door type. - Q: How do I remove a doorstop?
A: Unscrew the mounting screws and gently pull the doorstop away from the wall or floor. - Q: What materials are doorstops made from?
A: Common materials include rubber, metal, plastic, and wood. - Q: Can doorstops be painted to match my décor?
A: Yes, many doorstops can be painted or stained to fit your interior design. - Q: How do I ensure my doorstop is safe for children and pets?
A: Choose doorstops with rounded edges and non-toxic materials. - Q: Are magnetic doorstops reliable?
A: Yes, when installed correctly, magnetic doorstops can hold doors securely. - Q: Do I need special tools for installation?
A: Basic tools like a drill and screwdriver are usually sufficient. - Q: How often should I check my doorstop?
A: Inspect your doorstop every few months to ensure it remains secure and functional.
11. Conclusion
Installing a doorstop is a straightforward task that can significantly enhance the functionality and aesthetics of your space. By understanding the various types of doorstops, the tools needed, and the installation process, you can ensure your project is successful. Remember to regularly maintain your doorstop to prolong its life and functionality. Happy installing!