How to Replace a Fence Post in Concrete: A Step-by-Step Guide for Homeowners

-
Quick Links:
- Introduction
- Tools and Materials Needed
- Safety First
- Step-by-Step Guide
- Tips for Success
- Common Mistakes to Avoid
- Case Studies
- FAQs
Introduction
Replacing a fence post that has been set in concrete can seem like a daunting task for many homeowners. However, with the right tools and a little know-how, the process can be straightforward and manageable. In this guide, we will walk you through the steps to successfully replace a fence post in concrete, ensuring your fence remains sturdy and visually appealing.
Tools and Materials Needed
Before you begin the project, gather the following tools and materials:
- Post hole digger
- Concrete mix
- Shovel
- Level
- Hammer
- Wooden stakes
- Safety glasses
- Gloves
- Measuring tape
- Replacement fence post
Safety First
Always prioritize safety when undertaking DIY projects. Wear safety glasses and gloves to protect yourself from debris and sharp tools. Ensure your work area is clear and free of hazards.
Step-by-Step Guide
1. Assess the Damage
Before replacing the post, assess the condition of the surrounding area. Check for rot or damage in adjacent posts or panels. If the damage is extensive, you may need to replace more than one post.
2. Remove the Old Fence Post
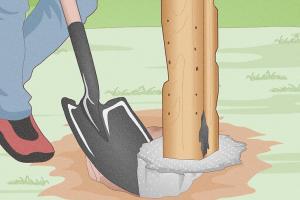
Using a post hole digger or shovel, remove the dirt around the old post. If the concrete is extensive, you may need to break it apart using a sledgehammer. Be cautious of any underground utilities.
3. Prepare the New Fence Post
Measure the height of the new fence post against the old one. Cut the new post to the appropriate height if necessary. If your new post requires additional treatment, apply wood preservative to prevent rot.
4. Set the New Post
Place the new post in the hole, ensuring it is level. Use wooden stakes to support the post while the concrete sets. This will help maintain its position and prevent it from leaning.
5. Mix and Pour Concrete
Follow the instructions on your concrete mix to prepare it. Pour the concrete into the hole around the post. Use a level to ensure the post remains straight as you fill in the concrete.
6. Allow to Cure
Let the concrete cure for the recommended time, usually 24 to 48 hours, depending on the concrete type. Avoid using the fence until the concrete has set completely.
Tips for Success
- Choose a concrete mix that is suitable for your climate.
- Consider using a quick-setting concrete for faster results.
- Double-check measurements before cutting the new post.
- Use a level frequently to ensure your post remains straight.
Common Mistakes to Avoid
- Not allowing the concrete enough time to cure.
- Failing to check for underground utilities before digging.
- Using insufficient support for the new post while the concrete sets.
- Neglecting to assess adjacent posts and panels for damage.
Case Studies
In one case, a homeowner in Ohio faced a similar issue with a leaning fence post. After following a similar step-by-step guide, they successfully replaced the post and reported that the fence remained sturdy for over five years. Another case involved a homeowner in Texas who used quick-setting concrete, which allowed them to complete the project in a single day.
FAQs
1. How long does it take for concrete to set around a fence post?
Concrete typically takes 24 to 48 hours to set, but full curing can take up to 28 days.
2. Can I reuse the old concrete?
It’s generally best to remove the old concrete, as it may have deteriorated and not provide a stable base for the new post.
3. What if the ground is too wet or too dry?
For wet ground, wait until it dries a bit before starting. For dry ground, you may want to moisten the area before pouring concrete.
4. Will a fence post replacement affect my property line?
Always check local regulations and property lines before replacing a fence post to avoid disputes with neighbors.
5. How can I tell if my fence post is rotting?
Check for soft spots, discoloration, or a spongy texture. If you notice any of these signs, it’s time to replace the post.
6. Is it necessary to treat a wooden fence post?
Treating wooden posts with a wood preservative is recommended to increase their lifespan and prevent rot.
7. Can I replace a fence post in winter?
Yes, but be aware that cold temperatures can affect concrete setting times. Use a quick-setting mix if you must work in colder weather.
8. What tools do I need for this project?
Basic tools include a post hole digger, shovel, level, hammer, and measuring tape.
9. How deep should a fence post be set in concrete?
A general rule is to set the post one-third of its height into the ground. For taller fences, deeper holes may be necessary.
10. Can I do this project alone?
While it’s possible to do it alone, having a helper can make the process easier, especially when setting the post level.