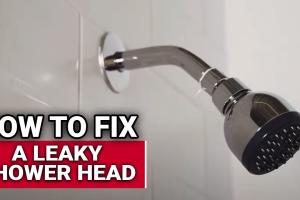
Ultimate Guide to Fixing a Leaking Shower Head: Step-by-Step Solutions

-
Quick Links:
- Introduction
- Understanding the Problem
- Tools and Materials Needed
- Step-by-Step Guide to Fixing a Leaking Shower Head
- Common Causes of Shower Head Leaks
- Case Studies: Real-Life Shower Head Repairs
- Expert Insights on Maintaining Your Shower
- Preventive Measures for Future Leaks
- Conclusion
- FAQs
Introduction
One of the most common issues faced by homeowners is a leaking shower head. Not only can it be annoying, but it can also lead to water wastage and increased utility bills. This comprehensive guide will provide you with in-depth knowledge and step-by-step solutions to fix a leaking shower head effectively. Let's dive in!
Understanding the Problem
A leaking shower head can manifest in various ways, including constant dripping or a steady stream of water. Understanding the underlying causes can help you identify the right solution.
Tools and Materials Needed
Before you start the repair process, gather the following tools and materials:
- Adjustable wrench
- Phillips and flat-head screwdrivers
- Plumber’s tape
- Replacement washers or O-rings
- Vinegar for cleaning
- Clean cloth
Step-by-Step Guide to Fixing a Leaking Shower Head
Step 1: Turn Off the Water Supply
Before beginning any repair, ensure that the water supply to the shower is turned off. This will prevent any accidental flooding while you work.
Step 2: Remove the Shower Head
Using the adjustable wrench, carefully unscrew the shower head from the arm. Be cautious not to damage the finish of the shower arm.
Step 3: Inspect the Washer and O-Rings
Once removed, check the washer and O-rings for wear and tear. These components are common culprits for leaks. Replace them if they appear damaged.
Step 4: Clean the Threads
Use vinegar and a clean cloth to clean the threads on both the shower head and the arm. This ensures a tight seal when reassembling.
Step 5: Reassemble the Shower Head
Apply plumber’s tape to the threads of the shower arm, then reattach the shower head by screwing it back on. Be careful not to overtighten.
Step 6: Turn the Water Supply Back On
Once everything is secured, turn the water supply back on and check for any leaks.
Common Causes of Shower Head Leaks
Here are some frequent causes of shower head leaks:
- Worn-out washers or O-rings
- Loose fittings
- Corroded parts
- Mineral buildup
Case Studies: Real-Life Shower Head Repairs
In this section, we will explore real-life scenarios where homeowners faced leaking shower heads and how they resolved the issues:
- Case Study 1: A homeowner discovered that their shower head was leaking due to a worn-out washer. After replacing the washer, the leak was fixed, demonstrating the importance of regular maintenance.
- Case Study 2: Another homeowner noticed a steady drip from their shower head. Upon inspection, they found mineral buildup. Cleaning the shower head resolved the issue, highlighting the need for periodic inspections.
Expert Insights on Maintaining Your Shower
To maintain your shower head effectively and prevent leaks:
- Regularly inspect and clean your shower head.
- Replace washers and O-rings every few years.
- Be mindful of water pressure to avoid undue stress on the fittings.
Preventive Measures for Future Leaks
Implementing preventive measures can save you from future headaches:
- Use a water softener if you live in an area with hard water.
- Check for leaks regularly.
- Consider installing a shower head with built-in leak protection.
Conclusion
Fixing a leaking shower head is a manageable task that can save you money and water. With the right tools and knowledge, you can tackle this home repair with confidence. Remember to perform regular maintenance to avoid future leaks.
FAQs
1. How do I know if my shower head is leaking?
If you notice water pooling around the base of the shower head or hear dripping sounds when the shower is off, it may be leaking.
2. Can I fix a leaking shower head myself?
Yes, with the right tools and instructions, most homeowners can fix a leaking shower head.
3. What causes a shower head to leak?
Common causes include worn-out washers, loose fittings, and mineral buildup.
4. How often should I check my shower head for leaks?
It's a good idea to check your shower head every six months for any signs of leaks or wear.
5. What tools do I need to fix a leaking shower head?
You will need an adjustable wrench, screwdrivers, plumber's tape, and replacement washers or O-rings.
6. Should I use plumber's tape on the threads?
Yes, using plumber's tape can help create a tighter seal and prevent leaks.
7. How do I clean mineral buildup from my shower head?
Soaking the shower head in vinegar can help dissolve mineral deposits.
8. Is it worth replacing the entire shower head instead of fixing it?
If the shower head is old or has significant wear, replacement may be more cost-effective in the long run.
9. Can high water pressure cause leaks?
Yes, excessive water pressure can put stress on the fittings and lead to leaks.
10. What should I do if the leak persists after my repair?
If the leak continues, it may be best to consult a professional plumber for further assistance.
Random Reads
- Install adobe flash player ubuntu
- Insert symbols in emails
- How to curve text in illustrator
- How to make whitewash
- How to make simple game mod
- How to calculate covariance
- How to write html code
- How to write game instructions
- How to get all the eevee evolutions in diamond pearl platinum
- How to hard reset macbook pro