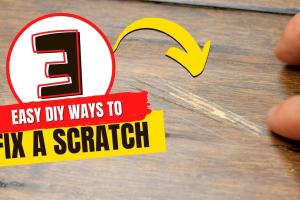
Ultimate Guide to Fixing Scratches on Hardwood Floors: Easy DIY Methods

-
Quick Links:
- Introduction
- Understanding Scratches on Hardwood Floors
- Types of Scratches
- Tools and Materials Needed
- Step-by-Step Guide to Fixing Scratches
- Preventive Measures
- Case Studies
- Expert Insights
- FAQs
Introduction
Hardwood floors are a timeless choice for many homeowners, adding beauty and value to a property. However, they are not impervious to damage. Scratches can detract from their appearance and prompt concerns about maintenance. Fortunately, fixing scratches on hardwood floors can be a straightforward DIY task. In this guide, we will explore various methods to restore your hardwood floors to their former glory, whether the scratches are light surface marks or deeper gouges.
Understanding Scratches on Hardwood Floors
Scratches on hardwood floors can occur for several reasons, including pet claws, dragging furniture, or normal wear and tear. Understanding the nature of the scratches can help determine the best repair method.
Common Causes of Scratches
- Pets: Claws can leave deep marks.
- Furniture: Moving items without protective pads causes scratches.
- Foot Traffic: Daily wear can lead to superficial scratches.
- Improper Cleaning: Using harsh chemicals can dull the finish.
Types of Scratches
Scratches vary in severity and can be categorized as follows:
- Surface Scratches: Minor abrasions that don't penetrate the finish.
- Deeper Scratches: Marks that extend into the wood itself.
- Gouges: Significant damage that removes a chunk of wood.
Tools and Materials Needed
Before starting your repair, gather the following tools and materials:
- Wood floor cleaner
- Soft cloths
- Fine-grit sandpaper
- Wood filler (for deeper scratches)
- Putty knife
- Wood stain (if necessary)
- Clear finish or polyurethane
- Protective pads for furniture
Step-by-Step Guide to Fixing Scratches
Now that you are equipped with the necessary tools, let’s dive into the step-by-step process of fixing scratches on hardwood floors.
1. Clean the Area
Start by cleaning the scratched area with a wood floor cleaner to remove any dirt or debris. Use a soft cloth to ensure you don’t create additional scratches.
2. Assess the Scratch Type
Determine whether the scratch is superficial or deeper. This will guide your approach.
3. Repairing Surface Scratches
- Apply a small amount of wood floor cleaner on a soft cloth and gently rub the scratched area.
- For persistent scratches, consider using a commercial scratch repair product designed for hardwood floors.
4. Repairing Deeper Scratches
- Sand the scratched area lightly with fine-grit sandpaper to smooth the edges.
- Apply wood filler with a putty knife, following the manufacturer's instructions.
- Allow the filler to dry completely before sanding it smooth.
- If necessary, stain the repaired area to match the surrounding wood.
- Seal the area with a clear finish or polyurethane to protect it.
5. Repairing Gouges
- For gouges, follow the same steps as for deeper scratches, ensuring the filler is applied generously to fill the void.
- After sanding and staining, apply multiple coats of finish for durability.
Preventive Measures
Preventing scratches is just as important as repairing them. Here are some tips:
- Use protective pads under furniture legs.
- Avoid wearing high heels on hardwood floors.
- Regularly clean the floor to remove debris.
- Consider area rugs in high-traffic areas.
Case Studies
To further illustrate the effectiveness of these methods, let’s look at some real-world examples:
Case Study 1: The Pet Owner
A homeowner with two dogs found multiple surface scratches across their living room floor. By following the cleaning and repair methods outlined above, they successfully restored their floor without the need for professional help.
Case Study 2: The Furniture Move
After rearranging furniture, another homeowner discovered deeper scratches. Utilizing wood filler and stain, they managed to seamlessly blend the repairs, demonstrating the effectiveness of DIY methods.
Expert Insights
We consulted flooring experts to gain insights on maintaining hardwood floors:
- “Regular maintenance and quick repair of scratches can significantly extend the life of hardwood flooring.”
- “Using the right products is key. Always opt for those specifically designed for hardwood.”
FAQs
Here are some common questions regarding fixing scratches on hardwood floors:
- Q1: Can I fix scratches on hardwood floors myself?
A1: Yes, most scratches can be repaired with DIY methods. - Q2: What type of wood filler should I use?
A2: Choose a wood filler that matches your floor color. - Q3: How do I prevent future scratches?
A3: Use furniture pads and avoid dragging items across the floor. - Q4: Is sanding necessary for all scratches?
A4: No, only for deeper scratches and gouges. - Q5: How long does wood filler take to dry?
A5: It generally takes about 24 hours to cure. - Q6: Can I use regular cleaning products on hardwood?
A6: No, use products specifically designed for hardwood floors. - Q7: How often should I maintain my hardwood floors?
A7: Regular cleaning and occasional refinishing are recommended. - Q8: What if the scratches are too deep?
A8: Consider consulting a professional for severe damage. - Q9: Will repair methods change the floor color?
A9: If stained, the color may vary; test in a small area first. - Q10: How can I tell if my floor needs refinishing?
A10: If scratches and dullness are widespread, refinishing may be needed.
Random Reads
- How to fill in gaps in wooden floors
- How to fill concrete holes
- How to send a word document
- How to send a fax
- Adding logo watermark youtube video
- How to change date and time on iphone
- Mastering brightness control windows 7
- Effective ways to clean grout in shower bathroom floor
- Simple steps to stream movies on discord
- How to change your skin in minecraft pe