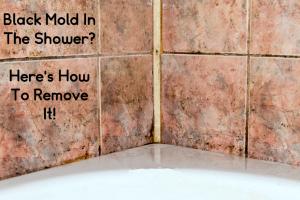
Ultimate Guide: How to Effectively Remove Mold from Shower Caulking

-
Quick Links:
- Introduction
- Understanding Mold
- Why Mold Grows on Caulking
- Dangers of Mold
- Tools and Materials
- Step-by-Step Guide to Removing Mold
- Prevention Tips
- Expert Insights
- Case Studies
- FAQs
Introduction
Mold is a common nuisance in households, especially in damp areas like bathrooms. When it appears on shower caulking, it can ruin the aesthetics of your bathroom and pose health risks. This comprehensive guide will teach you how to effectively remove mold from shower caulking and prevent its return.
Understanding Mold
Mold is a type of fungus that thrives in moist environments. It reproduces through spores that can become airborne and spread rapidly. Understanding how mold functions is key to controlling its growth in your home.
Why Mold Grows on Caulking
Shower caulking is often exposed to water, humidity, and organic material, making it an ideal breeding ground for mold. Factors contributing to mold growth include:
- High humidity levels
- Poor ventilation
- Water leaks
- Organic matter accumulation
Dangers of Mold
While mold can be unsightly, it also poses serious health risks, including:
- Allergic reactions
- Respiratory issues
- Infections
Understanding these dangers can motivate homeowners to address mold issues promptly.
Tools and Materials
To effectively remove mold from shower caulking, you will need the following tools and materials:
- Protective gloves and goggles
- Scrub brush or sponge
- Bucket
- Bleach or vinegar
- Water
- Spray bottle
- Old toothbrush (optional)
- New caulk (if replacement is necessary)
Step-by-Step Guide to Removing Mold
Follow these steps to effectively remove mold from shower caulking:
Step 1: Safety First
Put on protective gloves and goggles to avoid skin irritation and eye exposure to cleaning agents.
Step 2: Prepare Your Cleaning Solution
You can use a commercial mold remover, or create a homemade solution:
- Mix one part bleach with three parts water in a spray bottle.
- Alternatively, use undiluted white vinegar.
Step 3: Apply the Solution
Spray the cleaning solution generously on the affected caulking. Allow it to sit for 10-15 minutes to help kill the mold.
Step 4: Scrub the Area
Using a scrub brush or sponge, scrub the caulking to remove the mold. An old toothbrush can be handy for tight spaces.
Step 5: Rinse Thoroughly
Rinse the area with clean water to remove any cleaning solution and loosened mold. Ensure that no residue is left behind.
Step 6: Dry Completely
Use a towel to dry the area thoroughly. Mold thrives in moisture, so ensure there is no water left on the caulking.
Step 7: Replace Caulking (if necessary)
If the caulking is severely damaged or mold persists, consider replacing it. Remove the old caulk carefully and apply new caulk following the manufacturer’s instructions.
Prevention Tips
Preventing mold from returning is crucial. Here are some tips:
- Use a dehumidifier to keep humidity levels low.
- Ensure proper ventilation in the bathroom.
- Wipe down shower surfaces after each use.
- Regularly check for leaks and repair them promptly.
Expert Insights
According to experts in home maintenance, regular inspections and consistent cleaning routines can significantly reduce mold growth. "Using natural cleaners like vinegar can be just as effective and safer for the environment," states John Smith, a professional cleaner with over 10 years of experience.
Case Studies
Case Study 1: The Apartment Complex
An apartment complex in Seattle faced significant mold issues due to poor ventilation. After implementing a comprehensive cleaning and maintenance schedule, incidents of mold on caulking decreased by 75% within six months.
Case Study 2: The DIY Homeowner
A homeowner in Florida successfully removed mold from shower caulking using vinegar and reported no recurrence for over a year, attributing success to improved ventilation and regular cleaning.
FAQs
1. How often should I clean my shower caulking?
It's recommended to clean shower caulking at least once a month to prevent mold buildup.
2. Can I use baking soda to remove mold?
Yes, baking soda can be an effective natural cleaner for mold removal when mixed with water to create a paste.
3. What if the mold keeps coming back?
If mold keeps returning, check for underlying issues such as leaks or inadequate ventilation.
4. Is bleach safe for cleaning caulking?
Yes, bleach is effective for killing mold, but be cautious with its fumes and ensure proper ventilation during use.
5. How can I tell if my caulking needs to be replaced?
If the caulking is cracked, peeling, or has persistent mold, it’s time to replace it.
6. Can I paint over moldy caulking?
It’s not advisable to paint over moldy caulking. Mold must be removed first to prevent it from growing beneath the paint.
7. Is there a mold-resistant caulk?
Yes, there are specially formulated mold-resistant caulks available in most hardware stores.
8. How do I remove mold from silicone caulk?
Use the same cleaning methods, but be gentle when scrubbing to avoid damaging the silicone.
9. Do I need professional help for severe mold problems?
If mold covers a large area or keeps returning, it’s best to consult a professional mold remediation service.
10. Can humidity in my bathroom cause mold?
Yes, high humidity levels are a major contributor to mold growth in bathrooms.
Random Reads
- How to change a roof tile
- How to center text in html
- How to transfer music from pc to ipad
- How to transfer photos android to iphone
- How to refresh a webpage
- Can you charge airpods without a case
- Can linux run exe files
- Call usa from mexico
- Bypass age restrictions youtube
- How to exit frozen computer program