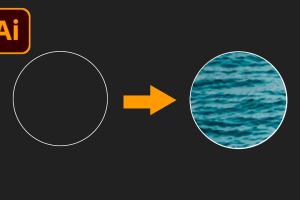
Mastering Image Insertion: How to Insert an Image into a Shape in Adobe Illustrator

-
Quick Links:
- 1. Introduction
- 2. Understanding Adobe Illustrator
- 3. Tools and Features You'll Need
- 4. Preparing Your Image
- 5. Creating Your Shape
- 6. Inserting the Image into the Shape
- 7. Advanced Techniques for Image Manipulation
- 8. Case Studies and Examples
- 9. Troubleshooting Common Issues
- 10. Conclusion
- 11. FAQs
1. Introduction
Adobe Illustrator is a powerful graphic design tool that allows artists and designers to create stunning visuals. One of the most sought-after techniques is inserting an image into a shape. This guide will provide you with a comprehensive understanding of how to achieve this, whether for personal projects or professional use.
2. Understanding Adobe Illustrator
Adobe Illustrator is renowned for its vector graphics capabilities. With a user-friendly interface and powerful tools, it is the go-to choice for designers looking to create graphics that can scale without losing quality. Understanding its core functionalities is essential for successful image manipulation.
2.1 Key Features of Adobe Illustrator
- Vector editing tools
- Layer management
- Color control
- Text and typography options
3. Tools and Features You'll Need
To successfully insert an image into a shape, familiarize yourself with the following tools in Adobe Illustrator:
- Selection Tool (V): Used to select and manipulate objects.
- Pen Tool (P): Allows for the creation of custom shapes.
- Clipping Mask: A powerful feature for embedding images within shapes.
- Layers Panel: Helps manage different elements of your design.
4. Preparing Your Image
Before inserting an image into a shape, ensure that your image is in the correct format (preferably JPEG or PNG) and that it is of high resolution to maintain quality.
4.1 Resizing and Cropping Your Image
Use Adobe Photoshop or Illustrator’s own cropping tool to adjust the dimensions of your image as needed. The ideal size will depend on the shape and overall design.
5. Creating Your Shape
Begin by creating the shape you want your image to be embedded within. You can use various tools in Illustrator to create geometric or custom shapes.
5.1 Using the Shape Tool
For simple shapes like circles or rectangles, use the Shape Tool located in the toolbar. Click and drag on the canvas to create your desired shape.
6. Inserting the Image into the Shape
Once your shape is ready, follow these steps to insert your image:
- Select the shape you created.
- Go to the menu and click on File > Place.
- Choose the image file you want to insert and click Place.
- With the image still selected, right-click and select Make Clipping Mask.
7. Advanced Techniques for Image Manipulation
Once you have mastered the basic technique, explore these advanced methods to enhance your designs:
7.1 Image Effects
Apply effects like shadows, glows, or blends to make your images pop. Use the Effects menu to explore various options.
7.2 Combining Multiple Images
Use multiple clipping masks to insert several images into one shape, creating a collage effect.
8. Case Studies and Examples
Let’s explore real-world examples of projects that effectively use image insertion techniques:
8.1 Branding Projects
Many brands use this technique in their logos and promotional materials to create visually appealing graphics that capture attention.
8.2 Social Media Graphics
In social media marketing, combining images with shapes can create engaging posts that encourage user interaction.
9. Troubleshooting Common Issues
As with any software, issues may arise. Here are some common problems and solutions:
9.1 Image Quality Loss
If your image appears pixelated after inserting, ensure that you are using a high-resolution image and that it’s not overly enlarged within the shape.
9.2 Clipping Mask Not Working
If the clipping mask doesn’t work, ensure that the image is above the shape in the Layers panel.
10. Conclusion
Inserting an image into a shape on Adobe Illustrator is a simple yet powerful technique that can significantly enhance your graphic design projects. By mastering this skill, you can create engaging visuals that stand out.
11. FAQs
1. Can I insert multiple images into one shape?
Yes, you can create multiple clipping masks to achieve this effect.
2. What file formats can I use?
JPEG and PNG are the most commonly used formats, but others may work as well.
3. Will the image quality be affected?
Quality can be affected if the image is not high resolution or is scaled improperly.
4. How do I resize the shape?
You can use the Selection Tool to click and drag the corners of the shape to resize it.
5. Is there a limit to the number of layers I can have?
No, but having too many layers can make your project difficult to manage.
6. Can I edit the image after inserting it into the shape?
Yes, you can edit the image by selecting it and using the editing tools available.
7. What if my image doesn't fit the shape?
You can resize the image before placing it or adjust the shape as needed.
8. Can I revert changes made to the shape or image?
Yes, use the Undo feature (Ctrl+Z or Command+Z) to revert changes.
9. How do I save my work?
Save your project regularly using the File > Save As option.
10. Are there any tutorials for beginners?
Many online resources, including Adobe’s official website, offer tutorials for beginners.
Random Reads
- Uninstall chrome extensions administrator
- Keep clear case from turning yellow
- Learn to use tor on iphone
- How to reset router wifi network
- How to reset sa password sql server
- Mastering paintbrush tool adobe illustrator
- Unlock super mario 64 ds characters
- Unlock sim guide
- How to replace a fascia board
- How to recall email in gmail