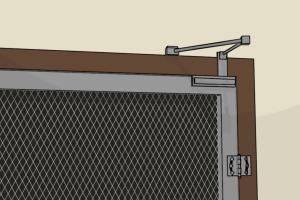
How to Install a Screen Door: A Comprehensive Step-by-Step Guide

-
Quick Links:
- Introduction
- Benefits of Screen Doors
- Types of Screen Doors
- Tools and Materials Needed
- Pre-Installation Steps
- Installation Process
- Post-Installation Tips
- Case Studies & Expert Insights
- Conclusion
- FAQs
Introduction
Installing a screen door can enhance your home's functionality while adding aesthetic appeal. Whether you want to enjoy a cool breeze without letting bugs in or enhance the ventilation in your home, a screen door is a perfect addition. This comprehensive guide will walk you through every step of the installation process, ensuring you have all the information you need to complete the task successfully.
Benefits of Screen Doors
- Improved Ventilation: Screen doors allow fresh air into your home while keeping insects out.
- Energy Efficiency: They can help reduce cooling costs by allowing you to use natural ventilation.
- Increased Natural Light: A screen door lets in light while providing a barrier against pests.
- Enhanced Aesthetics: Screen doors come in various designs that can complement your home’s style.
Types of Screen Doors
There are several types of screen doors available, each with its unique features:
- Sliding Screen Doors: Ideal for patio doors, these doors slide open and closed.
- Hinged Screen Doors: Traditional style that swings open like a regular door.
- Retractable Screen Doors: These can be hidden when not in use, maintaining your home's aesthetics.
- Magnetic Screen Doors: These allow easy passage without the need for hands, ideal for pets.
Tools and Materials Needed
Before starting your installation, ensure you have the following tools and materials:
- Measuring tape
- Level
- Drill and drill bits
- Screwdriver
- Hammer
- Screen door kit (includes the door, frame, and mounting hardware)
- Paint or stain (optional)
Pre-Installation Steps
Before you start the installation, follow these pre-installation steps:
- Measure the Door Frame: Measure the width and height of your door frame to ensure you purchase the correct size screen door.
- Select the Right Screen Door: Choose a screen door that matches your home’s style and fits the measurements taken.
- Gather Tools: Collect all the tools and materials listed above for easy access during installation.
Installation Process
Follow these detailed steps to install your screen door:
Step 1: Prepare the Door Frame
Clean the door frame to ensure a smooth installation. Remove any old hardware or obstacles that could interfere with the installation.
Step 2: Assemble the Screen Door Frame
Follow the manufacturer’s instructions to assemble the screen door frame. Ensure all components are securely attached.
Step 3: Position the Screen Door
Hold the assembled screen door against the door frame. Use a level to ensure it's straight. Adjust as necessary.
Step 4: Mark the Mounting Holes
Once positioned correctly, use a pencil to mark where the mounting holes will need to be drilled.
Step 5: Drill the Holes
Using your drill, create holes in the door frame at the marked locations. Be cautious not to drill too deep.
Step 6: Attach the Screen Door
Align the screen door with the drilled holes and use screws to secure it in place. Ensure it swings or slides smoothly.
Step 7: Final Adjustments
Check to ensure the door operates correctly. Make any necessary adjustments to hinges or tracks.
Post-Installation Tips
- Test the door multiple times to ensure it opens and closes smoothly.
- Inspect the screen for any gaps or areas that need sealing.
- Consider painting or staining the door if it’s unfinished to match your home’s decor.
Case Studies & Expert Insights
According to a survey by the Home Improvement Research Institute, 65% of homeowners report improved airflow and comfort after installing screen doors. A case study conducted by the National Association of Home Builders found that homes with well-installed screen doors sold 15% faster than those without.
Conclusion
Installing a screen door is a manageable DIY project that can significantly enhance your home’s comfort and aesthetics. By following this guide, you can ensure a successful installation that provides lasting benefits.
FAQs
1. Can I install a screen door by myself?
Yes, most screen doors can be installed by one person with the right tools and instructions.
2. How long does it take to install a screen door?
Typically, installation takes about 1-2 hours, depending on your experience and the type of screen door.
3. What tools do I need to install a screen door?
You’ll need a measuring tape, drill, screwdriver, level, and hammer.
4. Are there any maintenance tips for screen doors?
Regularly clean the screen and check for any tears or damage. Lubricate hinges to ensure smooth operation.
5. Do I need a permit to install a screen door?
Generally, no permit is required unless you are altering the structure of the home.
6. Can I paint my screen door?
Yes, you can paint your screen door as long as you use a suitable exterior paint.
7. What is the best type of screen door for pets?
Magnetic screen doors are popular for pet owners, allowing easy access while keeping insects out.
8. How do I measure for a screen door?
Measure the height and width of the door frame, taking care to ensure accuracy for a proper fit.
9. Can I install a retractable screen door?
Yes, retractable screen doors are a great option and can be installed similarly to regular screen doors.
10. What if my door frame is irregularly shaped?
Consider a custom screen door or adjustable frame options to accommodate irregular shapes.