Step-by-Step Guide to Installing a Bathroom Sink with Expert Tips

-
Quick Links:
- Introduction
- Tools and Materials Needed
- Preparation Steps
- Removing the Old Sink
- Installing the New Sink
- Making Plumbing Connections
- Finishing Touches
- Common Issues and Solutions
- Case Studies and Real-Life Examples
- Expert Insights
- FAQs
Introduction
Installing a bathroom sink may seem daunting, but with the right tools and a clear step-by-step guide, you can accomplish this project yourself. Not only does a new sink enhance your bathroom's aesthetics, but it can also improve functionality. In this comprehensive guide, we will cover everything from the tools you need to the final touches, ensuring you have a successful DIY experience.
Tools and Materials Needed
Before starting your sink installation, gather the necessary tools and materials. Here’s a checklist:
- Adjustable wrench
- Pipe wrench
- Screwdriver (flathead and Phillips)
- Plumber's putty
- Silicone sealant
- PVC or metal pipes
- New sink and faucet
- Bucket
- Tape measure
- Level
- Safety goggles
- Gloves
Preparation Steps
Preparation is key to a successful installation. Follow these steps:
- Turn off the water supply to the sink.
- Clear the area around the sink to have ample working space.
- Use a bucket to catch any water that may spill when disconnecting the old sink.
Removing the Old Sink
To remove your old sink, follow these steps:
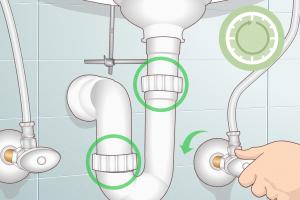
- Disconnect the water supply lines using an adjustable wrench.
- Unclamp the sink from the countertop or wall.
- Carefully lift the sink out and set it aside.
Installing the New Sink
Once the old sink is removed, it’s time to install the new one. Here’s how:
- Apply plumber's putty around the drain hole of the new sink.
- Set the sink into place and ensure it is level.
- Secure the sink with the provided clamps.
Making Plumbing Connections
Next, connect the plumbing:
- Attach the sink’s drain pipe to the new sink.
- Connect the water supply lines to the faucet.
- Turn the water supply back on and check for leaks.
Finishing Touches
To complete your installation:
- Apply silicone sealant around the sink edge.
- Reattach any cabinet doors or covers.
- Clean the area and enjoy your new sink!
Common Issues and Solutions
Even with careful planning, issues can arise. Here are some common problems and their solutions:
- Leakage: Check all connections and tighten them if necessary.
- Improper alignment: Use a level to adjust the sink position.
Case Studies and Real-Life Examples
To provide insight into the sink installation process, here are two case studies:
Case Study 1: A Simple Sink Replacement
A homeowner replaced a basic sink with a vessel sink. By following the outlined steps, they completed the installation in under three hours and noted the importance of measuring the cabinet height accurately.
Case Study 2: Upgrading Plumbing Fixtures
Another homeowner decided to upgrade both the sink and faucet. They faced minor leaks initially but resolved them by re-tightening connections and using plumber’s tape on the threads.
Expert Insights
We consulted plumbing experts, and here are their tips:
- Always turn off the water supply before starting.
- Use quality materials to avoid future issues.
- Don’t rush; take your time to ensure everything is done correctly.
FAQs
1. How long does it take to install a bathroom sink?
The average time for a DIY installation is about 2-4 hours, depending on your skill level.
2. Do I need a plumber for sink installation?
While you can do it yourself, hiring a plumber is advisable if you are unsure about plumbing.
3. What if my sink is leaking after installation?
Check all connections and tighten them. If the leak persists, consult a professional.
4. Can I install a sink without a vanity?
Yes, you can install a pedestal sink or wall-mounted sink without a vanity.
5. What type of sink is best for a small bathroom?
Consider a wall-mounted or pedestal sink to save space in small bathrooms.
6. Are there specific tools needed for plumbing?
Basic plumbing tools include wrenches, screwdrivers, and pipe cutters.
7. How do I choose the right sink for my bathroom?
Consider the size, style, and functionality that fits your bathroom design.
8. Is it safe to install a sink myself?
Yes, as long as you follow safety guidelines and manufacturer instructions.
9. What is the average cost to install a bathroom sink?
Costs can range from $200 to $1,000, depending on the sink type and installation complexity.
10. Can I reuse my old plumbing fixtures?
Yes, but ensure they are in good condition and compatible with the new sink.
For more information, check out these authoritative sources:
- Home Depot: How to Install a Bathroom Sink
- Lowe's: Install a Bathroom Sink
- Family Handyman: Install a Pedestal Sink
- Plumbing Supply: Bathroom Sink Installation Guide
- Consumer Reports: Choosing the Right Bathroom Sink
Random Reads
- How to sync hhotmail account on ipad
- How to trade pokemon john gba lite
- How to trade items on team fortress 2
- Testing ground rod
- The 10 best solutions to get any ink out of your carpet
- How to use your xbox 360 controller for windows
- How to remove unnecessary audio with audacity
- How to read a multimeter
- How to read a tape measure
- How to paint metal knobs