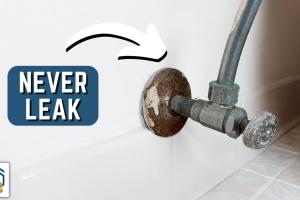
How to Replace Shut Off Valves: A Comprehensive Guide for Homeowners

-
Quick Links:
- Introduction
- Understanding Shut Off Valves
- When to Replace Shut Off Valves
- Tools and Materials Needed
- Step-by-Step Guide to Replace Shut Off Valves
- Common Mistakes to Avoid
- Case Studies and Examples
- Expert Insights
- Maintenance Tips for Shut Off Valves
- FAQs
Introduction
Shut off valves are essential components in any plumbing system, allowing you to control the flow of water to different areas of your home. Whether it's for repairs, maintenance, or emergencies, knowing how to replace shut off valves is a valuable skill for any homeowner. In this comprehensive guide, we will take you through the entire process, from understanding what shut off valves are, to the tools you'll need, and step-by-step instructions for replacement.
Understanding Shut Off Valves
Shut off valves are devices that stop or allow the flow of water in a plumbing system. They can be found in various locations, including:
- Main water supply line
- Individual fixtures (sinks, toilets, etc.)
- Appliances (water heaters, dishwashers)
There are different types of shut off valves, such as:
- Ball valves
- Gate valves
- Angle valves
Each type has its unique mechanism and applications. Understanding these can help you choose the right valve for replacement.
When to Replace Shut Off Valves
It’s essential to recognize the signs that indicate a shut off valve needs replacement:
- Leaking or drips from the valve
- Corrosion or rust on the valve body
- Difficulty turning the valve handle
- Old age (more than 20 years)
Addressing these issues promptly can prevent more significant plumbing problems down the line.
Tools and Materials Needed
Before starting the replacement process, ensure you have the following tools and materials:
- Pipe wrench
- Adjustable wrench
- Plumber's tape
- New shut off valve
- Pipe cutter or hacksaw
- Bucket or towel for water collection
- Safety goggles and gloves
Step-by-Step Guide to Replace Shut Off Valves
Step 1: Turn Off the Main Water Supply
Before you start, locate and turn off the main water supply to avoid flooding your home.
Step 2: Drain the System
Open faucets in your home to drain any remaining water from the pipes.
Step 3: Remove the Old Valve
Use a pipe wrench to unscrew the old shut off valve. Be prepared for some water to escape.
Step 4: Prepare the Pipe
Clean the threads of the pipe to ensure a good seal for the new valve.
Step 5: Install the New Valve
Wrap plumber's tape around the threads of the pipe and screw on the new valve tightly.
Step 6: Turn On the Water Supply
Slowly turn the main water supply back on and check for leaks around the new valve.
Step 7: Test the Valve
Operate the new valve to ensure it opens and closes smoothly.
Common Mistakes to Avoid
Here are some common pitfalls to watch out for when replacing shut off valves:
- Not turning off the main water supply
- Failing to drain the pipes
- Over-tightening the new valve
- Neglecting to check for leaks
Case Studies and Examples
Consider the story of a homeowner named Sarah, who faced a leaking valve in her kitchen. She followed the steps outlined in this guide and successfully replaced the valve without professional help, saving hundreds in plumbing fees. This is just one example of how DIY plumbing can empower homeowners.
Expert Insights
We consulted with plumbing experts who recommend regularly checking your shut off valves for leaks and corrosion, especially in older homes. Regular maintenance can prolong the life of your plumbing system.
Maintenance Tips for Shut Off Valves
To ensure longevity and optimal performance of your shut off valves:
- Exercise the valve periodically to prevent it from seizing.
- Inspect for signs of rust or corrosion.
- Keep the area around the valve clean and dry.
FAQs
Here are some frequently asked questions about replacing shut off valves:
1. How often should I replace shut off valves?
It’s advisable to inspect them every 5-10 years and replace them if you notice any signs of wear.
2. Can I replace a shut off valve myself?
Yes, with the right tools and this guide, many homeowners can successfully replace shut off valves.
3. What type of shut off valve should I use?
Ball valves are often recommended for their durability and ease of use.
4. Do I need a permit to replace shut off valves?
In most cases, no permit is required for residential plumbing repairs, but check local regulations.
5. What if I encounter a leak after installation?
Turn off the water supply immediately and check the installation for any loose fittings.
6. Can shut off valves freeze?
Yes, if located in unheated areas. Insulating the valves can help prevent freezing.
7. How do I know if my shut off valve is working properly?
Test the valve by turning it on and off; it should operate smoothly without leaks.
8. What is the average cost to replace a shut off valve?
DIY replacement can cost between $10-$50 depending on the valve type, while professional services can range from $150-$300.
9. Can I use tape on plastic fittings?
Avoid using plumber's tape on plastic fittings as it can cause cracks. Use a proper sealant instead.
10. What is the lifespan of a shut off valve?
Typically, shut off valves last 20-30 years if maintained properly.
By following the information in this article, you can confidently replace shut off valves in your home and maintain a functional plumbing system.