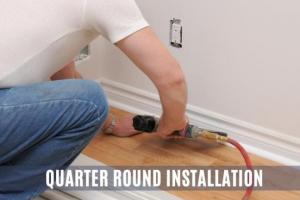
Mastering Quarter Round Installation: A Comprehensive Guide for DIY Enthusiasts

-
Quick Links:
- Introduction
- What is Quarter Round?
- Tools and Materials Needed
- Preparation Steps
- Measuring and Cutting Quarter Round
- Installation Process
- Finishing Touches
- Common Mistakes to Avoid
- Case Studies
- FAQs
Introduction
Installing quarter round can dramatically enhance the aesthetic appeal of your flooring by providing a seamless transition between the floor and the wall. It’s a relatively simple DIY project that can be accomplished with minimal tools and skills. This comprehensive guide will walk you through every step, ensuring that your quarter round installation is both professional-looking and durable.
What is Quarter Round?
Quarter round is a type of trim molding that has a quarter-circle profile. It is used primarily to cover gaps between the base of walls and the flooring, providing a finished look and protecting the edges of the flooring material. Available in various materials such as wood, MDF, and PVC, quarter round can match any décor style.
Tools and Materials Needed
- Quarter round molding (size according to your needs)
- Miter saw or hand saw
- Measuring tape
- Pencil
- Nail gun or hammer and finish nails
- Wood glue (optional)
- Caulk (for gaps)
- Paint or stain (if necessary)
- Safety goggles
- Dust mask
Preparation Steps
Before you start installing quarter round, proper preparation is key. Follow these steps to ensure a smooth installation:
- Clear the area: Remove any furniture or obstacles from the room.
- Clean the floor: Ensure the flooring is clean and free of debris.
- Inspect the walls: Check for any damage or uneven surfaces that may need repairs.
Measuring and Cutting Quarter Round
Accurate measurements and cuts are crucial for a professional finish. Here’s how to do it:
- Measure the Length: Use a measuring tape to determine the length of each wall where quarter round will be installed.
- Mark Your Cuts: Transfer your measurements to the quarter round, marking where to cut.
- Make the Cuts: Using a miter saw, cut the quarter round at a 45-degree angle at the corners for seamless joints.
Installation Process
Now that you have your quarter round cut, it’s time to install it. Follow these steps for proper installation:
- Dry Fit the Pieces: Before securing, place the pieces along the wall to ensure a proper fit.
- Secure the Quarter Round: Using a nail gun or hammer, attach the quarter round to the wall. Start at one end and work your way to the other, ensuring each piece is flush against the wall and the floor.
- Add Wood Glue (Optional): For added stability, apply wood glue to the edges before nailing.
Finishing Touches
Once installed, you’ll want to complete the project with these final steps:
- Fill Nail Holes: Use wood filler to fill any visible nail holes, allowing it to dry as per the manufacturer's instructions.
- Caulk Gaps: Apply caulk to any gaps between the quarter round and the wall for a seamless finish.
- Paint or Stain: If necessary, paint or stain the quarter round to match your decor.
Common Mistakes to Avoid
Avoid these common pitfalls during your installation:
- Not measuring accurately, leading to gaps and misalignments.
- Using insufficient nails or improper spacing, resulting in loose trim.
- Forgetting to fill nail holes or caulk gaps, leaving an unfinished look.
Case Studies
Here are a couple of examples of successful quarter round installations:
- Case Study 1: A homeowner in Texas updated their living room by installing quarter round to match new hardwood flooring. They followed our guide step-by-step and reported a significant improvement in the room's aesthetics.
- Case Study 2: A DIY enthusiast in California renovated their kitchen, incorporating quarter round around tile flooring. They highlighted the ease of installation and the professional finish achieved.
FAQs
- 1. What is the best material for quarter round?
- Wood is traditional, but MDF is more cost-effective and easier to paint.
- 2. Can I install quarter round over carpet?
- Yes, but it’s often better to install it over hard surfaces for a cleaner look.
- 3. How do I cut quarter round without a miter saw?
- You can use a hand saw, but it will require more precision and patience.
- 4. How long should the nails be for quarter round installation?
- 1.5 to 2-inch finish nails are typically sufficient.
- 5. Is caulking necessary for quarter round?
- It’s recommended to achieve a polished and seamless appearance.
- 6. Can I paint quarter round after installation?
- Yes, it’s often easier to paint before installation, but touch-ups can be done after.
- 7. How do I remove quarter round if I need to replace it?
- Carefully pry it off using a pry bar, taking care not to damage the wall or floor.
- 8. How much quarter round will I need?
- Measure the perimeter of the room and add 10% for mistakes and waste.
- 9. Can I use adhesive instead of nails?
- Adhesive can be used but is less secure than nailing.
- 10. What’s the difference between quarter round and shoe molding?
- Shoe molding is typically thinner and less curved than quarter round.
Random Reads
- How to measure a roof
- How to measure a door and door frame
- How to make mob spawner minecraft
- How to insulate a shed
- How to install youtube app kindle fire
- Quickly send calls to voicemail ios
- Quickly zoom out on mac
- How to unlock toadette mario kart wii
- How to waterproof concrete house
- How to watch youtube offline