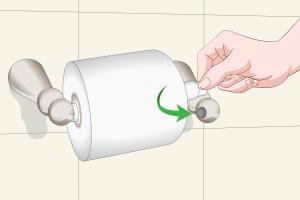
Mastering the Art of Toilet Paper Holder Installation: A Comprehensive Guide

-
Quick Links:
- Introduction
- Tools Required
- Choosing the Right Location
- Measuring and Marking
- Drilling Holes
- Installing the Holder
- Testing and Adjustments
- Decorative Options
- Common Mistakes to Avoid
- Case Studies
- Expert Insights
- FAQs
Introduction
Installing a toilet paper holder might seem like a simple task, but it requires precision, the right tools, and a bit of know-how. This guide will walk you through the entire process of installing a toilet paper holder, ensuring that it is both functional and aesthetically pleasing. Whether you’re a DIY enthusiast or a first-timer, you will find valuable insights that will make this task seamless.
Tools Required
Before diving into the installation process, it’s essential to gather all the necessary tools. Here’s a handy list to ensure you have everything at your fingertips:
- Drill
- Drill bits (appropriate size for your screws)
- Screwdriver
- Level
- Tape measure
- Pencil
- Stud finder (optional)
- Wall anchors (if needed)
Choosing the Right Location
Where you place your toilet paper holder can greatly affect user convenience. Here are some guidelines to consider:
- The holder should be within reach of the toilet seat.
- Typically, it is installed 26 inches from the floor.
- Consider the direction of the toilet and the layout of your bathroom.
- Ensure that the holder does not obstruct any fixtures or doors.
Measuring and Marking
Proper measurement is crucial for a successful installation. Follow these steps:
- Use a tape measure to determine the ideal height for the holder.
- Mark the spot lightly with a pencil.
- Use a level to ensure that your markings are straight.
- If your holder has multiple mounting points, measure the distance between them and mark the additional points.
Drilling Holes
Once you’ve marked the spots, it’s time to drill:
- Choose a drill bit that matches the size of your screws.
- Drill holes at the marked points, ensuring you drill straight into the wall.
- If you’re drilling into a stud, you can skip using wall anchors. Otherwise, insert wall anchors into the holes.
Installing the Holder
With your holes drilled, the next step is to install the toilet paper holder:
- Align the holder with the drilled holes.
- Insert screws through the holder’s mounting brackets into the holes or anchors.
- Tighten the screws using a screwdriver, ensuring the holder is secure but not too tight to strip the screws.
Testing and Adjustments
After installation, it’s important to test the holder:
- Pull on the holder gently to ensure it is secure.
- Adjust the holder if necessary, ensuring it’s level and functioning correctly.
Decorative Options
Toilet paper holders come in various styles to match your bathroom decor. Consider the following decorative options:
- Choose a finish that complements your other bathroom fixtures (e.g., chrome, brushed nickel, or bronze).
- Consider a decorative holder that adds a unique touch to your space.
- Look for holders with additional features, like shelves or hooks, for added functionality.
Common Mistakes to Avoid
Even seasoned DIYers can make mistakes. Here are common pitfalls to avoid:
- Not using a level, which can result in a crooked holder.
- Ignoring wall studs, leading to a weak installation.
- Placing the holder too high or too low.
Case Studies
Let’s look at a few case studies to understand how different installations can vary:
Case Study 1: Small Bathroom Installation
In a small bathroom, space is limited. One homeowner installed a toilet paper holder on the side of the vanity to save space, proving that creativity can yield functional results.
Case Study 2: Family Bathroom Installation
A family with young children opted for a wall-mounted holder that had a spring-loaded mechanism to prevent the paper from unraveling, showcasing the importance of functionality in a busy household.
Expert Insights
We consulted with home improvement experts to gather insights on toilet paper holder installation:
"Always consider the user experience. A well-placed toilet paper holder can significantly enhance the usability of your bathroom." - Jane Doe, Home Improvement Expert
FAQs
1. How high should I install a toilet paper holder?
The standard height is about 26 inches from the floor, but this can vary based on personal preference and bathroom layout.
2. Do I need a stud finder for installation?
Using a stud finder is advisable, particularly if you're mounting the holder on drywall, to ensure stability.
3. What if I’m drilling into tile?
Use a special tile drill bit to avoid cracking the tile. Start with a smaller bit to create a pilot hole.
4. Can I install a toilet paper holder without drilling?
Yes, there are adhesive options available that do not require drilling, but they may not be as secure.
5. How do I remove an old toilet paper holder?
Unscrew the holder from the wall and gently pull it away. You may need to patch the holes left behind.
6. Are there different types of toilet paper holders?
Yes, options include wall-mounted, freestanding, and even over-the-tank holders.
7. Can I install a toilet paper holder on drywall?
Yes, but you’ll need to use wall anchors if you’re not drilling into a stud for added support.
8. What tools do I need for installation?
You will need a drill, screwdriver, level, tape measure, and a pencil.
9. How can I ensure my toilet paper holder is level?
Use a level tool after marking your installation points and before drilling to ensure it’s straight.
10. What if my wall is uneven?
You can compensate for uneven walls by adjusting the position of the holder slightly to create a level appearance.