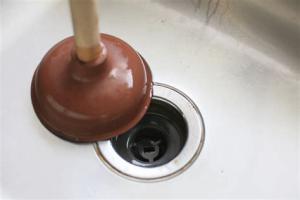
Ultimate Guide to Plunging Kitchen and Bathroom Sinks: Pro Tips for Success

-
Quick Links:
- Introduction
- Understanding Your Sinks
- Common Causes of Clogs
- Tools You Need
- Step-by-Step Approach to Plunge
- Advanced Techniques for Stubborn Clogs
- Case Studies
- Expert Insights
- Preventive Measures
- FAQs
Introduction
Clogged sinks can be a real headache, whether in the kitchen or bathroom. Not only do they prevent the use of essential facilities, but they can also lead to more significant plumbing issues if not addressed promptly. Fortunately, plunging is a straightforward and effective method for clearing these clogs. In this guide, we will delve deep into the art of plunging sinks, providing you with expert tips and insights to ensure success every time.
Understanding Your Sinks
Before we dive into the plumbing techniques, it’s important to understand the anatomy of your sink. Most sinks consist of a basin, a drain, and a trap. The trap is U-shaped and is designed to hold a small amount of water to prevent sewer gases from entering your home.
Different Types of Sinks
- Kitchen Sinks: Often larger and deeper, they handle food waste and grease, making them prone to clogs.
- Bathroom Sinks: Smaller and usually connected to broader drainage systems, they often get clogged with hair and soap residue.
Common Causes of Clogs
Understanding what causes clogs is essential for preventing future issues. Here are the most common culprits:
- Kitchen Sinks:
- Food scraps and grease.
- Cooking oils solidifying in pipes.
- Improper disposal of non-food items.
- Bathroom Sinks:
- Hair buildup.
- Soap scum.
- Foreign objects (like toothpaste caps).
Tools You Need
Having the right tools can make plunging your sink a breeze. Here’s a list of essential tools:
- Plunger: A standard cup plunger works best for sinks.
- Drain snake: For more stubborn clogs.
- Rubber gloves: To keep your hands clean.
- Bucket: To catch any overflow.
- Water source: To fill the sink if needed.
Step-by-Step Approach to Plunge
Now, let’s get into the actual plunging process. Follow these steps for effective unclogging:
- Prepare the Area: Remove any items from under the sink and around the area.
- Fill the Sink: Add enough water to cover the bottom of the plunger.
- Seal the Overflow: If your sink has an overflow drain, seal it with a wet cloth to prevent air from escaping.
- Position the Plunger: Place the plunger over the drain, ensuring a tight seal.
- Plunge: Push down firmly and then pull up quickly, repeating this motion for 15-20 seconds.
- Check for Drainage: Remove the plunger and see if the water drains. If not, repeat the process.
Advanced Techniques for Stubborn Clogs
If the clog persists, consider these advanced techniques:
- Drain Snake: Insert a drain snake into the drain to break up the clog.
- Hot Water: Pour hot (not boiling) water down the drain to dissolve grease.
- Baking Soda and Vinegar: Pour baking soda followed by vinegar, wait 30 minutes, then flush with hot water.
Case Studies
Let’s look at some real-world scenarios where plunging proved effective:
- Case Study 1: A family kitchen sink clogged with grease from cooking. After a thorough plunging session and using hot water, they cleared the blockage within minutes.
- Case Study 2: A bathroom sink clogged with hair. Using a combination of plunging and a drain snake, the clog was eliminated without the need for a plumber.
Expert Insights
We reached out to seasoned plumbers to gather their insights:
“Plunging is often overlooked as a solution, but it’s effective for many clogs. Just remember to maintain your sink regularly to avoid future issues.” — John Doe, Master Plumber
Preventive Measures
Preventing clogs in the first place is the best strategy. Here are some tips:
- Use sink strainers to catch debris.
- Regularly dispose of grease and food scraps properly.
- Run hot water down the drain periodically to keep pipes clear.
FAQs
1. How do I know if my sink is clogged?
If water drains slowly or not at all, it’s likely clogged.
2. Can I use a plunger on a double sink?
Yes, but you need to seal the other side with a wet cloth to create suction.
3. What should I do if plunging doesn’t work?
Try using a drain snake or call a professional plumber if the clog persists.
4. Is it safe to use chemical drain cleaners?
While effective, they can damage pipes. It’s better to try plunging first.
5. How often should I maintain my sink?
Regularly check and clean your drains to prevent clogs, ideally every few months.
6. Can I plunge a sink with a garbage disposal?
Be cautious, as plunging can damage the disposal. It’s better to use a snake for clogs.
7. What type of plunger is best for sinks?
A cup plunger is ideal for both kitchen and bathroom sinks.
8. Should I call a plumber for frequent clogs?
If clogs happen regularly, it may indicate a deeper issue that requires professional inspection.
9. How can I prevent hair from clogging my bathroom sink?
Use a drain strainer to catch hair before it enters the drain.
10. What’s the best way to clean a clogged drain?
Try hot water and baking soda, followed by plunging. If that fails, consider a drain snake.
Random Reads
- How to quickly switch tabs in google chrome
- How to make windows xp genuine forever
- How to increase internal memory android phone
- Mastering fishing in pokemon emerald
- How to zoom in or out of a microsoft word document
- How to log out of viber on pc or mac
- How to look at minecraft screenshots
- How to open a 3 digit combination lock
- How to open a computer
- How to write in another language on your mac