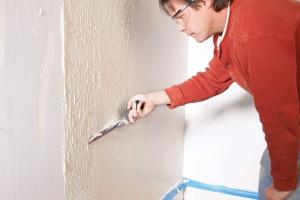
Mastering the Art of Skim Coating: A Beginner’s Guide to Wall Finishing

-
Quick Links:
- Introduction
- What is Skim Coating?
- Why Skim Coat a Wall?
- Tools and Materials Needed
- Preparing the Wall for Skim Coating
- Step-by-Step Guide to Skim Coating
- Common Mistakes to Avoid
- Finishing Touches
- Case Studies and Real-world Examples
- Expert Insights
- FAQs
Introduction
Skim coating is an essential technique for achieving smooth, flawless walls in your home. Whether you’re dealing with imperfections from previous paint jobs or seeking a fresh, modern look, understanding how to properly skim coat a wall can transform your interior spaces. This guide is tailored for beginners and will cover everything you need to know about skim coating, from preparation to the final touches.
What is Skim Coating?
Skim coating involves applying a thin layer of joint compound or plaster to a wall surface. This technique effectively smooths out blemishes, fills in cracks, and creates a uniform finish. It is often used as a preparatory step before painting or wallpapering.
Why Skim Coat a Wall?
- Restores Surface Integrity: Skim coating can repair damaged walls, making them look new.
- Improves Paint Adhesion: A smooth surface allows paint to adhere better, resulting in a more professional finish.
- Cost-effective: Skim coating is often less expensive than replacing drywall.
- Enhances Aesthetics: A well-finished wall can dramatically improve the overall look of a room.
Tools and Materials Needed
Before diving into the skim coating process, gather the following tools and materials:
- Joint compound or plaster
- Putty knife (6-inch and 12-inch)
- Taping knife
- Sanding block or pole sander
- Masking tape
- Drop cloths
- Paint roller and tray
- Bucket for mixing compound
- Dust mask
- Water (for mixing and cleanup)
Preparing the Wall for Skim Coating
Proper preparation is key to a successful skim coat. Follow these steps:
- Clear the Area: Remove furniture and cover the floor with drop cloths.
- Clean the Surface: Use a damp cloth to wipe down the walls and remove dust and dirt.
- Repair Large Imperfections: Fill any large holes or cracks with a patching compound and allow it to dry.
- Sand the Surface: Lightly sand the wall to ensure a smooth base for the skim coat.
- Mask Off Areas: Use masking tape to protect adjacent surfaces.
Step-by-Step Guide to Skim Coating
Step 1: Mix the Joint Compound
Mix your joint compound according to the manufacturer's instructions. Aim for a consistency similar to peanut butter.
Step 2: Apply the First Coat
Using the 12-inch taping knife, apply a thin layer of joint compound to the wall, starting from the top and working your way down. Use even pressure and long strokes.
Step 3: Feather the Edges
As you apply the joint compound, feather the edges to blend it into the existing wall. This will help create a seamless finish.
Step 4: Allow to Dry
Let the first coat dry completely, which may take several hours or overnight depending on the humidity and temperature.
Step 5: Sand the Surface
Once dry, lightly sand the surface with a sanding block or pole sander to remove any high spots.
Step 6: Apply Additional Coats
Repeat the process for one or two additional coats, ensuring each layer is feathered and sanded before applying the next.
Step 7: Final Sanding and Cleanup
After the final coat is dry, sand the surface again for a smooth finish. Clean up any dust and debris from the area.
Common Mistakes to Avoid
- Skipping Preparation: Always prep the wall properly to avoid a poor finish.
- Applying Too Much Compound: Thin layers are key; too thick can lead to cracking.
- Neglecting Drying Time: Ensure each coat dries completely before sanding or applying another coat.
Finishing Touches
Once you've achieved a smooth finish, you can proceed to paint or wallpaper your newly skim-coated walls. Choose high-quality paint for the best results and consider priming the wall first to enhance paint adhesion and color vibrancy.
Case Studies and Real-world Examples
Consider the case of a homeowner who transformed her dated living room by skim coating the walls. After applying several layers, she noted a significant improvement in both the appearance and acoustics of the room. The project cost approximately $200, which included materials, and she achieved a professional look without hiring a contractor.
Expert Insights
According to professional drywall finishers, proper technique is more important than the materials used. Investing time in learning the right methods can lead to a more satisfying and rewarding DIY experience.
FAQs
1. Can I skim coat over old paint?
Yes, but ensure the old paint is clean and well-adhered to the wall.
2. How long does it take for skim coat to dry?
Drying time can vary based on temperature and humidity but generally takes 24 hours.
3. Can I use a roller for skim coating?
While a knife is preferred, a roller can be used for larger areas, followed by a knife to smooth.
4. How do I know if I need to skim coat?
If your walls have visible imperfections, a skim coat can help create a smoother surface.
5. Is skim coating a messy job?
It can be, so be sure to cover floors and furniture adequately.
6. What type of joint compound should I use?
For skim coating, a lightweight joint compound is often recommended for ease of application.
7. Can I skim coat over textured walls?
Yes, but you may need to apply more compound to fill in the texture.
8. How many coats do I need?
Most projects require 2-3 thin coats for the best results.
9. Can I paint over skim coat immediately?
It’s best to wait until the skim coat is fully dry and sanded before painting.
10. Do I need to prime after skim coating?
Yes, priming is recommended to improve paint adhesion and finish quality.