Step-by-Step Guide: How to Remove Sliding Closet Doors with Ease

-
Quick Links:
- Introduction
- Tools Needed
- Safety Precautions
- Step-by-Step Guide to Remove Sliding Closet Doors
- Common Issues When Removing Sliding Doors
- Case Studies: Successful Door Removals
- Expert Insights on Sliding Closet Doors
- Conclusion
- FAQs
Introduction
Removing sliding closet doors can be an intimidating task for many homeowners. Whether you're looking to replace old doors, increase storage space, or simply upgrade the aesthetics of your room, understanding the removal process is essential. In this comprehensive guide, we will walk you through everything you need to know to safely and effectively remove sliding closet doors.Tools Needed
Before diving into the removal process, it’s crucial to gather the necessary tools. Here’s a comprehensive list:- Flathead screwdriver
- Phillips screwdriver
- Hammer
- Safety goggles
- Gloves
- Step ladder (if needed)
- Measuring tape
- Utility knife
Safety Precautions
Safety should always be your top priority when undertaking any DIY project. Follow these precautions:- Wear safety goggles to protect your eyes from debris.
- Use gloves to protect your hands from sharp edges.
- Ensure the area is clear of obstacles to prevent tripping.
- Consider enlisting a friend to help, especially if the doors are heavy.
Step-by-Step Guide to Remove Sliding Closet Doors
Removing sliding closet doors involves several straightforward steps. Follow this step-by-step guide to ensure a smooth process:Step 1: Clear the Area
Start by removing any items from inside the closet and around the door area. This will provide ample space to work and reduce the risk of damaging your belongings.Step 2: Examine the Hardware
Take a close look at the track and the rollers. Identify how the doors are hung; this will help you understand the removal process better.Step 3: Remove the Stoppers
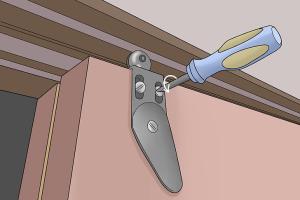
Using a screwdriver, remove the stoppers at the end of the track. These are usually small plastic or metal pieces that prevent the doors from sliding off the track.Step 4: Lift the Door Out
Gently lift the door upwards to disengage it from the track. If the door is heavy, this step may require assistance.Step 5: Remove the Second Door
Repeat steps 3 and 4 for the second sliding door.Step 6: Remove the Track (Optional)
If you're planning to replace the entire system, remove the track by unscrewing it from the closet frame.Common Issues When Removing Sliding Doors
Even the simplest removal can come with challenges. Here are some common issues and how to overcome them:- Stuck Doors: If the doors won’t budge, check for any obstructions in the track.
- Heavy Doors: If the doors are particularly heavy, consider using a dolly or seeking help.
- Damaged Tracks: If the tracks are damaged, it may be necessary to replace them.
Case Studies: Successful Door Removals
Understanding how others have navigated this project can provide valuable insights. Here are a few case studies:Case Study 1: The Small Bedroom Transformation
A homeowner in a small apartment removed their sliding doors to replace them with bi-fold doors, which opened up the space visually. The process took about two hours and required a friend’s assistance.Case Study 2: Upgrading to Modern Doors
Another homeowner opted for modern glass sliding doors. They faced challenges with the weight but found that using a utility knife to cut through old caulking made removal easier.Expert Insights on Sliding Closet Doors
Experts recommend considering the type of sliding doors before removal. If you're unsure about the process, consulting with a professional can save you time and potential issues.Conclusion
Removing sliding closet doors is a manageable DIY project that can enhance your home’s functionality and style. By following the steps outlined in this guide, you can confidently tackle this task and enjoy the benefits of a more open and organized closet space.FAQs
- What tools do I need to remove sliding closet doors? You will need a flathead screwdriver, Phillips screwdriver, hammer, safety goggles, gloves, and a utility knife.
- How long does it take to remove sliding closet doors? Typically, it takes about 1-2 hours to remove sliding closet doors, depending on your experience level.
- Can I remove the sliding doors by myself? Yes, but having a helper can make the process easier, especially for heavy doors.
- What should I do if the doors are stuck? Check for obstructions in the track, and gently wiggle the door to help free it.
- Is it necessary to remove the track? Only if you're replacing it; otherwise, you can leave it in place.
- Can I replace the sliding doors with bi-fold doors? Yes, many homeowners choose to upgrade to bi-fold doors for better access.
- What if the tracks are damaged? You may need to replace the tracks if they are bent or broken.
- How do I ensure safety during removal? Always wear safety goggles and gloves, and clear the area of obstacles.
- Can I paint the sliding doors? Yes, you can paint sliding doors for a fresh look, but ensure you use appropriate paint.
- Do I need to hire a professional? It’s not necessary, but if you feel uncomfortable, consider hiring a handyman.
Random Reads