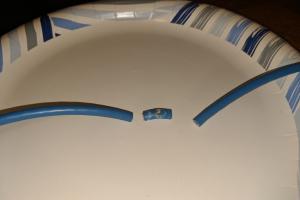
Ultimate Guide to Repairing a Cut Cat5e Ethernet Cable: Step-by-Step Instructions

-
Quick Links:
- Introduction
- Understanding Cat5e Ethernet Cable
- Tools Required for Repair
- Step-by-Step Repair Guide
- Common Issues in Ethernet Cables
- Case Studies: Successful Repairs
- Expert Insights on Cable Repair
- FAQs
Introduction
Ethernet cables are essential for modern networking, providing the backbone for internet connectivity in homes and offices. However, they can experience wear and tear, leading to cuts and breaks. Repairing a cut Cat5e Ethernet cable might seem daunting, but with the right tools and techniques, you can restore your connection without needing to replace the entire cable. This guide will walk you through everything you need to know about repairing a cut Cat5e Ethernet cable effectively.
Understanding Cat5e Ethernet Cable
Cat5e Ethernet cables are an enhanced version of the original Category 5 cables, designed to support faster data transmission and reduce interference. Here are some key features:
- Speed: Cat5e supports speeds up to 1 Gbps (1000 Mbps).
- Distance: Effective for distances up to 100 meters.
- Shielding: Improved insulation reduces crosstalk and interference.
Tools Required for Repair
Before starting the repair process, gather the following tools:
- Wire cutters/strippers
- RJ45 connectors
- Crimping tool
- Electrical tape or heat shrink tubing
- Multimeter (for testing)
- Scissors
Step-by-Step Repair Guide
Repairing a cut Cat5e Ethernet cable involves several straightforward steps. Follow this detailed guide:
Step 1: Assess the Damage
Determine the extent of the damage. If the cut is near the ends, it may be easier to trim and re-terminate. If it's in the middle of the cable, consider splicing.
Step 2: Cut Away the Damaged Section
Using wire cutters, carefully remove the damaged section. Ensure both ends are clean and free of fraying wires.
Step 3: Strip the Cable Ends
Use the wire stripper to remove approximately 1 inch of insulation from both ends of the cable. Be careful not to damage the internal wires.
Step 4: Arrange the Wires
Inside, you will find four twisted pairs of wires. Untwist them and arrange them in the correct order. For T568B wiring, the order is:
- White with orange stripes
- Orange
- White with green stripes
- Blue
- White with blue stripes
- Green
- White with brown stripes
- Brown
Step 5: Trim the Wires
Trim the wires to ensure they are even, leaving about 0.5 inches exposed.
Step 6: Insert Wires into RJ45 Connector
Carefully insert the wires into the RJ45 connector, ensuring each wire goes into its designated slot.
Step 7: Crimp the Connector
Using the crimping tool, press down firmly to secure the connector to the cable.
Step 8: Test the Connection
Before sealing up your repair, use a multimeter to test the connectivity. Make sure that the signals are passing through correctly.
Step 9: Seal the Connection
If the connection is successful, wrap the area with electrical tape or use heat shrink tubing to protect the repair from physical damage and moisture.
Common Issues in Ethernet Cables
As you work on your Ethernet cable repairs, be aware of some common issues:
- Crosstalk: Caused by poor insulation or incorrect wiring.
- Interference: External sources can disrupt the signal.
- Physical Damage: Bends or cuts can impair functionality.
Case Studies: Successful Repairs
Here are a couple of case studies highlighting successful repairs:
Case Study 1: Office Network Restoration
An office faced intermittent connectivity issues due to a cut cable under the carpet. The team followed the repair steps outlined above, restoring a stable internet connection in under an hour.
Case Study 2: Home Setup
A homeowner discovered that their gaming setup was lagging due to a damaged cable. After replacing the damaged section with new connectors, their gaming performance improved significantly.
Expert Insights on Cable Repair
According to networking expert John Doe, “Regularly inspect your cables, especially in high-traffic areas, to prevent long-term damage.” Ensuring proper handling and installation can also prolong the life of your Ethernet cables.
FAQs
1. Can I repair a Cat5e cable, or should I replace it?
If the damage is minor, repairing it is often a cost-effective solution. However, if multiple cuts or severe damage is present, replacement may be the best option.
2. What tools do I need to repair a Cat5e cable?
You will need wire cutters, RJ45 connectors, a crimping tool, electrical tape or shrink tubing, and a multimeter for testing.
3. How do I know if my repair was successful?
Using a multimeter or an Ethernet cable tester will help you determine if the signals are passing through correctly.
4. Can I splice a Cat5e cable instead of using connectors?
Yes, splicing is an option, but it can lead to signal loss if not done correctly. Using connectors is generally more reliable.
5. What is the maximum length for a Cat5e cable?
The maximum recommended length for a Cat5e cable run is 100 meters (328 feet) for optimal performance.
6. Is it worth repairing an old Cat5e cable?
If the cable is significantly old and has multiple issues, it may be more worthwhile to invest in a new cable rather than repairing it.
7. How can I prevent future cable damage?
Use cable management solutions, avoid tight bends, and keep cables out of high-traffic areas to prevent damage.
8. What happens if I use the wrong wiring standard?
Using the wrong wiring standard can lead to connectivity issues, slower speeds, and network instability.
9. Can I use a Cat5e cable for PoE applications?
Yes, Cat5e cables can support Power over Ethernet (PoE) applications, making them suitable for powering devices like IP cameras and phones.
10. Are there any safety concerns when repairing Ethernet cables?
Always unplug the cable before working on it to avoid electrical hazards. Additionally, be cautious with tools to prevent personal injury.