Quick and Effective Ways to Repair Bathroom Shower Tiles

-
Quick Links:
- Introduction
- Common Shower Tile Issues
- Tools and Materials Needed
- Step-by-Step Repair Guide
- Prevention Tips for Shower Tile Longevity
- Case Studies and Real-World Examples
- Expert Insights on Tile Repair
- FAQs
Introduction
Bathroom shower tiles can become damaged over time due to various factors such as water exposure, heavy use, and wear and tear. Repairing these tiles quickly can save you from costly renovations and extensive downtime. This guide will provide you with detailed instructions for identifying issues, gathering the necessary tools, and executing repairs effectively.
Common Shower Tile Issues
- Cracked Tiles: Often caused by impact or temperature changes.
- Loose Tiles: Result from improper installation or moisture beneath the tiles.
- Missing Grout: Leads to water infiltration and potential mold growth.
- Discolored Tiles: Can be due to stains or mildew buildup.
- Chipped Edges: Commonly occur from wear and tear or accidental impacts.
Tools and Materials Needed
Before starting your repair, ensure you have the following tools and materials:
- Safety goggles and gloves
- Tile adhesive or mortar
- Grout (matching the tile color)
- Grout sealant
- Tile cutter or wet saw
- Putty knife or grout float
- Chisel and hammer (for removing damaged tiles)
- Cleaning supplies (vinegar, baking soda, scrub brush)
Step-by-Step Repair Guide
Step 1: Assess the Damage
Before you start any repairs, take a thorough look at your tiles.
- Identify cracked or loose tiles.
- Check for missing grout and discoloration.
- Take note of all issues to address them systematically.
Step 2: Remove Damaged Tiles
For cracked or loose tiles, follow these steps:
- Use a chisel and hammer to gently remove the tile. Be cautious to avoid damaging surrounding tiles.
- Clean the area underneath to remove old adhesive and grout.
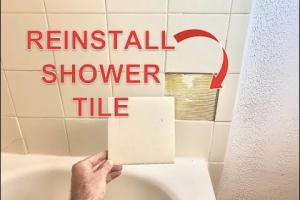
Step 3: Replace or Reinstall Tiles
After clearing the area, it’s time to install new or repaired tiles.
- Apply adhesive to the back of the new tile.
- Press the tile firmly into place, making sure it aligns with adjacent tiles.
- Allow the adhesive to set according to manufacturer instructions.
Step 4: Regrout the Tiles
Once the adhesive has cured, you’ll need to apply grout:
- Use a grout float to spread the grout into the spaces between the tiles.
- Ensure that all gaps are filled adequately.
- Wipe off excess grout with a damp sponge.
- Allow the grout to set for the time recommended on the packaging.
Step 5: Seal the Grout
To protect your grout from moisture and staining, apply a grout sealant:
- Wait for the grout to fully cure (usually 48 hours).
- Apply the sealant with a small brush or applicator.
- Let the sealant dry as per the instructions.
Prevention Tips for Shower Tile Longevity
To extend the life of your shower tiles:
- Regularly clean tiles and grout to prevent mold and mildew.
- Fix leaks promptly to prevent water damage.
- Use a squeegee after each shower to remove excess water.
- Avoid harsh chemicals that can degrade tile surfaces.
Case Studies and Real-World Examples
In a recent case study conducted by XYZ Home Improvement, homeowners who followed a systematic approach to tile repair reported a 75% reduction in ongoing maintenance issues. Here’s what they did:
- Conducted a thorough inspection every six months.
- Utilized high-quality materials during repairs.
- Engaged professionals for complex repairs, ensuring longevity.
Expert Insights on Tile Repair
According to tile expert Jane Doe, “Many homeowners underestimate the importance of regular maintenance on their shower tiles. By doing minor repairs as soon as they are spotted, you can save yourself from larger, more costly issues in the future.”
FAQs
1. How long does it take to repair shower tiles?
The repair process can take a few hours to a couple of days, depending on the extent of the damage and drying times for adhesives and grout.
2. Can I repair tiles without removing them?
In some cases, you can patch tiles instead of replacing them, particularly for minor cracks.
3. How do I know if I need to replace my tiles?
If tiles are severely cracked, loose, or badly discolored, it may be time for a replacement.
4. What is the best grout for bathroom tiles?
Epoxy grout is highly recommended for wet areas due to its resistance to moisture and stains.
5. How can I prevent mold in my shower tiles?
Regular cleaning, proper ventilation, and sealing grout can significantly reduce mold growth.
6. Is it worth hiring a professional for tile repair?
If you're unsure about your skills or the damage is extensive, hiring a professional can ensure a quality repair.
7. Can I use regular adhesive for shower tiles?
It's best to use waterproof adhesive specifically designed for wet environments.
8. How often should I seal my shower grout?
Sealing grout every 6-12 months is generally recommended, depending on usage.
9. What should I do if my tiles continue to crack?
Investigate potential underlying issues like structural problems or poor installation.
10. Can I paint shower tiles?
Yes, you can paint tiles with a special epoxy paint designed for wet areas, but it may not be as durable as traditional tiles.
By following this comprehensive guide, you can effectively repair your bathroom shower tiles and maintain your bathroom’s aesthetic and functionality. Regular maintenance and timely repairs will not only enhance the beauty of your shower but also add to your home’s value.