2 Simple Ways to Transfer Photos From Your Computer to Your iPad Effortlessly

-
Quick Links:
- Introduction
- Method 1: Using iCloud Photos
- Method 2: USB Transfer Using iTunes
- Case Studies
- Expert Insights
- FAQs
Introduction
Transferring photos from your computer to your iPad can be a daunting task, especially if you're not familiar with the process. Fortunately, there are several simple methods available that make this task straightforward and efficient. In this article, we'll explore two easy ways to transfer photos from your computer to your iPad—using iCloud Photos and a USB connection via iTunes. We'll provide detailed, step-by-step instructions, expert insights, and case studies to ensure you're well-equipped to execute these transfers with ease.
Method 1: Using iCloud Photos
iCloud Photos is a convenient way to keep your photos synced across all your Apple devices. Follow these steps to transfer your photos from your computer to your iPad using iCloud:
Step 1: Set Up iCloud on Your Computer
- Open the Settings app on your Windows PC or Mac.
- Sign in with your Apple ID (create one if you don't have it).
- Open iCloud settings and enable Photos.
Step 2: Upload Photos to iCloud
- Open File Explorer on Windows or Finder on Mac.
- Locate the photos you want to upload.
- Drag and drop them into the iCloud Drive or the Photos section.
Step 3: Access Photos on Your iPad
- Open the Photos app on your iPad.
- Ensure you're signed in to the same Apple ID.
- Your uploaded photos will automatically appear in the app.
Method 2: USB Transfer Using iTunes
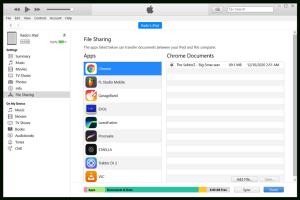
If you prefer a direct transfer method, using a USB connection via iTunes is an excellent alternative. Here’s how to do it:
Step 1: Install iTunes
- Download and install iTunes from Apple’s official website if it's not already installed on your computer.
- Connect your iPad to the computer using a USB cable.
Step 2: Sync Your Photos
- Open iTunes and select your device from the top left corner.
- Click on the Photos tab in the sidebar.
- Select Sync Photos and choose the folder containing the photos you want to transfer.
Step 3: Complete the Transfer
- Click on Apply to start the transfer.
- Once completed, disconnect your iPad and open the Photos app to view your images.
Case Studies
Many users have found success using both methods for transferring photos. For instance, a graphic designer named Sarah often uses iCloud Photos to sync her images seamlessly across devices, while a photographer named Mark prefers the USB method for large batches of photos due to its speed and reliability.
Expert Insights
According to tech experts, using iCloud offers the advantage of automatic updates and easy access from anywhere. However, for users concerned about data usage or looking to transfer large photo collections, a USB transfer remains the most efficient method.
FAQs
- Can I transfer videos using the same methods? Yes, both iCloud and USB methods support video transfers.
- What if I run out of iCloud storage? You may need to purchase additional storage or use the USB method.
- Is there a size limit for transferring photos? iCloud limits individual photo sizes to 200 MB, while USB transfers depend on available storage on your iPad.
- How long does the transfer take? It varies based on the number of photos and the method used; USB transfers are generally faster.
- Can I transfer photos from a non-Apple computer? Yes, as long as you have iTunes installed and follow the steps for USB transfer.
- Do I need to use iTunes for USB transfers? Yes, iTunes is required for managing content on your iPad via USB.
- Can I use third-party apps for transferring photos? Yes, there are many apps available that facilitate photo transfers.
- Will transferring photos delete existing ones on my iPad? No, transferring photos does not delete existing content on your iPad.
- What about transferring photos from a Mac? The steps are similar; just ensure you’re using the latest version of iTunes or Finder on macOS Catalina and later.
- Is it safe to transfer sensitive photos? Always ensure you're using secure methods and trusted software for transferring sensitive content.
Random Reads
- How to size cut secure fascia boards
- How to strip and wax a floor
- How to strip and splice wire
- How to make a castle in minecraft
- How to make a clothes line
- Mastering digital privacy permanently deleting files
- How to open 7z files
- How to oil teak furniture
- How to multiply in excel
- How to make fire in minecraft