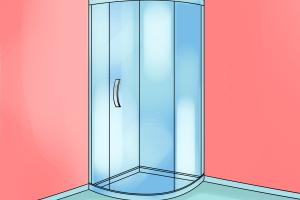
A Comprehensive Step-by-Step Guide to Installing a Shower Stall

-
Quick Links:
- Introduction
- Planning Your Shower Stall Installation
- Materials Needed
- Step-by-Step Installation Process
- Tips for a Successful Installation
- Case Studies
- Expert Insights
- FAQs
Introduction
Installing a shower stall can seem daunting, but with the right tools and guidance, it can be a rewarding DIY project. This comprehensive guide aims to simplify the process, ensuring you have everything you need to complete the installation effectively.
Planning Your Shower Stall Installation
Before diving into the installation process, it’s crucial to plan carefully. Consider the following:
- Measure Your Space: Take precise measurements of your bathroom and choose a shower stall that fits comfortably.
- Choose the Right Type: There are various types of shower stalls including prefabricated units and custom builds. Decide which suits your needs best.
- Check Local Codes: Consult local building codes to ensure compliance. Some areas have specific regulations regarding plumbing and electrical work.
Materials Needed
Gathering the right materials is essential for a smooth installation. Below is a list of items you may need:
- Shower stall kit
- Showerhead and faucet
- Plumbing pipes and fittings
- Waterproofing materials
- Sealant
- Tools: Drill, screwdriver, level, tape measure, etc.
Step-by-Step Installation Process
Follow these detailed steps to install your shower stall:
Step 1: Prepare Your Bathroom
Remove any existing fixtures and ensure the area is clean and dry. This will provide a solid foundation for the new installation.
Step 2: Install the Shower Base
Follow the manufacturer’s instructions to install the shower base. Ensure it is level and securely fastened.
Step 3: Assemble the Walls
Install the wall panels according to the product guidelines. Make sure to apply waterproofing where necessary to prevent leaks.
Step 4: Install Fixtures
Connect the plumbing for the showerhead and faucet. Ensure all connections are tight and leak-free.
Step 5: Seal and Finish
Apply sealant around edges and joints. This will help prevent water damage and mold growth.
Tips for a Successful Installation
- Take Your Time: Rushing can lead to mistakes. Take the time you need for each step.
- Double Check Measurements: Always measure twice before cutting materials.
- Ask for Help: Don’t hesitate to enlist a friend or family member for assistance.
Case Studies
Let’s look at a couple of real-world examples to illustrate the installation process:
Case Study 1: Small Apartment Installation
In a small apartment in New York, a couple opted for a prefabricated shower stall. They measured their space, chose a compact model, and followed the installation steps with modifications to fit their plumbing setup.
Case Study 2: Custom Build in a Family Home
A family in California decided to build a custom shower stall to accommodate their needs. They hired a contractor for plumbing but managed the tile installation themselves, resulting in a beautiful and functional space.
Expert Insights
Industry experts recommend investing in quality materials to ensure longevity. According to a study by the National Kitchen and Bath Association, well-planned renovations can increase home value significantly.
FAQs
1. How long does it take to install a shower stall?
The installation process can take anywhere from a few hours to a couple of days, depending on your experience and the complexity of the project.
2. Do I need a permit to install a shower stall?
It depends on local regulations. Always check with your local building department before starting any plumbing work.
3. Can I install a shower stall by myself?
Yes, many homeowners successfully install shower stalls on their own. However, if you’re unsure about plumbing, consider hiring a professional.
4. What tools do I need for the installation?
Common tools include a drill, level, tape measure, and basic hand tools. Make sure to have everything ready before starting.
5. How can I prevent leaks in my shower stall?
Proper sealing and waterproofing are key. Use high-quality sealant and ensure all connections are tightly fitted.
6. What type of shower stall is best for small bathrooms?
Prefabricated corner units are often ideal for small spaces as they maximize available area.
7. Can I replace an old shower stall with a new one?
Yes, replacing an old shower stall is a common renovation project. Ensure you follow the proper disassembly and installation steps.
8. What maintenance is required after installation?
Regular cleaning and periodic checks for leaks are essential to maintain the shower stall in good condition.
9. What are the most common mistakes during installation?
Common mistakes include improper sealing, incorrect measurements, and neglecting local codes.
10. Is it worth it to install a custom shower stall?
Custom shower stalls can be tailored to your needs and preferences, often resulting in better functionality and aesthetics.
Random Reads
- Unlocking the lost in binding of isaac rebirth
- How to download xbox 360 game
- How to download videos safely
- How to edit buildings in fortnite
- How to edit audio iphone
- Create txt file mac
- Create text columns adobe illustrator
- How to clean box fan
- How to clean black composite sink
- 4 simple ways to configure your home router