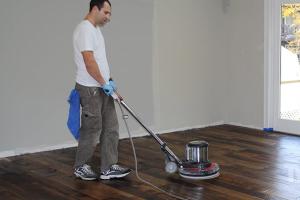
Ultimate Guide: How to Buff Floors for a Gleaming Finish

-
Quick Links:
- Introduction
- Understanding Different Floor Types
- Tools and Materials Needed
- Step-by-Step Guide to Buffing Floors
- Maintaining Your Buffed Floors
- Common Mistakes to Avoid
- Case Studies and Real-World Examples
- Expert Insights
- FAQs
Introduction
Buffing floors can transform dull and scratched surfaces into vibrant and shiny floors. Whether you have hardwood, tile, or laminate, knowing how to buff your floors correctly can extend their life and enhance your home's aesthetic appeal. This guide will provide you with everything you need to know about buffing floors, including techniques, tools, and maintenance tips.Understanding Different Floor Types
Before you start buffing, it's essential to understand the type of flooring you have. Different materials require different buffing techniques.Hardwood Floors
Hardwood floors are durable and can be buffed to restore their shine. They can be sanded and refinished, but regular buffing helps maintain their luster.Laminate Floors
Laminate floors don't require heavy buffing but can benefit from light polishing to remove scratches and enhance shine.Tile Floors
Tile floors can be buffed, but special care must be taken with grout lines and the type of tile.Tools and Materials Needed
To buff your floors effectively, you'll need the right tools and materials. Here's a comprehensive list:- Floor buffer/polisher
- Microfiber mop
- Floor cleaner suitable for your flooring type
- Buffing pads (soft and abrasive)
- Protective gear (gloves, goggles)
- Optional: Wax or polish for added shine
Step-by-Step Guide to Buffing Floors
Now that you have your tools and understanding of the floor types, let’s dive into the step-by-step process of buffing floors.Step 1: Prepare the Area
- Clear the area of furniture and rugs. - Sweep or vacuum the floor to remove dust and debris.Step 2: Choose the Right Buffing Pad
- Select a soft pad for polishing and a more abrasive pad for deeper cleaning.Step 3: Apply Floor Cleaner
- Use a cleaner appropriate for your floor type. - Apply it evenly using a microfiber mop.Step 4: Buff the Floor
- Attach the buffing pad to the machine. - Start at one corner and work your way across the room in a circular motion. - Keep the buffer moving to avoid uneven patches or burns.Step 5: Inspect and Repeat
- After the first pass, inspect the floor. - Repeat the buffing if necessary, especially for high-traffic areas.Step 6: Final Touches
- If desired, apply a layer of wax or polish for additional shine. - Allow it to dry before walking on the floor.Maintaining Your Buffed Floors
To keep your floors looking their best, regular maintenance is key. Here are some tips: - Regularly sweep or vacuum to remove dirt and debris. - Clean spills immediately to prevent stains. - Buff floors every 6-12 months, or as needed.Common Mistakes to Avoid
Even with the best intentions, mistakes can happen. Here are some common pitfalls to avoid: - Using the wrong cleaning products that can damage your floor. - Not properly preparing the floor before buffing. - Over-buffing, which can cause damage.Case Studies and Real-World Examples
Consider the case of a family who neglected their hardwood floors for years. After a thorough buffing, they reported a 50% increase in light reflection in their living room, drastically improving the overall ambiance of their home. Another example involves a commercial space that experienced heavy foot traffic. Implementing a regular buffing routine every three months not only improved the aesthetic but also extended the lifespan of the flooring, saving on costly renovations.Expert Insights
We consulted flooring experts who emphasized the importance of using the right tools and techniques. According to flooring specialist John Smith, “Investing in a quality floor buffer can make a world of difference in achieving that professional sheen.”FAQs
- How often should I buff my floors? It’s recommended to buff hardwood floors every 6-12 months, depending on traffic.
- Can I buff laminate floors? Yes, but use a soft pad and avoid excessive moisture.
- What type of cleaner should I use? Use a cleaner that is specifically formulated for your floor type.
- Can I buff floors without a machine? Yes, you can use manual buffing pads, but it requires more effort.
- Are there professional buffing services? Yes, many flooring companies offer buffing services for both residential and commercial spaces.
- What if my floors are heavily scratched? You may need to sand and refinish the floors before buffing.
- Is buffing safe for all floor types? Most floor types can be buffed, but check the manufacturer's recommendations.
- How long does the buffing process take? Depending on the area, it can take a couple of hours to complete.
- Can buffing remove stains? Buffing can help reduce the appearance of some stains but may not remove them entirely.
- Do I need to wax my floors after buffing? Waxing is optional but can enhance shine and protection.
Random Reads
- How to install a condensate pump
- How to install a closet rod
- Simple methods insert pdf word document
- How to find catch mewtwo pokemon heartgold soulsilver
- Download wikipedia page as pdf
- How to use image as windows icon
- How to use home wiring tv radio antenna
- How to mute yourself during a zoom call
- Sync outlook with gmail
- Sync outlook calendar ios