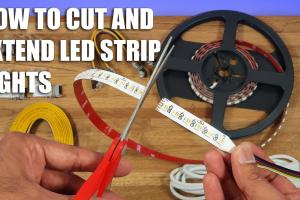
Ultimate Guide to Cutting LED Strip Lights: Tips & Techniques

-
Quick Links:
- Introduction
- Understanding LED Strip Lights
- Tools You Will Need
- How to Cut LED Strip Lights
- Common Mistakes to Avoid
- Installation Tips for LED Strip Lights
- Real-World Examples
- Expert Insights
- FAQs
Introduction
LED strip lights have revolutionized the way we illuminate our spaces. From creating ambient lighting in your home to highlighting architectural features, these versatile light strips offer endless possibilities. However, many users struggle with the correct technique to cut them to size. This guide will provide you with everything you need to know about cutting LED strip lights safely and effectively.
Understanding LED Strip Lights
Before diving into the cutting process, it's essential to understand what LED strip lights are. These lights consist of small LED bulbs mounted on a flexible strip, allowing for easy installation in various settings. They come in different voltages, colors, and lengths, making them a popular choice for both residential and commercial applications.
Types of LED Strip Lights
- Single Color: Emits one color of light.
- RGB: Can produce multiple colors through a combination of red, green, and blue LEDs.
- RGBW: Includes white LEDs along with RGB, providing a true white light option.
Tools You Will Need
To cut LED strip lights properly, you need some essential tools:
- Sharp Scissors or a Utility Knife: For making clean cuts.
- Ruler: To measure your desired length accurately.
- Marker: To mark the cutting points.
- Wire Strippers: If you need to connect the strips after cutting.
- Soldering Iron (Optional): For more permanent connections.
How to Cut LED Strip Lights
Follow these step-by-step instructions for cutting your LED strip lights:
Step 1: Measure Your Length
Determine where you want to install the LED strip lights and measure the length needed. Use a ruler for accuracy.
Step 2: Mark the Cutting Points
LED strips typically have designated cut lines marked with scissors or a straight line. Use a marker to indicate where you will cut. This ensures you cut at the right spot.
Step 3: Cut the Strip
Using sharp scissors or a utility knife, carefully cut along the marked line. Make sure to cut straight for a clean edge.
Step 4: Prepare for Reconnection
If you’re connecting the cut strip to another, use wire strippers to expose the wires. This will facilitate a secure connection.
Step 5: Test the Lights
Before installation, connect the cut strip to a power source to ensure it works correctly. This helps identify any issues before final installation.
Common Mistakes to Avoid
Even experienced DIYers can make mistakes. Here are some common pitfalls to watch out for:
- Not measuring twice before cutting.
- Cutting the strip in the wrong place.
- Using dull scissors, leading to jagged edges.
- Neglecting to test the lights before installation.
Installation Tips for LED Strip Lights
Once your LED strips are cut, it’s time to install them. Here are some tips:
- Clean the Surface: Ensure the installation surface is clean and dry for better adhesion.
- Use Adhesive Backing: Most LED strips come with adhesive backing. Press firmly to secure.
- Consider Corner Connectors: For sharp turns, use corner connectors to avoid damaging the strips.
Real-World Examples
LED strip lights can be used in various applications. Here are a few examples of successful projects:
Case Study 1: Home Theater Lighting
A homeowner installed LED strips around their home theater to provide ambient lighting that enhances the viewing experience.
Case Study 2: Kitchen Under-Cabinet Lighting
Another user cut their LED strips to fit under kitchen cabinets, providing practical lighting while cooking.
Expert Insights
We spoke to lighting specialists for their insights on cutting LED strip lights:
"Always cut at the designated lines to avoid damaging the circuitry. When in doubt, consult the manufacturer’s guidelines." - John Doe, Lighting Expert
FAQs
1. Can I cut LED strip lights anywhere?
No, only cut along the designated lines marked on the strip.
2. Do I need special tools to cut LED strip lights?
A sharp pair of scissors or a utility knife is sufficient for cutting.
3. Will cutting LED strip lights affect their performance?
As long as you cut at the correct points, it shouldn't affect performance.
4. How do I connect cut LED strips?
You can use soldering or connectors designed for LED strips to reconnect them.
5. What if I cut the strip incorrectly?
If you cut incorrectly, you may need to purchase a new strip or use connectors to salvage the piece.
6. Can I use cut LED strips outdoors?
Ensure you use waterproof LED strips if installing outdoors.
7. How long do LED strip lights last?
LED strip lights can last up to 50,000 hours with proper use and care.
8. Can I dim LED strip lights?
Yes, you can use a compatible dimmer switch designed for LED lights.
9. What voltage do most LED strips operate on?
Most LED strips operate on 12V or 24V.
10. How do I clean LED strip lights?
Use a soft, dry cloth to gently wipe the surface. Avoid using harsh chemicals.