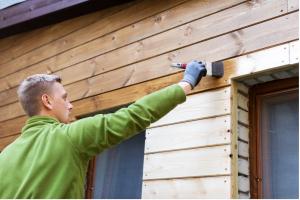
Ultimate Guide to Preparing Exterior Wood for Painting: Step-by-Step Techniques

-
Quick Links:
- Understanding Different Types of Wood
- Importance of Preparing Wood for Painting
- Tools and Materials Needed
- Step-by-Step Preparation Process
- Common Mistakes to Avoid
- Case Studies and Real-World Examples
- Expert Insights and Tips
- FAQs
Understanding Different Types of Wood
Before you begin the painting process, it's crucial to understand the type of wood you are working with. Different woods have unique properties that can affect how they absorb paint and last over time.
Softwoods vs. Hardwoods
Softwoods, such as pine and cedar, are generally easier to work with and less expensive. Hardwoods, like oak and mahogany, provide durability but can be more challenging to prepare and paint.
Importance of Preparing Wood for Painting
Proper preparation of exterior wood is essential for several reasons:
- Improved adhesion of paint.
- Prevention of peeling and chipping.
- Enhanced aesthetics and finish quality.
- Extended lifespan of the paint job.
Tools and Materials Needed
Gathering the right tools and materials is vital for a successful wood preparation process. Here’s a comprehensive list:
- Sander (orbital or hand sander)
- Sandpaper (various grits)
- Paint scraper
- Wire brush
- Wood filler
- Primer
- Protective gear (gloves, mask, goggles)
- Drop cloths or tarps
Step-by-Step Preparation Process
1. Clean the Surface
Start by cleaning the wood surface to remove dirt, mildew, and old paint. Use a pressure washer or a scrub brush with a cleaning solution designed for wood.
2. Inspect for Damage
Look for cracks, splits, or signs of rot. Address these issues by replacing damaged boards or using wood filler for minor imperfections.
3. Sand the Wood
Sanding is a crucial step in preparing exterior wood. Use coarse sandpaper (60-80 grit) to remove old paint and smooth rough areas. Follow up with finer sandpaper (120-220 grit) for a smoother finish.
4. Remove Dust and Debris
After sanding, thoroughly clean the surface again to remove all dust and debris. A vacuum or tack cloth can be very effective here.
5. Apply Primer
Using a high-quality primer is essential for sealing the wood and improving paint adhesion. Choose a primer suitable for exterior use and apply it evenly.
6. Final Sanding
Once the primer is dry, lightly sand the surface again with fine sandpaper to ensure a smooth finish before painting.
Common Mistakes to Avoid
To ensure the best results, avoid these common pitfalls:
- Skipping the cleaning step.
- Not allowing sufficient drying time for primer.
- Using low-quality paint or primer.
- Neglecting to sand between coats.
Case Studies and Real-World Examples
Let's analyze a couple of case studies where proper wood preparation led to outstanding results:
Case Study 1: Cedar Deck Restoration
A homeowner restored a weathered cedar deck by following the preparation steps outlined earlier. The deck's lifespan was extended by five years due to proper cleaning and priming.
Case Study 2: Exterior Wood Siding
In another scenario, a family repainted their wood siding after thoroughly preparing it. They reported minimal peeling and chipping two years later, thanks to the detailed prep work.
Expert Insights and Tips
According to painting professionals, the secret to a long-lasting paint job lies in meticulous preparation. Here are some expert tips:
- Always choose products that are specifically designed for exterior applications.
- Consider weather conditions when preparing and painting.
- Invest time in preparation; it pays off in the long run.
FAQs
1. How long should I wait after cleaning before painting?
It's best to wait at least 24 hours to ensure the surface is completely dry.
2. Can I paint over old paint?
Yes, but you must sand and prime the surface to ensure the new paint adheres properly.
3. What type of primer should I use?
Choose a primer specifically formulated for exterior wood surfaces.
4. Is it necessary to sand between coats of paint?
Yes, this helps achieve a smoother finish and better adhesion of subsequent coats.
5. How can I tell if wood is rotting?
Look for soft, discolored areas or visible decay. A screwdriver can help test for softness.
6. What is the best weather for exterior painting?
Ideally, paint when temperatures are between 50°F and 85°F, and avoid rainy or excessively humid conditions.
7. Should I use oil-based or water-based paint?
Both have their benefits; oil-based paints are more durable, while water-based paints are easier to clean and apply.
8. How often should I repaint exterior wood?
Typically, every 5-7 years, but this can vary based on climate and wood type.
9. Can I use a paint sprayer for exterior wood?
Yes, a paint sprayer can provide a smooth finish but requires careful preparation and masking.
10. What should I do if I notice peeling paint?
Remove the peeling paint, sand the area, and repaint with a suitable primer and paint.
By following these guidelines and understanding the importance of wood preparation, you'll ensure a successful and long-lasting exterior paint job. Happy painting!
Random Reads
- Reply to specific messages whatsapp
- How to repair rotted wood
- How to repair league of legends
- Simple steps to zoom out in adobe illustrator
- How to hide files in windows using cmd
- How to hide icon names desktop
- How to use a level
- How to use a proxy
- How to use a kindle paperwhite
- How to install a chair rail