Ultimate Guide to Reimaging a Computer: Step-by-Step Instructions for Beginners

-
Quick Links:
- Introduction
- What is Reimaging a Computer?
- When to Reimage a Computer?
- Preparation Steps Before Reimaging
- How to Reimage a Computer
- Common Issues During Reimaging
- Case Studies and Examples
- Expert Insights on Reimaging
- FAQs
Introduction
Reimaging a computer can seem like a daunting task, especially if you're not tech-savvy. However, understanding the process can save you time and money in the long run. In this guide, we'll walk you through everything you need to know about reimaging a computer, from preparation to execution, and even troubleshooting common issues.
What is Reimaging a Computer?
Reimaging a computer involves restoring a computer's operating system to its original state, typically by using an image file that contains the operating system and necessary software. This process is often used to troubleshoot issues, remove malware, or reset a computer to its factory settings.
When to Reimage a Computer?
- Severe system performance issues
- Persistent malware or virus infections
- Frequent crashes or blue screens
- Corrupted operating system files
- Preparation for sale or donation
Preparation Steps Before Reimaging
Before you begin the reimaging process, there are several critical steps to take to ensure a smooth experience:
- Backup Your Data: Always back up your important files and documents. Use external drives or cloud storage solutions.
- Gather Necessary Tools: Ensure you have the required installation media (USB/DVD) and product keys if needed.
- Check System Requirements: Verify that your hardware meets the requirements for the new operating system version.
- Document Settings: Take note of any custom settings or installed applications that you may want to restore later.
How to Reimage a Computer
Step 1: Boot from Installation Media
Insert your installation media into the computer and restart it. You may need to change the boot order in BIOS/UEFI settings to boot from USB or DVD.
Step 2: Initiate the Installation Process
Follow the on-screen prompts to begin the installation process. Choose the appropriate options for your needs.
Step 3: Select Custom Installation
When prompted, select the custom installation option. This allows you to choose where to install the operating system.
Step 4: Format the Drive (If Necessary)
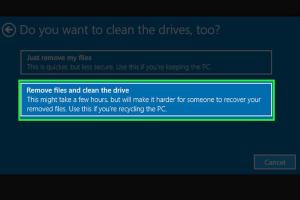
If you want to completely wipe the hard drive, you can format it. Be cautious, as this will delete all data on the drive.
Step 5: Follow the Remaining Prompts
Continue following the prompts to complete the installation. This may take some time, so be patient.
Step 6: Install Drivers and Updates
Once the installation is complete, install necessary drivers and updates to ensure your system functions properly.
Common Issues During Reimaging
During the reimaging process, you may encounter various issues:
- Installation Fails: Ensure the installation media is intact and not corrupt.
- Drivers Missing: Download drivers from the manufacturer's website if they are not included.
- Data Loss: Always backup data to prevent loss during the reimaging process.
Case Studies and Examples
Example 1: Reimaging for Performance Issues
A user experiencing significant slowdowns reimaged their computer, resulting in improved performance and faster boot times.
Example 2: Malware Recovery
After a severe malware attack, a user reimaged their system to remove all traces of the infection, restoring their computer to a clean state.
Expert Insights on Reimaging
According to IT professionals, regularly reimaging a computer can help maintain optimal performance and security. Experts recommend keeping installation media updated to ensure compatibility with the latest hardware and software.
FAQs
Here are some frequently asked questions about reimaging a computer:
- 1. What should I do before reimaging my computer? Backup all important data and gather necessary installation media.
- 2. Can I recover data after reimaging? If you didn't back up data before reimaging, recovery options may be limited.
- 3. How long does the reimaging process take? It typically takes 30 minutes to a few hours, depending on the system.
- 4. Will I lose all my applications? Yes, reimaging typically removes all applications, so you'll need to reinstall them.
- 5. Is reimaging the same as resetting my computer? No, reimaging restores the entire operating system, while resetting may keep some user data.
- 6. Do I need a product key to reimage? Yes, unless you are using a version that does not require activation.
- 7. Can I reimage a Mac? Yes, the process is similar but uses macOS recovery options.
- 8. What if I don't have installation media? You can create one using official tools provided by your operating system vendor.
- 9. Does reimaging fix hardware issues? No, reimaging addresses software problems but not hardware failures.
- 10. Should I reimage my computer regularly? It depends on usage; businesses may require regular reimaging, while home users may not.
Random Reads
- How to install a new light fixture
- How to install a modem
- How to see iphone call history
- How to kill herobrine minecraft
- How to trim video samsung galaxy
- How to remove hacker from your iphone
- How to remove glue from wood
- Mute group text android phone
- Mute keyboard sounds
- How to make temporary nameplate