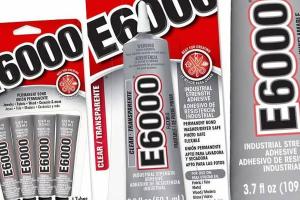
Ultimate Guide to Removing E6000 Glue: Effective Methods and Tips

-
Quick Links:
- Introduction
- Understanding E6000 Glue
- Safety Precautions
- Materials Needed
- Step-by-Step Methods to Remove E6000 Glue
- Case Studies
- Expert Insights
- Troubleshooting
- Conclusion
- FAQs
Introduction
E6000 glue is a popular industrial-strength adhesive known for its versatility and durability. It's commonly used in various projects, from crafting to automotive repairs. However, removing this strong adhesive can be a daunting task. In this guide, we will explore effective methods for removing E6000 glue, ensuring you can tackle any sticky situation with confidence.
Understanding E6000 Glue
E6000 is an epoxy-based adhesive widely used due to its strong bond, flexibility, and resistance to water and chemicals. It is often favored for crafts, jewelry making, and home repairs. Understanding its chemical composition can help you choose the right method for removal.
The Composition of E6000 Glue
This adhesive is primarily made of a combination of resins and solvents, which contribute to its strong bonding properties. The main components include:
- Polyurethane resins
- Solvent-based compounds
- Additives for flexibility and durability
Safety Precautions
Before attempting to remove E6000 glue, it’s essential to take safety precautions to protect yourself and your workspace:
- Work in a well-ventilated area.
- Wear gloves to protect your skin.
- Use safety goggles to shield your eyes.
- Keep away from open flames, as E6000 is flammable.
Materials Needed
Gather the following materials to effectively remove E6000 glue:
- Acetone or nail polish remover
- Rubbing alcohol (isopropyl alcohol)
- Plastic scraper or putty knife
- Soft cloth or paper towels
- Heat gun or hairdryer
- Soap and water for cleanup
Step-by-Step Methods to Remove E6000 Glue
Here are several effective methods to remove E6000 glue, depending on the surface and situation:
Method 1: Using Acetone
- Soak a cotton ball or cloth in acetone.
- Place it directly on the glue and let it sit for 5-10 minutes.
- Gently scrape with a plastic scraper to lift the glue.
- Wipe the area with a clean cloth and soapy water.
Method 2: Rubbing Alcohol
- Apply rubbing alcohol to a cloth.
- Press the cloth against the glue and allow it to absorb for 10 minutes.
- Scrape off the glue with a plastic scraper.
- Clean the area with soap and water.
Method 3: Heat Application
- Use a heat gun or hairdryer to warm the glue for 30 seconds.
- Once the glue softens, use a plastic scraper to lift it off.
- Wipe away residue with a damp cloth.
Method 4: Commercial Adhesive Removers
If household methods fail, consider using a commercial adhesive remover. Follow the manufacturer’s instructions for application. Ensure it’s suitable for the surface you’re treating.
Case Studies
Case Study 1: Crafting Projects
A group of craft enthusiasts shared their experiences removing E6000 glue from various surfaces. They experimented with acetone, reporting success on glass and metal surfaces but found it less effective on porous materials.
Case Study 2: Automotive Repairs
An automotive technician shared insights on removing E6000 adhesive from car interiors. He utilized heat application combined with a specialized adhesive remover to ensure no damage to the upholstery.
Expert Insights
We consulted with adhesive specialists to gather tips for effective E6000 glue removal:
“Always test your removal method on a small, inconspicuous area first. This will help you avoid damaging the surface.”