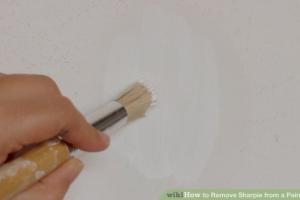
Effortless Techniques for Removing Sharpie from Painted Walls

-
Quick Links:
- Introduction
- Understanding Sharpie Ink
- Safety First: Precautions to Consider
- Step-by-Step Removal Techniques
- Home Remedies for Sharpie Removal
- Commercial Products for Stain Removal
- Case Studies and Real-World Examples
- Expert Insights on Paint Care
- Preventive Measures: Keeping Your Walls Clean
- FAQs
Introduction
Sharpie markers are a favorite among artists, students, and DIY enthusiasts for their ability to create bold, vibrant lines. However, when these markers end up on painted walls, they can cause distress. Whether it's a child's art project or an accidental slip of the hand, removing Sharpie stains from painted walls can seem daunting. In this comprehensive guide, we'll explore effective techniques for tackling this common household issue.
Understanding Sharpie Ink
Sharpie ink is primarily made from a blend of dyes and solvents, which are designed for permanence. This characteristic makes it especially challenging to remove from surfaces like painted walls. Understanding the composition of the ink can help in selecting the most effective removal method.
Safety First: Precautions to Consider
Before diving into removal techniques, it's essential to prioritize safety. Here are some precautions to take:
- Work in a well-ventilated area to avoid inhaling fumes from cleaning products.
- Wear gloves to protect your hands from irritants.
- Test any removal method on an inconspicuous area first to ensure it won't damage the paint.
Step-by-Step Removal Techniques
There are several effective methods to remove Sharpie ink from painted walls. Below we outline a step-by-step approach for each technique:
1. Rubbing Alcohol Method
- Soak a cotton ball or cloth in rubbing alcohol.
- Gently dab the stained area without rubbing.
- Continue dabbing until the stain begins to lift.
- Wipe the area with a clean, damp cloth to remove any residue.
2. Baking Soda Paste
- Mix equal parts baking soda and water to form a paste.
- Apply the paste to the stained area using a soft cloth.
- Gently scrub in a circular motion.
- Wipe clean with a damp cloth.
3. Vinegar Solution
- Mix one part vinegar with one part water in a spray bottle.
- Spray the solution onto the stain.
- Allow it to sit for a few minutes, then gently wipe with a cloth.
Home Remedies for Sharpie Removal
In addition to the methods mentioned above, several other home remedies can effectively remove Sharpie from painted walls:
- Toothpaste: Non-gel toothpaste can be applied directly to the stain and gently scrubbed with a cloth before wiping clean.
- Hand Sanitizer: The alcohol in hand sanitizer can help lift the stain. Apply it to a cloth and dab the area.
- Makeup Remover: Oil-based makeup removers can also be effective. Apply to a cotton pad and gently dab the stain.
Commercial Products for Stain Removal
If home remedies fail, consider using commercial products specifically designed for ink removal. Some popular options include:
- Goof Off: A powerful solvent that can remove tough stains.
- Krud Kutter: An effective cleaner for various surfaces.
- WD-40: While primarily a lubricant, it can also help with ink stains.
Case Studies and Real-World Examples
Several homeowners have successfully removed Sharpie ink using various techniques. For example, one family found that a simple paste of baking soda and water completely erased a large Sharpie stain after their child used the wall as a canvas. Another homeowner swore by the effectiveness of vinegar, stating it worked wonders without damaging their painted walls.
Expert Insights on Paint Care
Experts recommend regular maintenance and protective measures to keep painted walls looking pristine. Applying a clear coat can help resist stains and make cleanup easier. Consulting with a professional painter can also provide tailored advice based on the specific paint type used in your home.
Preventive Measures: Keeping Your Walls Clean
To prevent future incidents, consider the following tips:
- Designate a specific area for children to draw to keep walls safe.
- Use washable markers for creative activities.
- Keep cleaning supplies handy for quick cleanups.
FAQs
1. Can Sharpie stains be removed from all types of paint?
Most methods work on washable and semi-gloss painted surfaces, but always test in an inconspicuous area first.
2. What if the stain doesn’t come out?
Repeated applications of the cleaning method may be necessary. If it persists, consider consulting a professional cleaner.
3. Are there any methods to avoid that can damage the wall?
Avoid using abrasive scrubbing pads or harsh chemicals that could strip the paint.
4. Is it safe to use bleach on painted walls?
It is generally not recommended as it can discolor or damage the paint.
5. How can I protect my walls from future stains?
Consider using a protective clear coat over your paint to provide an extra layer of defense.
6. What should I do if I accidentally use the wrong cleaning method?
Stop immediately and assess any damage. You may need to repaint the area if there is significant damage.
7. Can I use essential oils for cleaning?
Some essential oils can help lift stains, but they are less effective than alcohol-based solutions.
8. Will using a hairdryer help with removal?
Heat can help lift some stains, but use caution to avoid damaging the paint.
9. How often should I clean my painted walls?
Regular cleaning every few months can help maintain the appearance and longevity of your paint.
10. What’s the best way to remove Sharpie from textured walls?
Using a soft-bristled brush with your chosen cleaning method may help reach into the crevices of textured surfaces.
In conclusion, removing Sharpie from painted walls may seem challenging, but with the right approach and techniques, it can be effectively managed. By following these tips and tricks, you can restore the beauty of your walls and maintain a clean, welcoming home.
For more information on home cleaning solutions, consider visiting Good Housekeeping or Merry Maids.
Random Reads