Ultimate Guide to Repairing Your Delta Brand Kitchen Faucet: DIY Tips & Tricks

-
Quick Links:
- Introduction
- Understanding Delta Faucets
- Common Problems with Delta Faucets
- Tools and Materials Needed
- Step-by-Step Repair Guide
- Preventive Maintenance Tips
- Case Studies
- Expert Insights
- FAQs
- Conclusion
Introduction
Delta brand kitchen faucets are renowned for their durability and performance. However, like any plumbing fixture, they may encounter issues over time. This comprehensive guide will walk you through the process of repairing your Delta kitchen faucet, ensuring that you can tackle common problems with confidence and ease.
Understanding Delta Faucets
Delta faucets use innovative technologies such as DIAMOND™ Seal Technology and MagnaTite® Docking to enhance performance and longevity. Understanding how these features work can help you diagnose issues more effectively.
DIAMOND™ Seal Technology
This technology uses a diamond-embedded ceramic disc, which significantly reduces leaks and ensures smooth operation.
MagnaTite® Docking
This feature employs magnets to secure the faucet's spray head in place, preventing drooping or misalignment.
Common Problems with Delta Faucets
- Leaking Faucet: A frequent issue that may arise from worn-out washers or seals.
- Low Water Pressure: This can be caused by mineral buildup or clogging.
- Stiff Handle: Often due to mineral deposits or lack of lubrication.
- Spray Head Malfunction: The spray head may not function properly if it is clogged or damaged.
Tools and Materials Needed
Before you start your repair, gather the following tools and materials:
- Adjustable wrench
- Screwdriver (flat and Phillips)
- Plumber's grease
- Replacement parts (washers, O-rings, cartridges)
- Cleaning solution (vinegar or CLR for mineral buildup)
- Towel or bucket (to catch water)
Step-by-Step Repair Guide
Follow these detailed steps to repair your Delta kitchen faucet:
Step 1: Turn Off the Water Supply
Locate the water supply valves under your sink and turn them off. Open the faucet to drain any remaining water.
Step 2: Disassemble the Faucet
Remove the handle by unscrewing any visible screws. If the handle is stuck, gently wiggle it while pulling upwards.
Step 3: Inspect the Internal Components
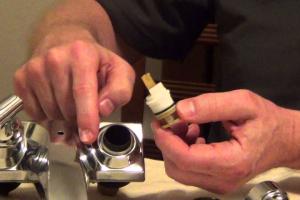
Look for signs of wear on the O-rings, washers, and cartridges. If any are damaged, replace them with new parts.
Step 4: Clean the Faucet
Use vinegar or a commercial cleaning solution to remove any mineral buildup. Rinse thoroughly before reassembling.
Step 5: Reassemble the Faucet
Carefully reassemble the faucet in reverse order. Ensure all screws are tightened, but be cautious not to overtighten.
Step 6: Turn On the Water Supply
Once reassembled, turn the water supply back on and test the faucet for leaks and proper functionality.
Preventive Maintenance Tips
To prolong the life of your Delta kitchen faucet:
- Regularly clean the faucet and aerator to prevent mineral buildup.
- Check for leaks periodically and address minor issues before they escalate.
- Use plumber's grease on moving parts to enhance performance.
Case Studies
Here are some real-world examples of common Delta faucet issues and their resolutions:
Case Study 1: Leaking Faucet
A homeowner noticed water pooling around the base of their Delta faucet. After inspection, they found that the O-ring was worn out. Replacing the O-ring resolved the issue, and they followed up with preventive maintenance tips to avoid future leaks.
Case Study 2: Low Water Pressure
A family experienced decreased water pressure from their faucet. Upon cleaning the aerator, they discovered it was clogged with mineral deposits, restoring normal flow within minutes.
Expert Insights
According to plumbing experts, regular maintenance is key to preventing major faucet issues. In a survey conducted by the Plumbing Manufacturers International, 70% of homeowners reported that routine checks could have saved them from costly repairs.
FAQs
- How do I know if my Delta faucet needs repair? Signs include leaking, low water pressure, or a stiff handle.
- Can I repair my Delta faucet myself? Yes, most repairs can be done with basic tools and a little patience.
- What parts should I keep on hand? Replacement O-rings, washers, and cartridges are useful for common repairs.
- How often should I clean my faucet? Cleaning every six months is recommended to prevent mineral buildup.
- Are Delta faucet parts universal? No, Delta has specific parts for different models; always check compatibility.
- What is the warranty on Delta faucets? Delta offers a limited lifetime warranty on their faucets for original owners.
- How do I remove mineral deposits from my faucet? Soak parts in vinegar or use a commercial descaler.
- Is it worth calling a plumber for faucet repairs? For complex issues or if you're uncomfortable with DIY, a plumber can provide professional assistance.
- Can I replace a Delta faucet cartridge myself? Yes, replacing the cartridge is a straightforward process that most homeowners can manage.
- What if my faucet still leaks after replacing parts? Check for misalignment or incorrect installation of parts.
Conclusion
Repairing a Delta kitchen faucet may seem daunting, but with the right tools and guidance, you can handle it yourself. By understanding the common problems and following this comprehensive guide, you'll not only save money but also gain confidence in your DIY plumbing skills. Regular maintenance and timely repairs will ensure your Delta faucet continues to perform at its best for years to come.
For further reading and resources, consider visiting the following authoritative sites:
Random Reads
- How to turn on bluetooth iphone android
- Simple ways to clean laptop keyboard keys
- Simple ways to find lost apple pencil
- Recover overwritten files
- Redeem steam wallet code
- Reinstall os x lion
- Ultimate guide to laptop care
- Ultimate guide proper cell phone care
- Simple ways to get electric claw in blox fruits
- Mastering gps navigation troubleshooting