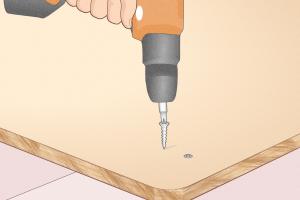
Mastering Chipboard Repair: The Ultimate Guide to Fixing Screw Holes

-
Quick Links:
- Introduction
- Understanding Chipboard
- Common Causes of Screw Hole Damage
- Tools and Materials Required
- Step-by-Step Guide to Repair Screw Holes
- Case Study: Successful Chipboard Repairs
- Expert Tips for Long-Lasting Repairs
- Maintenance and Prevention
- Conclusion
- FAQs
Introduction
Chipboard, also known as particle board, is a versatile material widely used in furniture and home construction. However, its susceptibility to damage, particularly screw holes, can be a headache for DIY enthusiasts and homeowners alike. This comprehensive guide will walk you through the process of repairing screw holes in chipboard, ensuring your furniture remains sturdy and aesthetically pleasing.
Understanding Chipboard
Chipboard is made from wood chips, sawmill shavings, or even sawdust, which are glued together and compressed. This material is popular due to its affordability and ease of use. However, it has a few drawbacks, including its ability to easily crumble when screws are over-tightened or removed.
Common Causes of Screw Hole Damage
- Over-tightening screws.
- Frequent assembly and disassembly.
- Moisture exposure, which weakens the integrity of the chipboard.
- Excessive weight placed on furniture, leading to stress on screw holes.
Tools and Materials Required
Before starting your repair, gather the following tools and materials:
- Wood glue or adhesive putty.
- Wood filler or epoxy.
- Sandpaper (medium and fine grit).
- Putty knife or a scraper.
- Drill with the appropriate bits.
- Clamps (for larger repairs).
- Paint or touch-up marker (for finishing touches).
Step-by-Step Guide to Repair Screw Holes
Follow these detailed steps to repair screw holes in your chipboard furniture:
Step 1: Assess the Damage
Begin by examining the extent of the damage. If the hole is small, it can typically be filled with wood filler. Larger holes may require more extensive repair techniques.
Step 2: Clean the Area
Remove any loose debris or rough edges around the hole. A clean area ensures better adhesion of the filler materials.
Step 3: Choose Your Filler
For small holes, wood filler is sufficient. For larger holes, consider using epoxy or adhesive putty that can provide additional strength.
Step 4: Apply the Filler
Using a putty knife, apply your chosen filler into the screw hole. Ensure it's packed tightly and slightly overfill the area to allow for sanding later.
Step 5: Allow to Dry
Let the filler cure as per the manufacturer’s instructions. This could take anywhere from a few hours to overnight.
Step 6: Sand the Area
Once dry, sand the repaired area using medium-grit sandpaper, followed by fine-grit sandpaper for a smooth finish. Be careful not to damage the surrounding chipboard.
Step 7: Paint or Stain
If desired, touch up the repaired area with paint or stain to match the rest of the furniture.
Case Study: Successful Chipboard Repairs
In a recent home improvement project, a family faced the challenge of multiple screw holes in their chipboard dining table due to frequent moves. They followed the steps outlined above, using an epoxy filler for larger holes. The result was a sturdy, attractive table that looked as good as new, demonstrating the effectiveness of the repair methods discussed.
Expert Tips for Long-Lasting Repairs
- Always pre-drill holes before inserting screws to prevent damage.
- Use a high-quality wood filler for better durability.
- Consider reinforcing damaged areas with metal brackets for added support.
- Store furniture in a dry environment to avoid moisture damage.
Maintenance and Prevention
To prevent future damage to your chipboard furniture, consider the following maintenance tips:
- Avoid excessive tightening of screws.
- Regularly check for signs of wear and tear.
- Apply protective coatings to reduce moisture absorption.
Conclusion
Repairing screw holes in chipboard may seem daunting, but with the right tools, materials, and steps, it's a manageable task. By following this guide, you can restore your furniture's integrity and prolong its lifespan, saving you money and enhancing your home’s aesthetics.
FAQs
1. Can I use regular glue to fill screw holes?
While you can use regular glue, a specialized wood filler or epoxy is recommended for stronger, more durable repairs.
2. How long does it take for wood filler to dry?
Drying times can vary based on the product, but most fillers take a few hours to overnight to fully cure.
3. Is it necessary to sand the area after applying filler?
Yes, sanding is essential to ensure a smooth finish and to make the repair less noticeable.
4. What if the screw hole is very large?
For large holes, consider using a dowel or a wooden plug for added strength before applying filler.
5. Can I paint over the repaired area?
Absolutely! Use a paint that matches your furniture for a seamless look.
6. How do I prevent screw hole damage in the future?
Pre-drill holes and avoid over-tightening screws to minimize damage.
7. Are there special fillers for chipboard?
Yes, there are fillers specifically designed for chipboard and particle board that provide better adhesion and durability.
8. Can I repair screw holes in chipboard without removing the screws?
It’s best to remove the screws to properly clean and fill the hole for a better repair.
9. How can I tell if my chipboard furniture is too damaged to repair?
If the structural integrity is compromised or there is extensive damage, it may be more cost-effective to replace the furniture.
10. Is this repair suitable for outdoor chipboard furniture?
While the repair method can work for outdoor furniture, ensure the chipboard is sealed against moisture to prevent future damage.