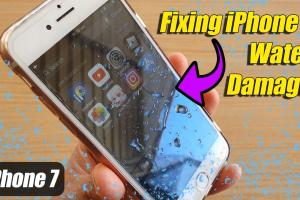
Ultimate Guide to Repairing a Water-Damaged iPhone: Tips & Tricks

-
Quick Links:
- Introduction
- Understanding Water Damage
- Immediate Actions to Take
- Effective Drying Methods
- Cleaning Corrosion and Residue
- Testing Your iPhone
- When to Seek Professional Help
- Preventive Tips for Future Damage
- Case Studies
- Expert Insights
- FAQs
Introduction
Water damage is one of the most common issues iPhone owners face. Whether it's from a spilled drink, accidental drop in water, or exposure to rain, the consequences can be costly. However, with the right knowledge and techniques, you can potentially save your device and prevent further damage. This comprehensive guide provides you with everything you need to know about repairing a water-damaged iPhone, from immediate actions to long-term care strategies.
Understanding Water Damage
Water damage occurs when liquid infiltrates your iPhone, leading to potential short circuits, corrosion, and other mechanical failures. Understanding how water affects your device is crucial in addressing the problem effectively. Here are some key insights:
- Liquid Ingress: Liquid can penetrate through openings such as the charging port, headphone jack, and SIM card slot.
- Corrosion: Water can cause metal components to corrode over time, leading to malfunction.
- Short Circuits: Water can create short circuits, disrupting the electronic pathways that allow your iPhone to function.
Immediate Actions to Take
When your iPhone has come into contact with water, quick actions can minimize damage. Follow these steps:
- Turn Off Your iPhone: Immediately power down the device to prevent electrical shorting.
- Remove Accessories: Take off any cases, screen protectors, and disconnect all accessories.
- Remove SIM Card: Eject the SIM card tray to allow air circulation.
Effective Drying Methods
After taking immediate action, drying your iPhone is the next step. Here are some popular methods:
1. Air Drying
Place your iPhone in a dry area, preferably in a vertical position to allow gravity to assist in draining water. Avoid using heat sources like hair dryers, as they can cause further damage.
2. Silica Gel
Silica gel packets are known for their moisture-absorbing properties. Place your iPhone in a container filled with silica gel packets for maximum effect.
3. Rice Method
While not as effective as silica gel, placing your iPhone in a bowl of uncooked rice can help absorb moisture. Ensure the device is completely covered.
Cleaning Corrosion and Residue
After drying your iPhone, check for any signs of corrosion, especially in the charging port and SIM card slot. Here’s how to clean it:
- Use Isopropyl Alcohol: Dip a cotton swab in isopropyl alcohol and gently clean corroded areas.
- Brush Off Residue: Use a soft-bristled brush to remove any debris or corrosion.
Testing Your iPhone
Once you have dried and cleaned your device, it’s time to test it:
- Power On: Turn on your iPhone and check for any immediate issues.
- Test Functions: Check all functionalities, including the camera, buttons, and speakers.
When to Seek Professional Help
If your iPhone exhibits ongoing issues or does not power on, it may be time to consult a professional. Here are signs that indicate professional help is necessary:
- Persistent screen flickering
- Unresponsive touchscreen
- Strange noises coming from the device
Preventive Tips for Future Damage
To safeguard your iPhone from future water damage, consider the following tips:
- Invest in a waterproof case.
- Stay aware of your surroundings when using your phone near water.
- Use caution during rainy weather.
Case Studies
Understanding real-world scenarios can provide valuable insights. Here are a couple of case studies:
Case Study 1: Coffee Spill
John spilled coffee on his iPhone. He immediately turned it off, used silica gel, and cleaned the device. Fortunately, it worked perfectly after a few hours.
Case Study 2: Swimming Pool Incident
Sarah accidentally dropped her iPhone in a swimming pool. After following the air drying method for 48 hours, her device showed signs of corrosion. A professional repair was necessary.
Expert Insights
We consulted tech repair experts for their take on water damage:
“The key to saving a water-damaged phone is acting quickly. The sooner you dry it out, the better your chances are of recovery.” - Tech Repair Specialist
FAQs
1. Can my iPhone recover from water damage?
Yes, if you act quickly, your iPhone may recover from water damage.
2. How long should I wait before turning on my iPhone?
It’s best to wait at least 24-48 hours to ensure it is completely dry.
3. Does putting my iPhone in rice really work?
While rice can absorb moisture, silica gel is more effective.
4. Should I use a hairdryer to dry my iPhone?
No, using a hairdryer can cause further damage to the internal components.
5. How can I prevent future water damage?
Using a waterproof case and being cautious around liquids are effective preventive measures.
6. Can I fix water damage myself?
Many minor cases can be handled at home, but severe damage may require professional repair.
7. What should I do if my iPhone is still under warranty?
Check if your warranty covers water damage, as many do not.
8. Is it safe to charge a wet iPhone?
No, charging a wet iPhone can cause electrical damage and should be avoided.
9. What are the signs of water damage?
Common signs include a malfunctioning display, distorted audio, and unusual battery behavior.
10. How often should I check for water damage?
It’s advisable to check your device regularly, especially if it has been exposed to moisture.
Random Reads
- How to paint formica countertops
- How to paint over chrome surface
- How to locate viruses using attrib command
- How to install the sims 4
- How to install storm door
- Ultimate guide jailbreaking ps3
- Ultimate guide destroying hard drives
- How to upgrade ice staff cod bo2
- How to upgrade a laptop replace parts
- Mastering five nights at freddys 3